
Want to give your Apple Watch a fresh look? Switching out the band is a quick and easy way to personalize your device.
Whether you’re upgrading to a sleek new style or just swapping for a different vibe, this guide will walk you through the process in a few simple steps.
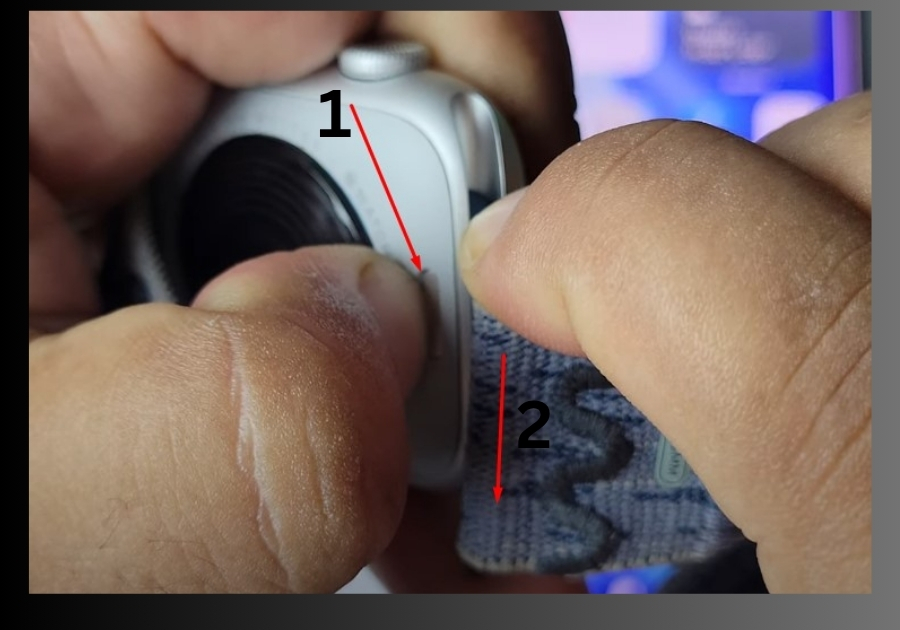
Step 1: Remove the Old Band
Flip your Apple Watch over and take a look at the back. You’ll see two small buttons near where the band connects.
- Press and hold one of the buttons.
- While pressing, slide the band out to the side.
- Do the same on the other side.
That’s it, your old band is off.
Step 2: Insert the New Band
Now grab your new band.
- Line up the connector with the slot on the watch.
- Slide it in gently until you hear or feel a soft click.
- Repeat this on the other side.
You don’t need to press any buttons this time, just slide the band in, and it’ll lock into place automatically.

Step 3: Wear and Go
Once both sides are clicked in, give them a little tug to make sure they’re secure. Now you’re ready to wear your Apple Watch with its fresh new look.
That’s all!
With just a press and a slide, you can transform your Apple Watch in seconds. Try experimenting with different bands to find your favorite look. Got a cool band combo? Share it with us in the comments below!