Creating silhouettes in Photoshop sounds fancy, but trust me, it’s way easier than you think. Whether you want to design a cool profile graphic or create dramatic art, a silhouette gives your photo a clean and striking look.
In this quick tutorial, I’ll show you exactly how to turn any photo into a silhouette using just a few simple steps.
Step-by-Step Guide to Creating a Silhouette
Step 1: Open and Unlock Your Photo
Start by opening your photo in Photoshop. In the Layers panel (usually on the right), you’ll see your image as a locked layer. Double-click the layer to unlock it. Name it something like “Photo” for clarity, then hit OK. This lets you edit the image freely.
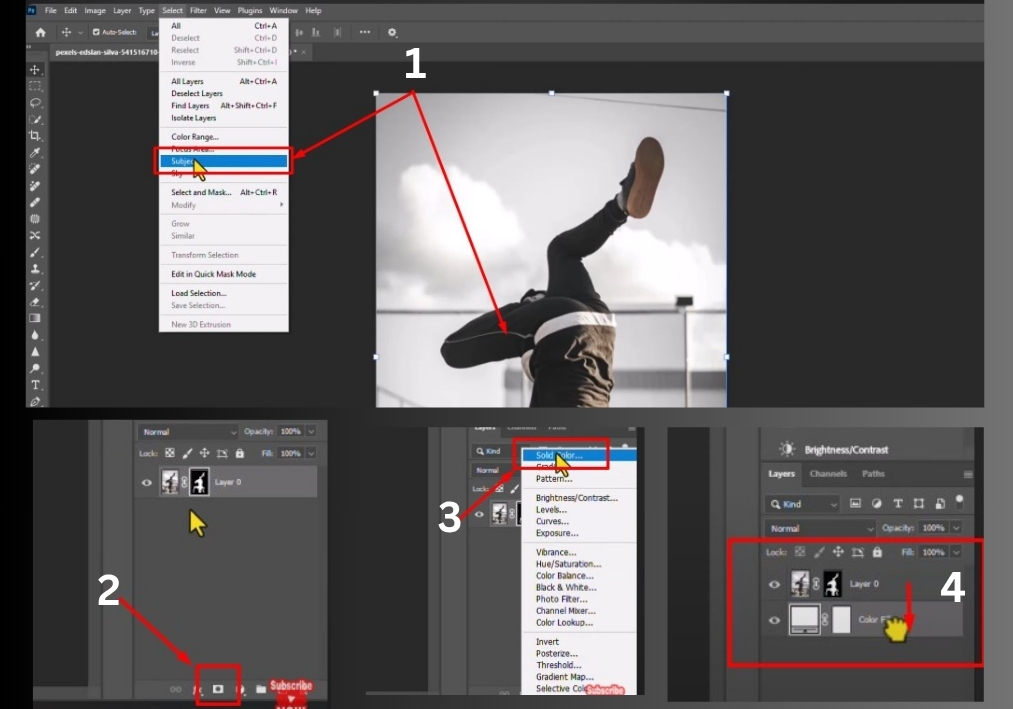
Step 2: Select Your Subject
Go to the top menu and click Select > Subject. Photoshop’s smart selection tool will automatically outline your subject in seconds. It works best with clear, high-contrast images, so choose a photo where the subject stands out against the background.
Step 3: Mask the Selection
With your subject selected, look at the Layers panel. Click the Add Layer Mask icon (it looks like a rectangle with a circle inside). This creates a mask, isolating your subject from the background. Your subject should now be the only visible part of the image.
Step 4: Add a White Background
To make the silhouette pop, add a solid white layer behind your subject. In the Layers panel, click the Create New Fill or Adjustment Layer icon (a half-filled circle) and choose Solid Color. Pick white from the color picker and click OK. Drag this new layer below your photo layer in the Layers panel.
Step 5: Create the Silhouette
Now, let’s turn your subject into a silhouette. Add a new blank layer by clicking the New Layer icon (a square with a folded corner) in the Layers panel. Drag this blank layer to the top of the layer stack.
Next, hold down the Ctrl key (or Cmd on a Mac) and click the thumbnail of your photo layer’s mask. This selects the outline of your subject again.
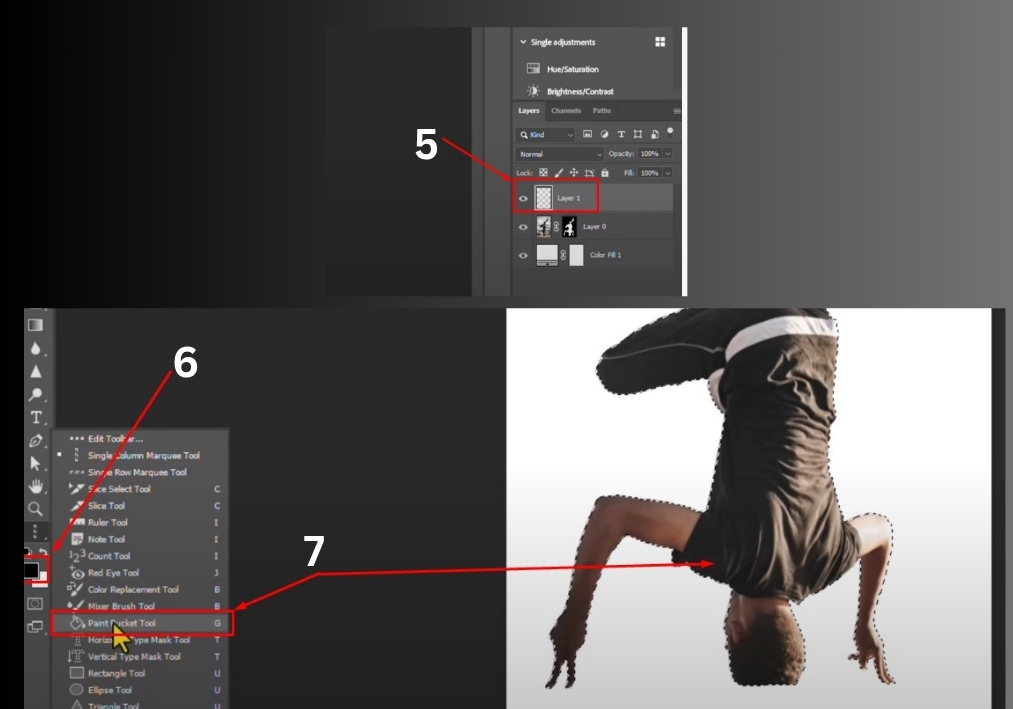
Step 6: Fill with Black
Make sure your foreground color is set to black. You can check this in the toolbar; black should be the top color swatch. If it’s not, press D to reset colors, ensuring black is selected.
Select the Paint Bucket Tool from the toolbar (it’s nested under the Gradient Tool). Click inside your selection to fill it with black. This creates the silhouette effect.
Step 7: Deselect and Admire
Press Ctrl+D (or Cmd+D) to deselect the outline. That’s it! You now have a clean, bold silhouette against a white background. Save your work or tweak it further for your project.
Silhouettes are perfect for logos, posters, or social media graphics. They’re simple yet powerful, grabbing attention with minimal effort. Now that you know the steps, go create something awesome!