
Photo collages are a fantastic way to showcase multiple images in one creative layout. Whether you’re making a family photo grid or designing social media content, Photoshop makes it easy to create professional-looking collages.
This step-by-step tutorial will walk you through the entire process, from setting up your canvas to adding those finishing touches that make your collage pop.
Simple Steps Creating a Collage in Photoshop
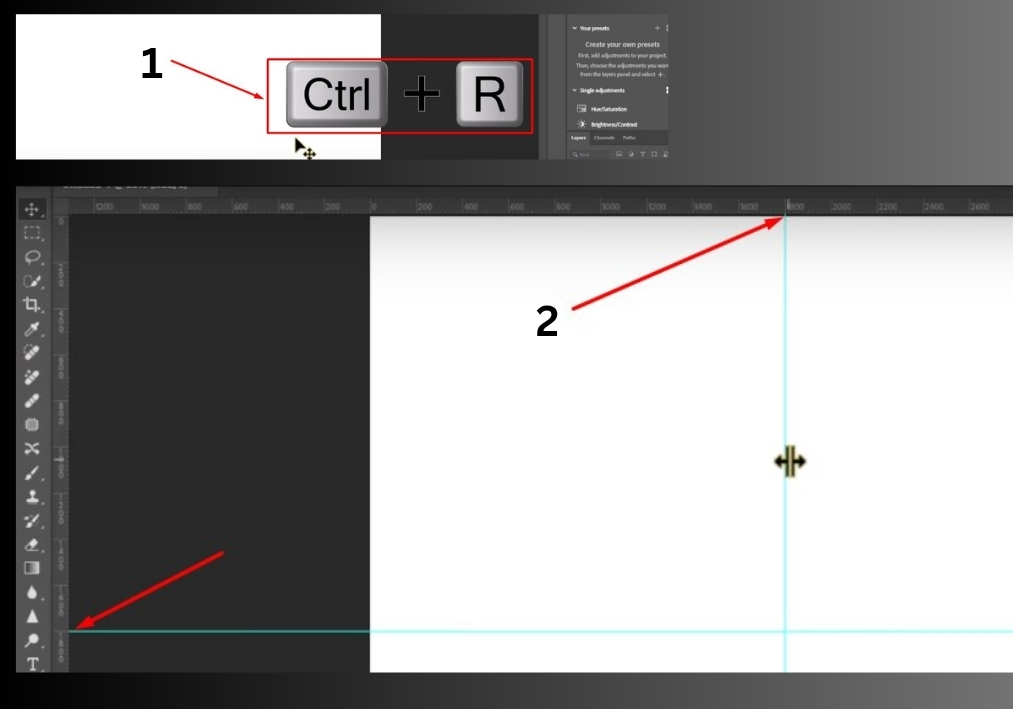
Step 2: Add Rulers for Alignment
Press Ctrl + R (Windows) or Cmd + R (Mac) to show the rulers. Drag a horizontal ruler to the center of your canvas and a vertical ruler to the vertical center. This splits your canvas into four equal parts for a neat grid.
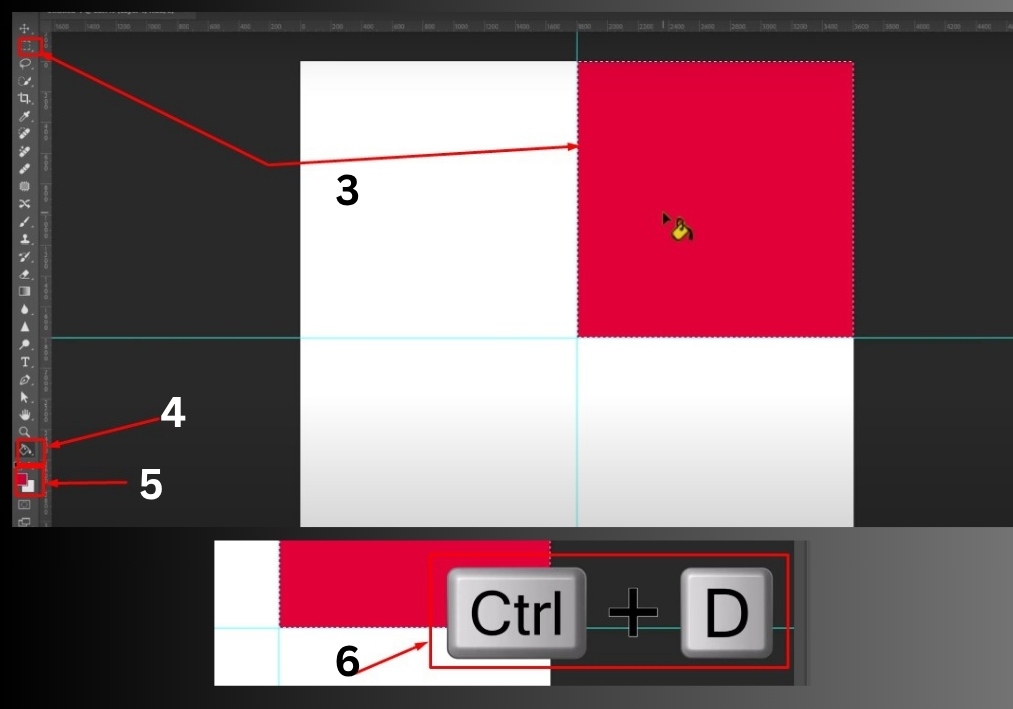
Step 3: Create Your First Colored Section
Add a new layer by clicking the New Layer icon in the Layers panel. Select the Marquee Tool (shortcut: M) from the toolbar. Draw a rectangle over the first section of your grid (like the top-left quadrant).
Next, pick the Paint Bucket Tool (shortcut: G). Click the foreground color box in the toolbar to choose a color. In the options bar at the top, set the fill type to Foreground. Click inside your selected rectangle to fill it with color. Press Ctrl + D (or Cmd + D) to deselect.
Step 4: Add More Colored Sections
Repeat the process for the other three sections. For each:
- Add a new layer.
- Use the Marquee Tool to select another quadrant.
- Choose a different color with the Paint Bucket Tool.
- Fill the selection and deselect with Ctrl + D.
You’ll now have a four-part grid with each section filled with a unique color.
Step 5: Place Your Photos
Select the first layer in the Layers panel. Go to File > Place Embedded and choose an image from your computer. Once it appears on the canvas, resize or reposition it by dragging the corners or moving it. Click the checkmark in the options bar to confirm.
Right-click the image layer and select Create Clipping Mask. This locks the image to the shape of the colored section below it.
Repeat this for the other three layers: select each layer, place an image, adjust it, and create a clipping mask. You now have a photo grid!
Step 6: Add a Border (Optional)
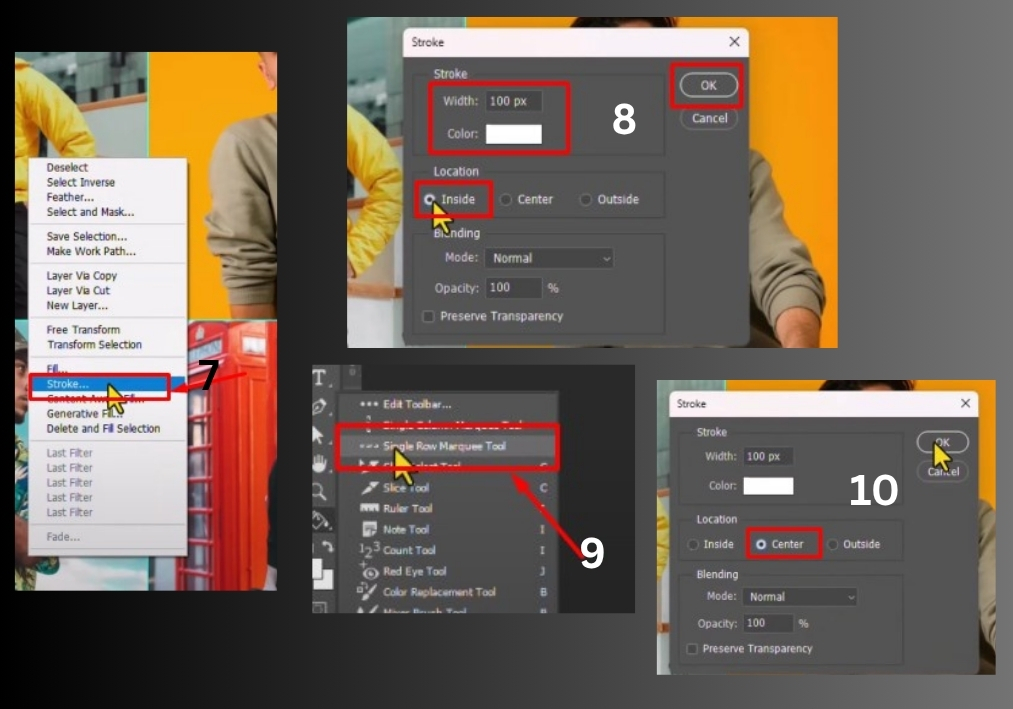
To give your collage a polished look, add a border. Select the first layer and create a new blank layer. Use the Marquee Tool to select the entire grid. Right-click inside the selection and choose Stroke. Set the width to 100 pixels, pick white for the color, and choose Inside for the location. Click OK and deselect with Ctrl + D.
For vertical and horizontal dividers:
- Create a new blank layer.
- Use the Single Row Marquee Tool to draw a horizontal line across the center. Right-click, select Stroke, set it to Center, and click OK.
- Create another blank layer and use the Single Column Marquee Tool for a vertical line. Apply the same stroke settings.
Step 7: Clean Up and Save
Hide the rulers by pressing Ctrl + R again. Use the Move Tool (shortcut: V) to make any final adjustments. Save your project by going to File > Save As and choosing your preferred format (like PSD or JPEG).
That’s it!
You’ve created a vibrant photo collage in Photoshop. Experiment with different colors, images, or border styles to make it your own.