Need to add a professional grid to your Photoshop project? Whether you’re designing layouts, creating mockups, or organizing visual elements, grids are essential tools that bring structure and balance to your work.
This straightforward method will have you creating custom grids in just a few minutes.
Quick Tutorial to Make A Grid in Photoshop
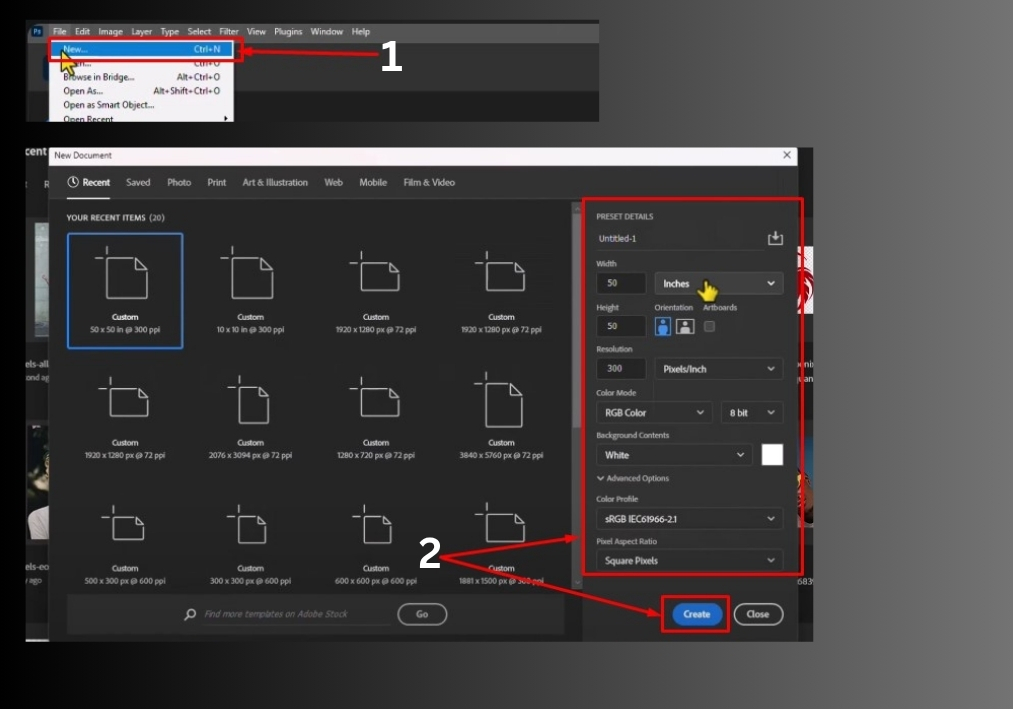
Step 1: Create a New Project for the Grid Pattern
Start by opening Photoshop and creating a new project. Set the dimensions to 10 inches by 10 inches with a resolution of 300 DPI. Choose a transparent background to keep things clean. Once your canvas is ready, you’re set to build the grid pattern.
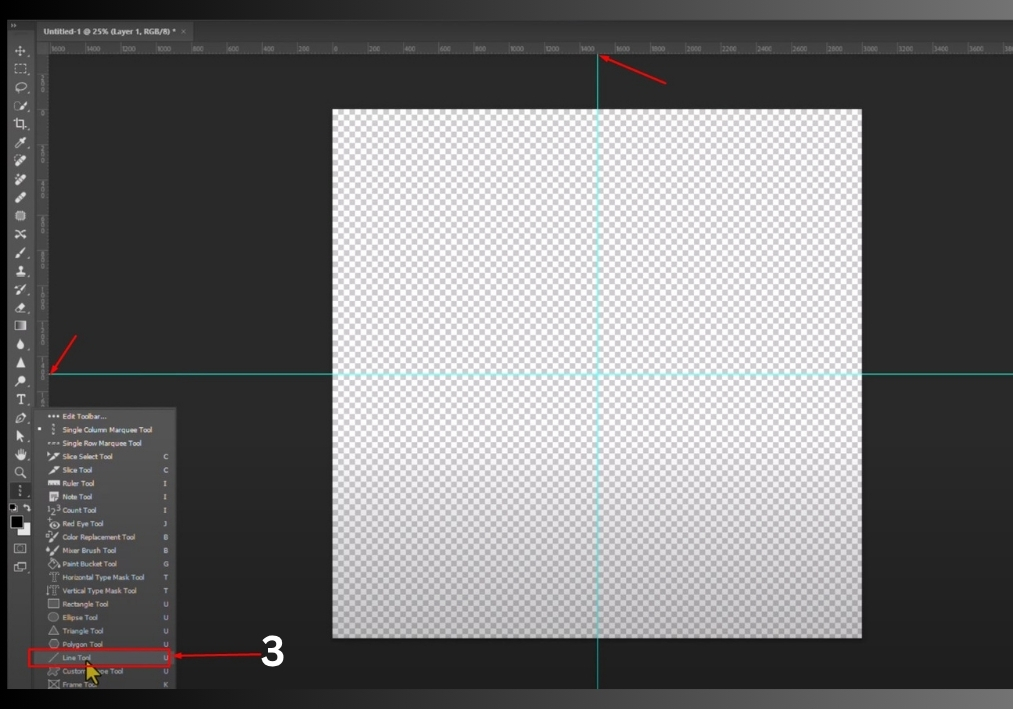
Step 2: Enable and Use Rulers
To make sure your grid is centered, press Ctrl + R (or Command + R on a Mac) to turn on the rulers. Drag a horizontal guide from the top ruler to the canvas’s center point. Then, drag a vertical guide from the left ruler to the vertical center. These guides will help you place your grid lines accurately.
Step 3: Draw the Grid Lines
Select the Line Tool from the toolbar on the left. In the options bar at the top, set it to Shape mode. Pick a color for your grid lines (any color works since it’s just for the pattern). Make sure the Stroke is disabled and set the line weight to around 20 pixels for visibility.
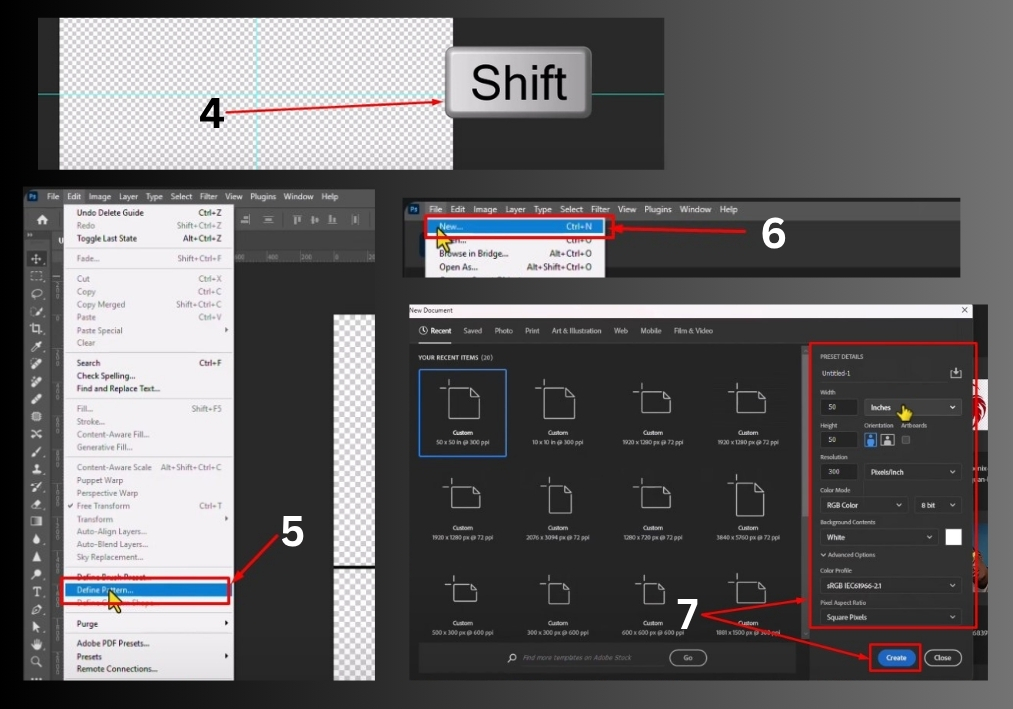
Hold down the Shift key to keep things straight, then draw a vertical line along the vertical guide. Repeat the process, holding Shift, to draw a horizontal line along the horizontal guide. You should now have a simple cross that forms the base of your grid.
Step 4: Remove the Rulers
Once your lines are drawn, you don’t need the rulers anymore. Press Ctrl + R again to hide them, leaving just your grid lines on the transparent background.
Step 5: Save the Grid as a Pattern
To turn your grid into a reusable pattern, go to the Edit menu and select Define Pattern. Give it a name like “Sample Grid” and click OK. Your grid is now saved as a pattern you can use in any Photoshop project. Feel free to close this project file.
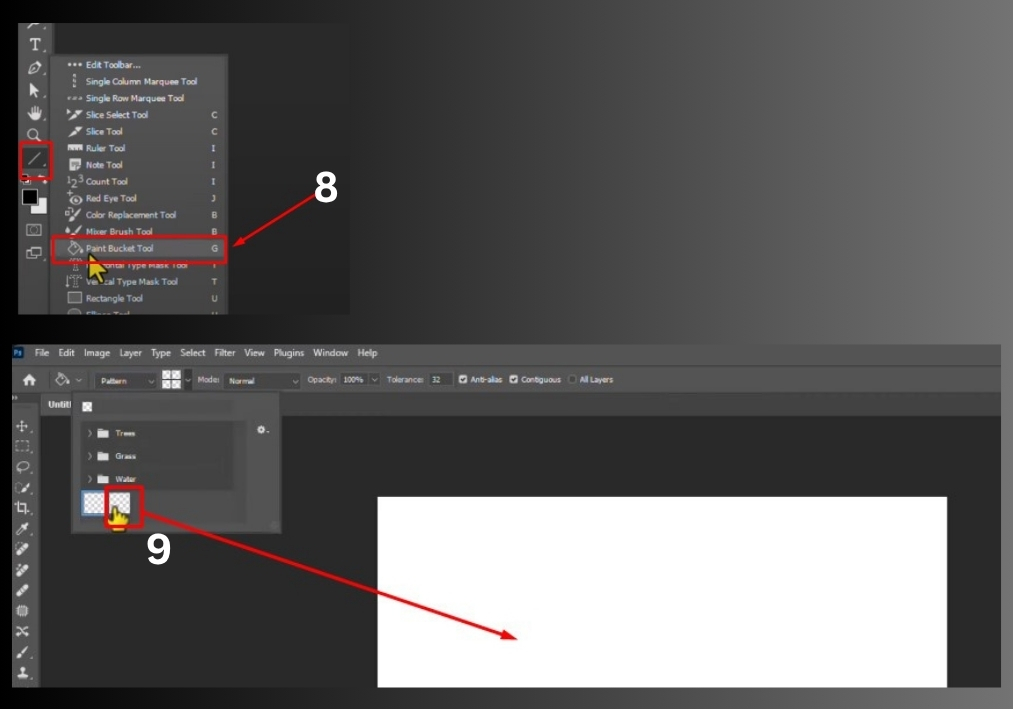
Step 6: Apply the Grid to Your Project
Open the project where you want to use your grid. Grab the Paint Bucket Tool from the toolbar. In the options bar, change the fill type from Foreground Color to Pattern. Click the pattern dropdown and select the “Sample Grid” pattern you just created. Now, click anywhere on your canvas, and voilà, your grid is applied!
That’s it!
You’ve created a custom grid pattern and applied it to your project in just a few steps. This trick is perfect for aligning elements, creating layouts, or adding a structured look to your designs.