
Got a photo that looks a little too soft or blurry? No worries, Photoshop makes it easy to fix that with just a few clicks.
Whether you’re working with portraits, landscapes, or product photos, this simple technique will help you bring out those fine details and make your images look crisp and professional.
Step-by-Step Guide to Sharpening Images
Step 1: Duplicate Your Image Layer
Start by opening your image in Photoshop. To keep things safe, duplicate your image layer first. This way, you can always go back to the original if needed. In the Layers panel, right-click your image layer and select Duplicate Layer, or simply press Ctrl+J (Windows) or Cmd+J (Mac). Now you’ve got a copy to work with!
Step 2: Open the Unsharp Mask Tool
With your duplicated layer selected, head up to the top menu and click Filter. Hover over the Sharpen option, and from the dropdown, choose Unsharp Mask. This tool is a classic for adding sharpness and enhancing details in your image.
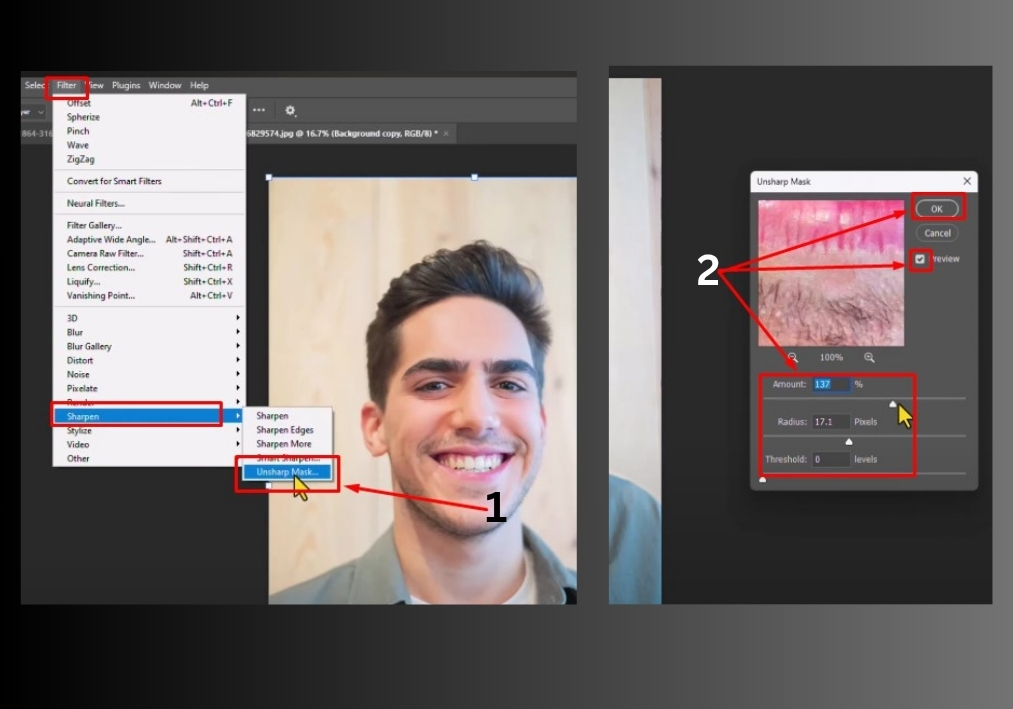
Step 3: Adjust the Unsharp Mask Settings
Once the Unsharp Mask window pops up, make sure the Preview box is checked. This lets you see real-time changes as you tweak the settings. You’ll see three sliders:
- Amount: This controls how strong the sharpening effect is. Slide it up to around 100-150% for a noticeable boost, but don’t overdo it to avoid unnatural results.
- Radius: This determines how wide the sharpening effect spreads around the edges. A value between 1.0 and 2.0 pixels usually works well for most images.
- Threshold: This setting decides how much contrast is needed for Photoshop to sharpen an area. Keep it low (0-5) to avoid adding noise to smooth areas like skin or skies.
Play around with these sliders to find the sweet spot for your image. You’ll see the changes live in the preview window, so trust your eyes!
Step 4: Apply and Review
When you’re happy with the settings, click OK to apply the sharpening. Zoom in on your image to check the details. If it looks too sharp or has weird halos around edges, undo (Ctrl+Z or Cmd+Z) and try lowering the Amount or Radius. Your goal is a crisp, natural look.
Step 5: Compare and Save
Toggle the visibility of your duplicated layer on and off (click the eye icon in the Layers panel) to compare the sharpened version with the original. If it looks good, save your work by going to File > Save As and choosing your preferred format, like JPEG or PNG.
There you go!
In just a few clicks, you’ve sharpened your image like a pro. Try this technique on your next project, and watch your photos come to life.