
Want to make your photo look sharper and bigger without it turning into a blurry mess?
Photoshop makes it easy if you know what buttons to push.
In this quick guide, I’ll show you exactly how to upscale photo quality in just a few clicks. No confusing terms. Just an easy way to make your image cleaner, clearer, and ready for printing or sharing.
Upscale Your Photos in Photoshop in a Minute
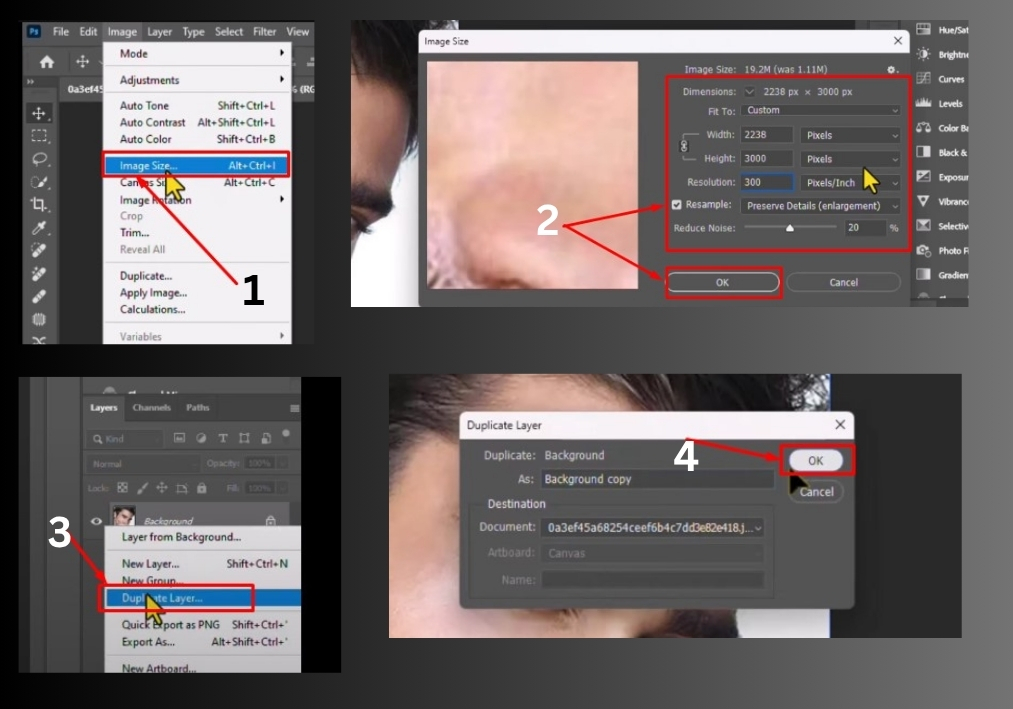
Step 1: Adjust Image Size
Start by opening your photo in Photoshop. Head to the Image menu at the top and click Image Size. A dialog box will pop up. Here’s what to do next:
- Check the Resample box to allow Photoshop to adjust the pixel count.
- In the Resample dropdown, choose Preserve Details (enlargement). This option helps keep your image sharp when scaling up.
- Set the Resolution to 300 pixels/inch for high-quality results, especially for printing.
- Enter a new Width (e.g., 505.59 pixels). The height will adjust automatically to maintain the aspect ratio.
- Make sure the unit is set to Pixels, then click OK.
Your image will now be larger, but we’re not done yet!
Step 2: Zoom Out for a Better View
To see the full image after resizing, hold down the Alt key (or Option on a Mac) and scroll your mouse wheel to zoom out. This helps you check the overall look of your upsized photo.
Step 3: Duplicate the Layer
Next, we’ll enhance the sharpness. Right-click on your image layer in the Layers panel and select Duplicate Layer. This creates a copy to work on, keeping your original safe.
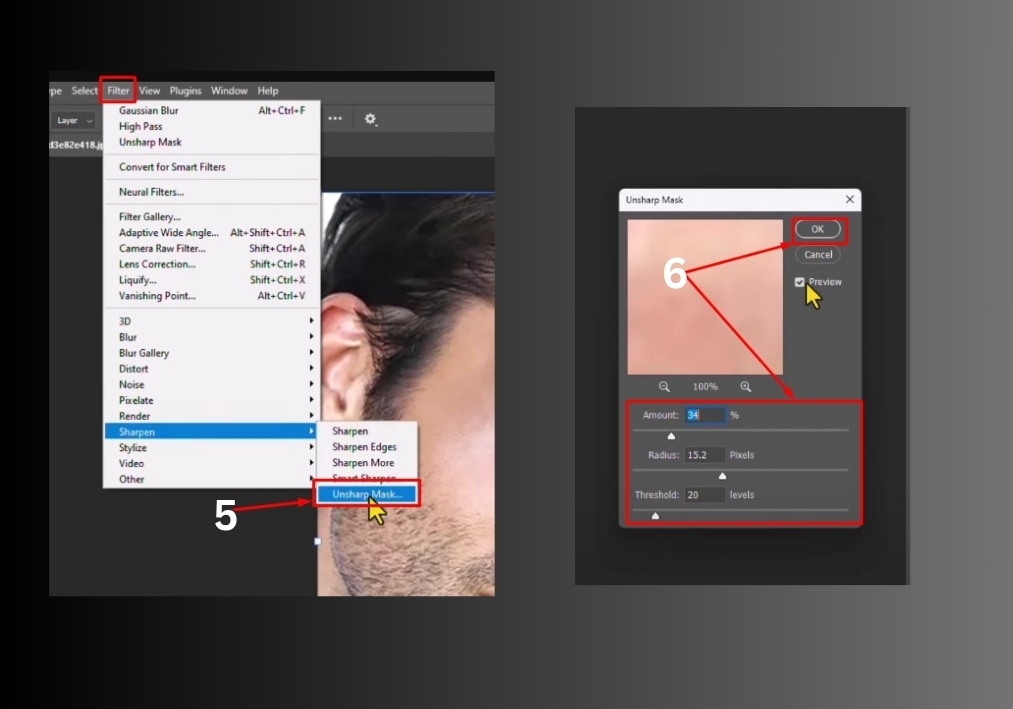
Step 4: Apply the Unsharp Mask
With the duplicated layer selected, go to the Filter menu, hover over Sharpen, and click Unsharp Mask. A new window will appear. Here’s how to tweak it:
- Check the Preview box to see changes in real time.
- Adjust the sliders for Amount, Radius, and Threshold:
- Amount: Controls the intensity of sharpening (try around 91%).
- Radius: Sets how far the sharpening effect spreads (around 1.8 pixels works well).
- Threshold: Determines how much contrast is needed for sharpening (try 2-3 levels).
- Play with these values until your photo looks crisp but natural. Click OK when you’re happy with the result.
Step 5: Compare and Save
Toggle the duplicated layer on and off to compare the before and after. You’ll notice your photo looks sharper and more detailed! Once satisfied, save your work by going to File > Save As and choosing your preferred format (like JPEG or PNG).
That’s it!
You’ve just upscaled and sharpened your photo like a pro. Try this technique on your favorite images and see the difference!