
Adding your logo to dozens or even hundreds of photos one by one sounds like a nightmare, right?
Well, it doesn’t have to be. Photoshop has a powerful feature that can automatically add your logo to multiple images in just a few clicks.
This automation can save you hours of repetitive work and ensure consistent branding across all your photos.
Add Logo to Multiple Photos Automatically in Photoshop
Step #1
Launch Adobe Photoshop on your computer.
Go to the top menu and click on File > Open, then select one of the images you want to use for setting up the logo.
Next, go to Window > Actions to open the Actions panel. This is where we will create our automated task.
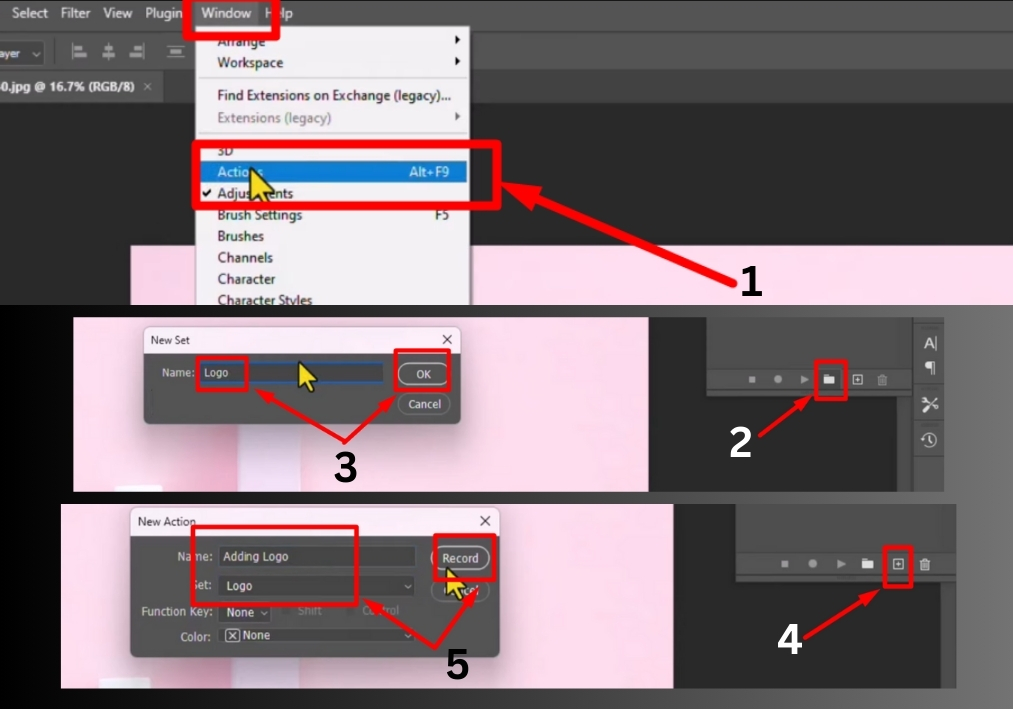
Step #2
In the Actions panel:
- Click the folder icon (Create new set).
- Name it something like Logo.
- Click OK.
Now, you are ready to record the action that will apply your logo to each photo.
Step #3
Click the plus icon (+) in the Actions panel to create a new action.
Name it Adding Logo, and from the “Set” dropdown, choose the set you just created (Logo ).
Click Record to begin recording your steps.
From now on, every action you perform will be saved as part of this automation.
Step #4
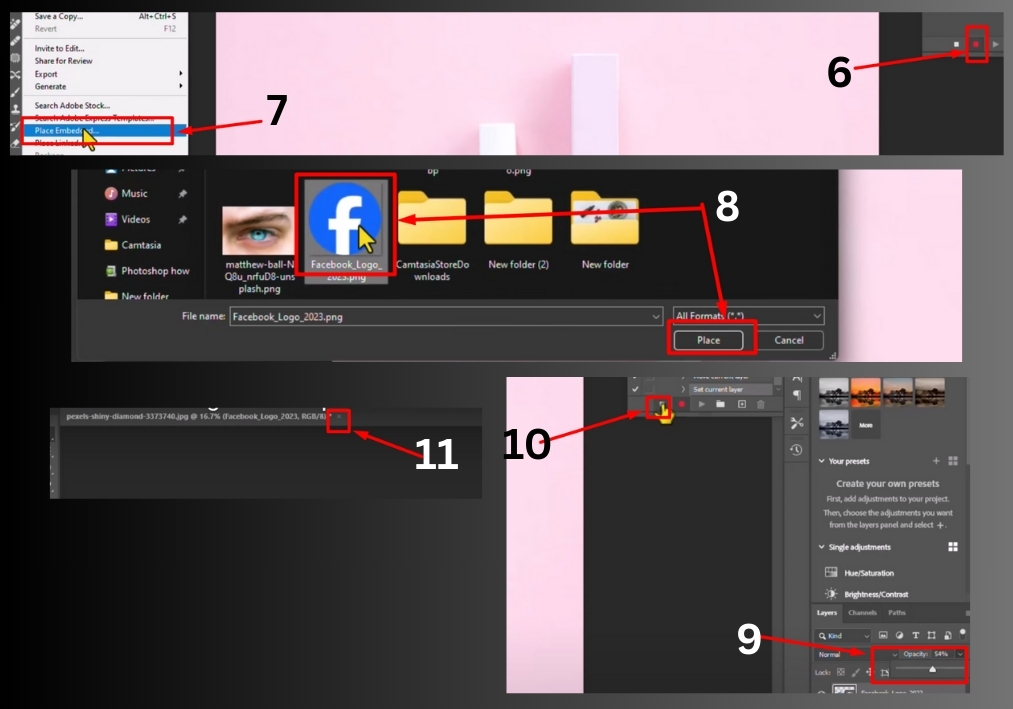
Go to File > Place Embedded.
Navigate to the logo file on your computer, select it, and click Place.
Your logo will appear over the image. You can now:
- Resize the logo by dragging the corners.
- Move it to your preferred location.
- Click Enter (Windows) or Return (Mac) when done.
If you want to adjust the logo (like lowering its opacity), double-click the logo layer and make your changes in the Layers panel.
Once you are happy with everything, click the Stop Record button (the square icon) in the Actions panel.

Step #5
Now that your action is recorded, it’s time to apply it to all your images automatically.
Go to File > Scripts > Image Processor.
In the Image Processor window:
- Click Select Folder under “Select the images to process.”
- Choose the folder containing your photos and click OK.
Then, under “Select location to save processed images”:
- Check the box next to Save in the same location or choose a different folder by clicking Select Folder.
Under File Type Options:
- Check JPEG and adjust the quality (a value of 10 works well for high quality).
- Make sure Run Action is checked.
- From the dropdown, choose the Logo set and the Adding Logo action.
Finally, click Run.
Photoshop will now batch-process all your images, applying your logo automatically to each one.
Step #6
Once Photoshop finishes processing, head to your selected output folder.
Open a few files to make sure the logo was added correctly and looks the way you intended.
That’s it!
You have successfully added a logo to multiple images without doing any of the work manually.