If you’re working with layers in Photoshop and need to edit a vector layer like a shape or text more freely, rasterizing is the way to go. It’s a quick and easy process once you know where to look.
In this short guide, I will show you exactly how to rasterize a layer using the simplest method, just straightforward steps that work every time.
Steps to Rasterize a Layer in Photoshop
Step #1
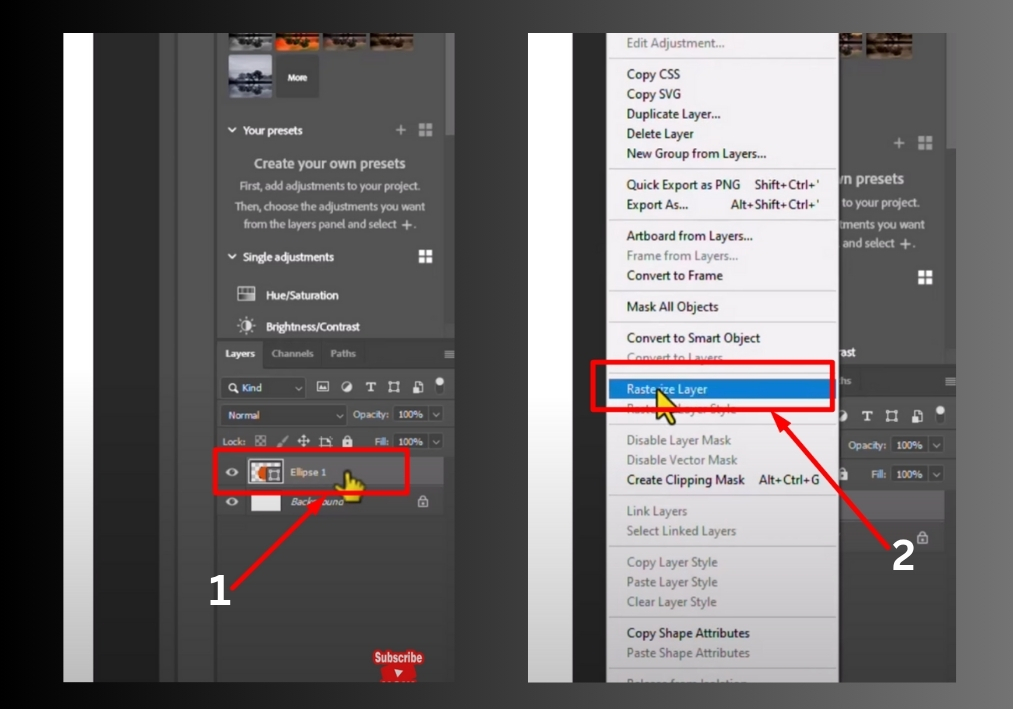
Start with your Photoshop project open. For this example, you’ll have a background layer and a subject layer in the Layers panel.
Step #2
Find the layer you want to rasterize. In this case, it’s the subject layer. Click on it to make it active.
Step #3
With the subject layer selected, right-click on it. A menu will pop up with several options.
Step #4
Look for the “Rasterize Layer” option in the menu. Click it to apply the rasterize effect to your subject layer.
That’s it!
Your layer is now rasterized, and you’re ready to move on with your editing.