
Need to prepare an image for print but not sure how to get it to 300 DPI?
Don’t worry, with just a few clicks in Photoshop, you can adjust your image’s resolution without losing quality.
In this quick guide, I will show you exactly how to change your image to 300 DPI using Photoshop, step by step. Perfect for beginners and anyone needing print-ready images fast.
Guide to Change Image DPI to 300 in Photoshop
Step #1
Launch Photoshop and open your image. Just drag the file into Photoshop or go to “File” > “Open” and select your image.
Step #2
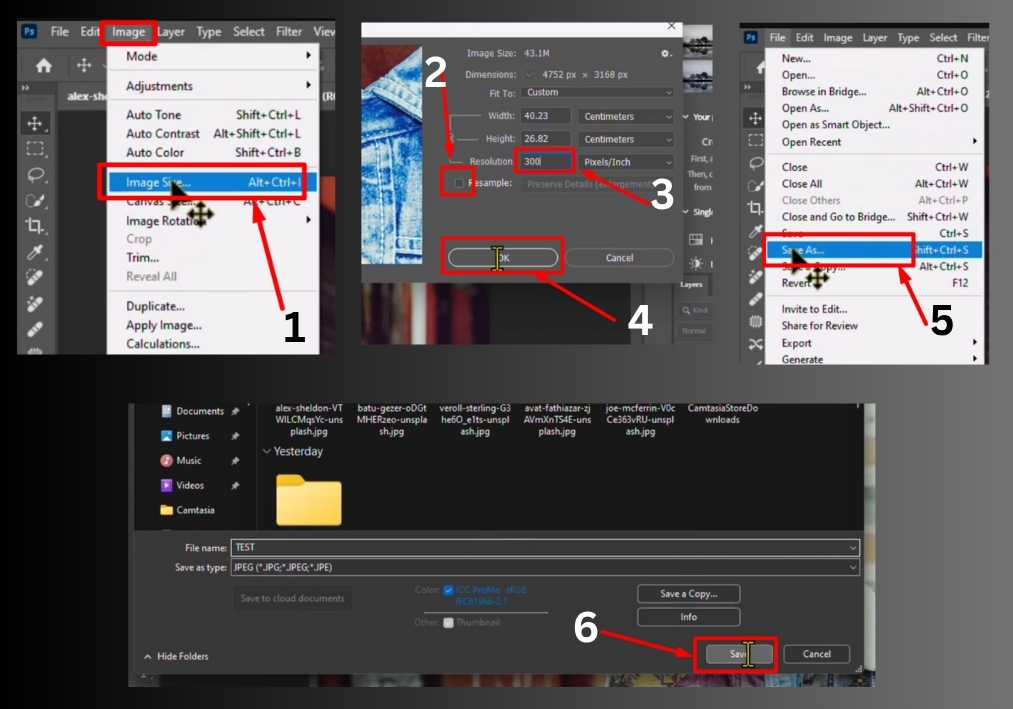
In Photoshop, head to the top menu and click “Image” > “Image Size.” A dialog box will pop up. Here’s the key part: uncheck the “Resample” option. This ensures you’re only changing the DPI, not messing with the image’s pixel count. In the “Resolution” box, type “300.” You’ll notice the image’s print dimensions may adjust slightly, but that’s normal.
Step #3
Once you’ve set the resolution to 300 DPI, click “OK” to apply the change. Now, go to “File” > “Save As.” Choose your preferred file format (like JPEG or PNG) and save the image to your desired location.
Step #4
To confirm your changes, right-click the newly saved image file, go to “Properties,” and check the “Details” tab again. You should now see the DPI listed as 300.