
Ever wanted to create that cool effect where your video plays behind your text?
You know, the one where it looks like your text is a window showing the video underneath? This trendy effect is easier to make in CapCut PC and it adds a professional touch to any project.
In this quick guide, I’ll show you how to create polished, eye-catching videos using just the built-in tools in CapCut.
Easy Steps to Create a Video Behind Text Effect in CapCut PC
Step #1
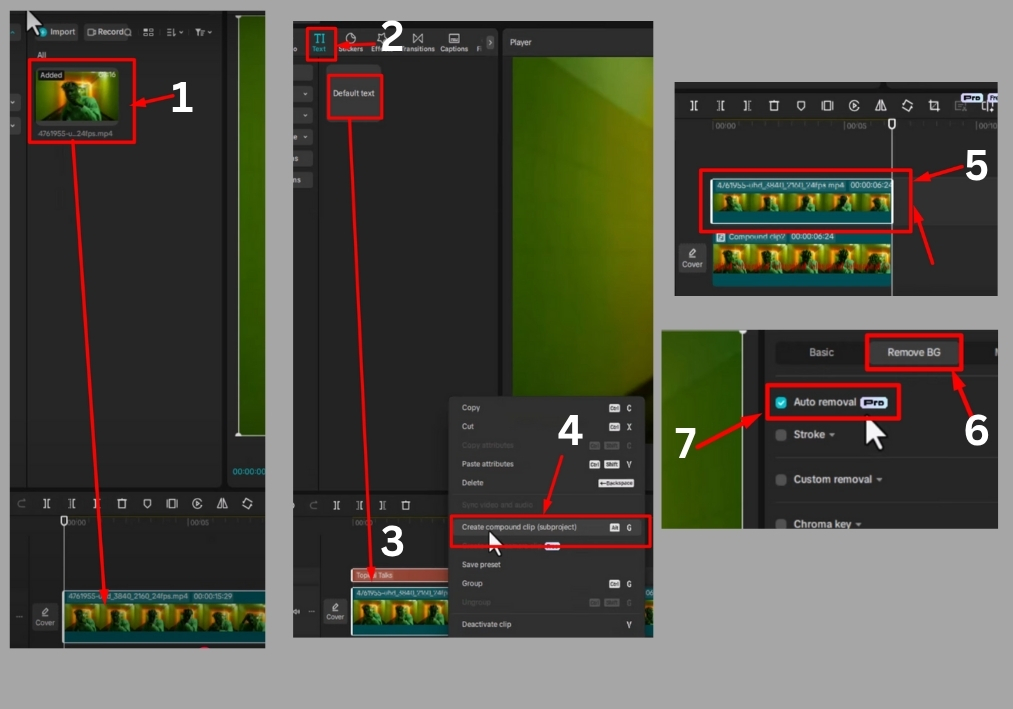
Start by opening CapCut on your PC and importing the video you want to use. Just click the import button, select your video file.
Step #2
Once imported, drag your video from the media library down to the timeline. This will be the base layer for your project.
Step #3
Look for the text icon in the CapCut toolbar. Click it to create a new text layer. Type the text you want to appear in front of the video. You can customize the font, size, color, or style to match your vibe.
Step #4
Right-click on the video in the timeline and select “Duplicate.” This creates a second copy of your video clip, which you’ll need for the effect.
Step #5
Now, select both the original video layer and the text layer in the timeline. Right-click and choose “Create Compound Clip.” This groups them together, locking the text and video as one unit.
Step #6
Take the duplicated video clip and drag it to a track above the compound clip in the timeline. This layering is key to making the effect work.
Step #7
With the duplicate video layer selected, head to the right side of the CapCut interface. Look for the “Remove Background” option. Click it and choose “Auto Removal.” CapCut will automatically detect the text area and remove the background from the duplicated video layer, revealing the original video behind the text.
And that’s it!
With just a few clicks, you’ve created a stunning video-behind-text effect in CapCut PC.