Want to export a video with no background from Premiere Pro? Maybe you’re working on a logo animation, motion graphics, a cool overlay for a project, or need a clip to pop over another video, or anything that needs to sit perfectly on top of other visuals. Whatever the case, rendering transparent videos is actually easier than you might think.
Here’s a simple, step-by-step guide you need to follow.
Render Transparent Video in Premiere Pro
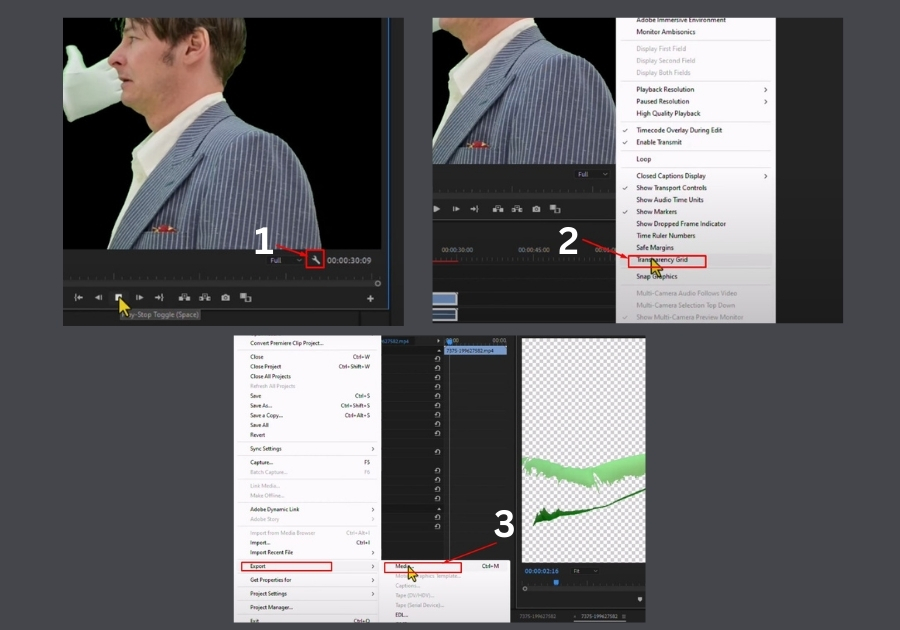
Step 1: Check If Your Video Has a Transparent Background
First, make sure your video actually has no background.
- Open your project in Premiere Pro.
- In the timeline, click the wrench icon (Settings).
- Select Transparency Grid.
If you see a gray checkerboard pattern behind your video, you’re working with transparency.
Step 2: Set Up the Export Settings
Time to export your video with that clean, see-through background.
- Go to the top menu and click File.
- Hover over Export, then select Media.
- In the Format dropdown, choose QuickTime.
- Now, under Video Codec, select Animation.
Animation codec is what keeps the background transparent, it’s a key step, so don’t skip this one.
Step 3: Enable the Alpha Channel (Transparency)
- Scroll down a bit in the export settings.
- Make sure to select 8-bpc + alpha (the “alpha” part is what carries transparency info).
Then hit Export and let Premiere do its thing.
Step 4: Check Your Exported File
Once the rendering is done:
- Open your file in your media player or drop it into another project.
- If it shows up with no background.

Quick Tip
If your video isn’t showing as transparent, double-check that you selected RGB + Alpha in the export settings. Also, ensure your original clip had a transparent background to begin with; Premiere Pro can’t magically remove a solid background for you.
And that’s it! It’s a super quick way to render transparent video without jumping through hoops.