Want to add a line to your PDF in Adobe Acrobat?
Adding lines in Adobe Acrobat is a simple way to emphasize key points, underline text, or even create custom annotations. It’s perfect for collaborating on documents, reviewing drafts, or just making your PDFs look sharper.
Here’s how you can draw a line in Adobe Acrobat:
Draw Line in PDF
Step 1: Open Your PDF in Adobe Acrobat
First, open your PDF file in Adobe Acrobat. Make sure you’re using the full version of Acrobat, not just the free Reader.
Step 2: Go to the Comments Tool
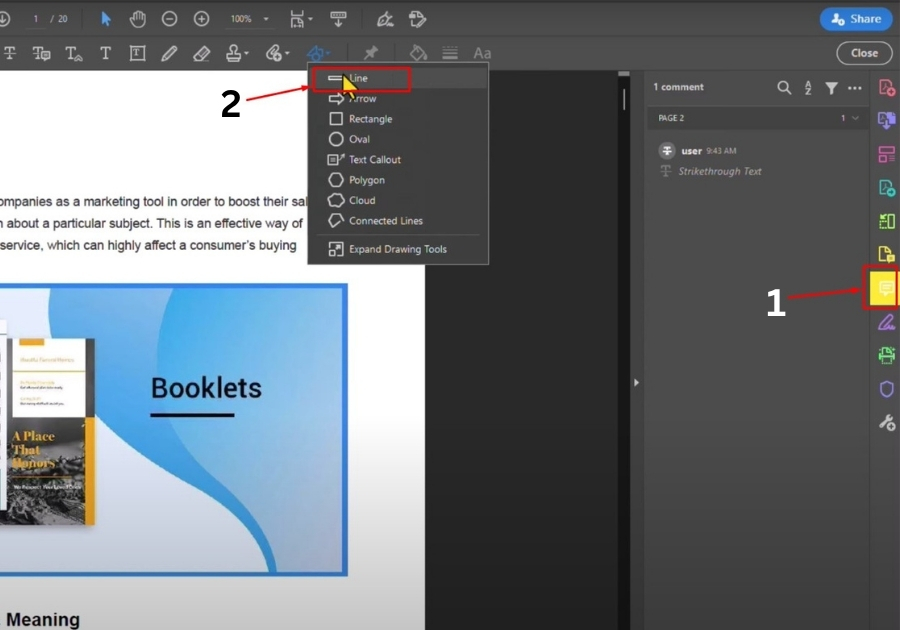
Look over to the right-hand menu and click on “Comments.” This will open up a bunch of options you can use to mark up your PDF.
Step 3: Pick the Line Tool
Inside the Comments section, you’ll see drawing tools. Click on the one that looks like a line.
Now, you’re ready to draw.
Step 4: Draw Your Line
Just click and drag your mouse to draw a line on the PDF. Want to make it perfectly straight?
Hold down the Shift key while dragging, and Acrobat will lock the line to a straight path, horizontal, vertical, or diagonal.
Step 5: Customize Your Line
After you’ve drawn the line, you can adjust a few things to make it look just right:
- Change the thickness: Click on the line thickness icon and slide it to make your line thinner or thicker.
- Pick a color: Want the line to stand out? Click on the color option and choose any color that fits your style or purpose.
That’s it!
It’s simple, fast, and a great way to highlight or separate sections in your PDF without any extra tools.