Turning a PDF into a JPG makes it easier to share or upload to platforms that don’t play nice with PDFs. Plus, JPGs are lightweight and perfect for quick previews or embedding in documents. With Adobe Acrobat, you get high-quality images every time, and the process takes just a minute.
In this quick guide, we will go through the process of converting your PDF to JPG using Adobe Acrobat in 2025.
Convert Your PDF to JPG in Adobe Acrobat
Step 1: Open Your PDF in Adobe Acrobat
Start by opening your PDF file in Adobe Acrobat. Just double-click the file or open it through Acrobat directly.
Step 2: Head to the Tools Section
At the top of Adobe Acrobat, click on Tools. It will take you to a page with different options for editing and managing your document.
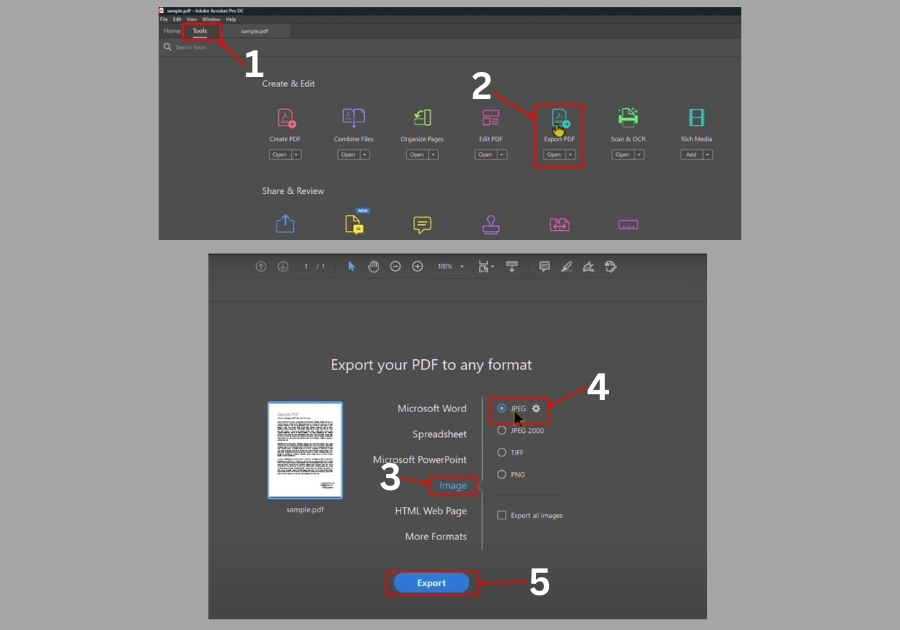
Step 3: Click on “Export PDF”
Under the Create and Edit section, look for Export PDF and click it. This is the tool that lets you convert your file into other formats.
Step 4: Choose the Image Format
Once you are in the Export PDF section:
- Select Image
- Then choose JPEG as the image format
Step 5: Save the File
Click Export, then pick a location on your computer where you want to save the new JPG file. You can also rename the file if you want. Once that’s done, hit Save.
Step 6: Check the Image File
Now go to the folder where you saved the file. You will see the JPG version of your PDF sitting right there, ready to use.
It really easy like this.
Whether working on a project, preparing files for print, or just cleaning up documents, converting PDFs to JPG with Adobe Acrobat saves time and effort.