Both options are straightforward and don’t require any fancy skills. The Fill and Sign tool is great for quick additions, while the Stamp tool gives you a bit more flexibility for placement. Plus, you can easily switch between a checkmark and a cross depending on what your PDF needs.
Adding a checkmark to a PDF might sound tricky, but with Adobe Acrobat, it’s actually pretty simple. Here are two easy ways to do it without any hassle.
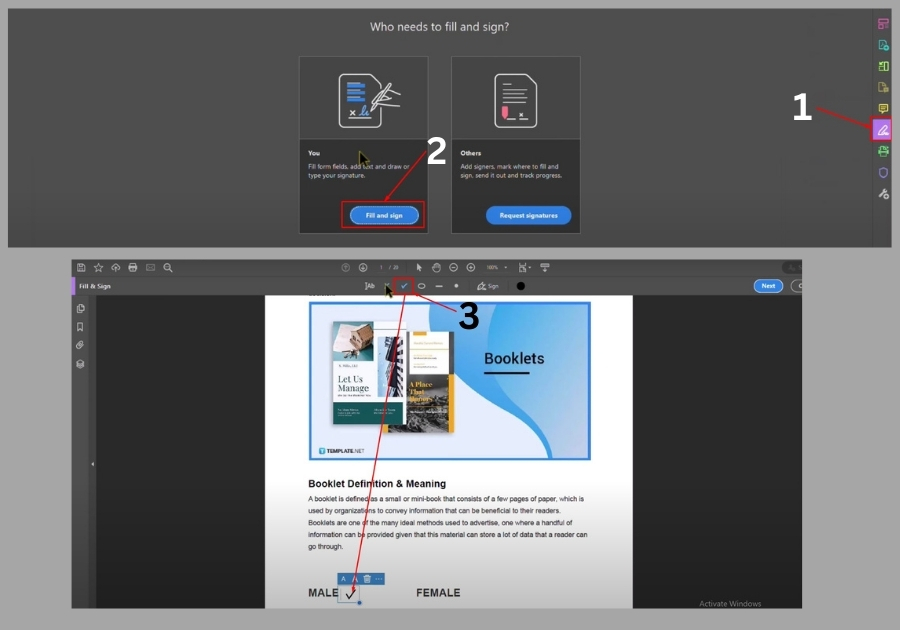
Method 1: Use Fill & Sign
This is the easiest way to add a checkmark.
- Open your PDF in Adobe Acrobat.
- On the right-hand side, click on Fill & Sign.
- Choose Fill and Sign by yourself.
- You will see a checkmark icon in the top menu, click on it.
- Now, click anywhere on your PDF where you want the checkmark to appear.
Want to make it bigger or smaller? No problem. Just click and drag the corners to adjust the size.
Bonus tip: There’s also a cross mark available right next to it if you need that instead.
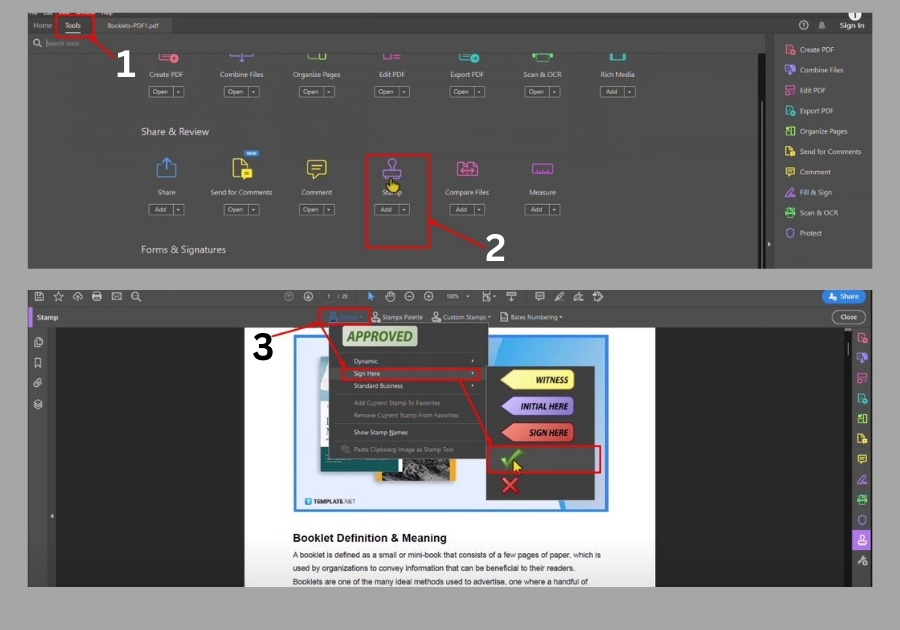
Method 2: Use Stamps
Prefer a stamp-style checkmark? Here’s how you can do that:
- Click on Tools at the top.
- Select Stamp from the list.
- Hit the Stamp button again and hover over Sign Here.
- You’ll see a checkmark option, click it.
- Now just click and drag where you want the checkmark placed on your PDF.
Just like the first method, you can resize it easily. And yes, there’s a cross mark available in this option too!
Both methods are quick and easy, allowing you to add professional-looking checkmarks to any PDF document without needing to print anything. The method you choose depends on your specific needs and preferences.