
Need to add a circle in a PDF file using Adobe Acrobat?
Circles are a great way to draw attention to specific parts of your document, like key text or images. They are also handy for creating clean, professional-looking annotations without cluttering your PDF. Whether you are marking up a report or designing a form, this simple feature can make your work pop.
Here’s a quick step-by-step guide to help you draw a circle and make it look exactly how you want.
Draw a Circle in PDF in Adobe Acrobat
Step 1: Open Your PDF in Adobe Acrobat
Start by opening your PDF file in Adobe Acrobat 2025. Once your file is open, look over to the right-hand menu.
Step 2: Click on the “Comment” Tool
In that side menu, click on “Comment.” This tool lets you add shapes, notes, and other markup options to your PDF.
Step 3: Choose the Shape Tool
Once you are in the Comment section, look for the shape icon. Click it, and from the dropdown, select the oval shape. This is what you will use to draw a circle.
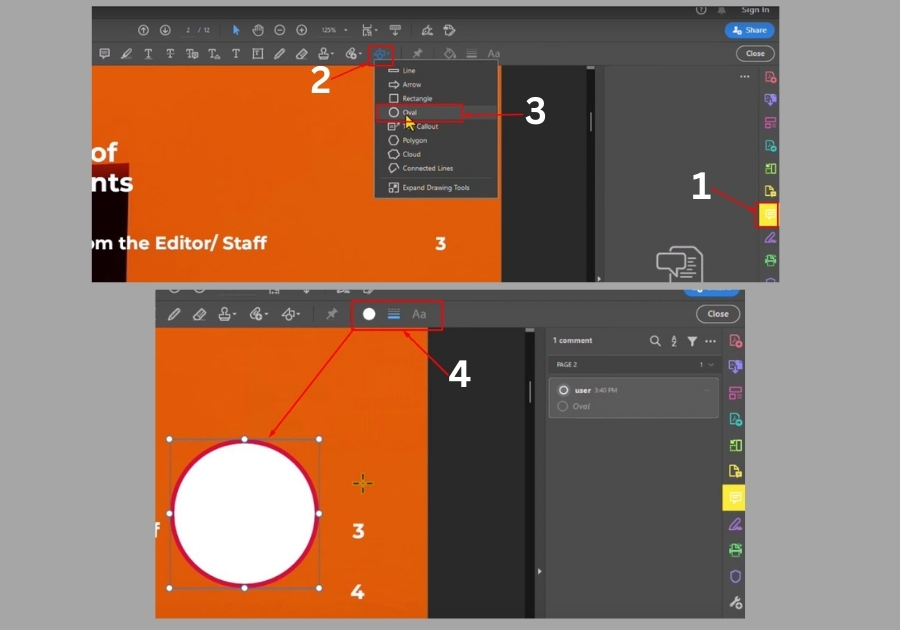
Step 4: Draw Your Circle
Now, click and drag on the PDF to start drawing. If you want a perfect circle (not an oval), hold down the Shift key while dragging. That’s the little trick that keeps it symmetrical.
Step 5: Customize Your Circle
Once the circle is on your page, you can easily adjust the look:
- Change the thickness of the border
- Pick a new border color
- Fill the circle with any color you like
Just right-click on the circle and choose “Properties” to see all the options.
And that’s it!
It’s a quick and easy way to add clean, neat circles to your PDF documents without any extra tools.