
Adding a watermark to your PDF can make it look professional or protect your content. Watermarks are great for branding, protecting your work, or adding a professional touch. They are perfect for business documents, creative projects, or anything you want to mark as yours. With Adobe Reader, it takes just a few clicks to get it done.
This quick guide shows you how to do it using Adobe Acrobat or Adobe Reader.
Add a Watermark in Your PDF
Step 1: Open Your PDF
First, launch Adobe Acrobat or Adobe Reader and open the PDF you want to work on.
Step 2: Find the Watermark Option
If you are using Adobe Acrobat, look at the menu on the right-hand side and click on “Edit PDF.”
Then, click “Add Watermark.”
If you are using Adobe Reader, it’s just as easy:
- Go to the top menu and click “Edit.”
- Then, choose “Watermark,” and hit “Add.”
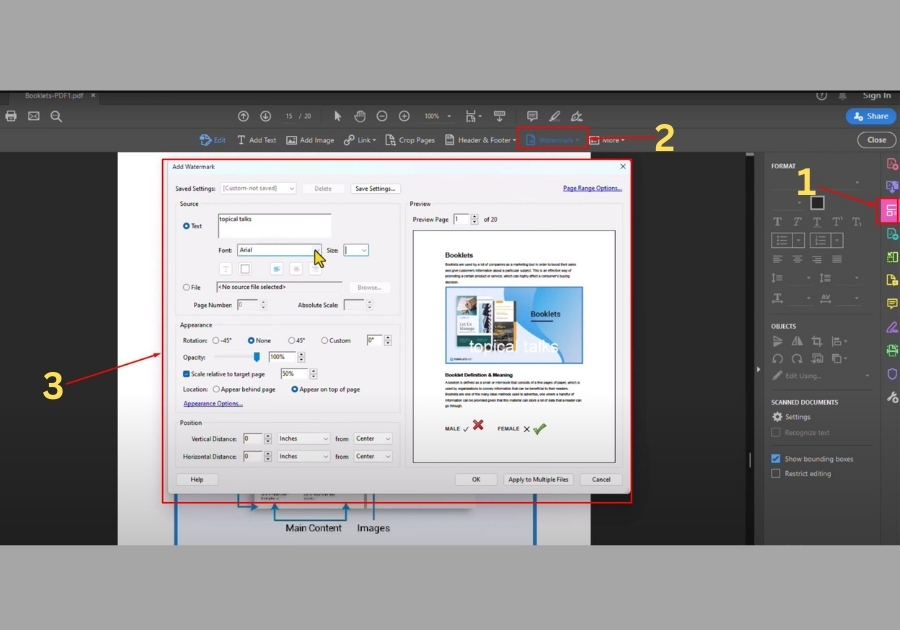
Step 3: Customize Your Watermark
Once you click “Add,” a window will pop up where you can design your watermark.
- Type your watermark text in the box. It could be anything like “Draft,” “Confidential,” or your brand name.
- You will see a preview of your watermark right away.
- You can change the color, adjust the font size, and choose a different font if you want.
Take a moment to play around with it until it looks just right.
Step 4: Apply the Watermark
Once you are happy with the design, just click “OK.” The watermark will instantly appear on every page of your PDF.
Step 5: Save Your File
Don’t forget to hit “Save” to keep your changes.
And that’s all!
No complicated steps, no third-party tools, just a simple built-in feature that gets the job done fast.