Need to hide private info from a PDF?
Redacting is super useful when you’re sharing documents that contain private info, like financial records, legal forms, or work-related files. It permanently removes the selected content, so no one can uncover it later.
Just follow this easy step-by-step process.
Redact a PDF Free in Adobe Acrobat
Step 1: Open Your PDF in Adobe Acrobat
Start by launching the Adobe Acrobat app. Once it’s open, load the PDF file you want to redact.
Step 2: Head to the Tools Section
At the top of the app, look for the Tools section. Inside this area, scroll down until you find an option called Redact. You’ll usually see it under the “Protect” or “Standardize” section. Click on it.
Step 3: Choose What You Want to Redact
Once you’re in the Redact tool, click Mark for Redaction.
Now you’ll get to choose what exactly you want to hide:
- Redact Text and Images – Great for blacking out names, numbers, or photos.
- Redact Pages – Useful if you want to remove an entire page.
For this guide, let’s go with Text and Images. Click OK to confirm.
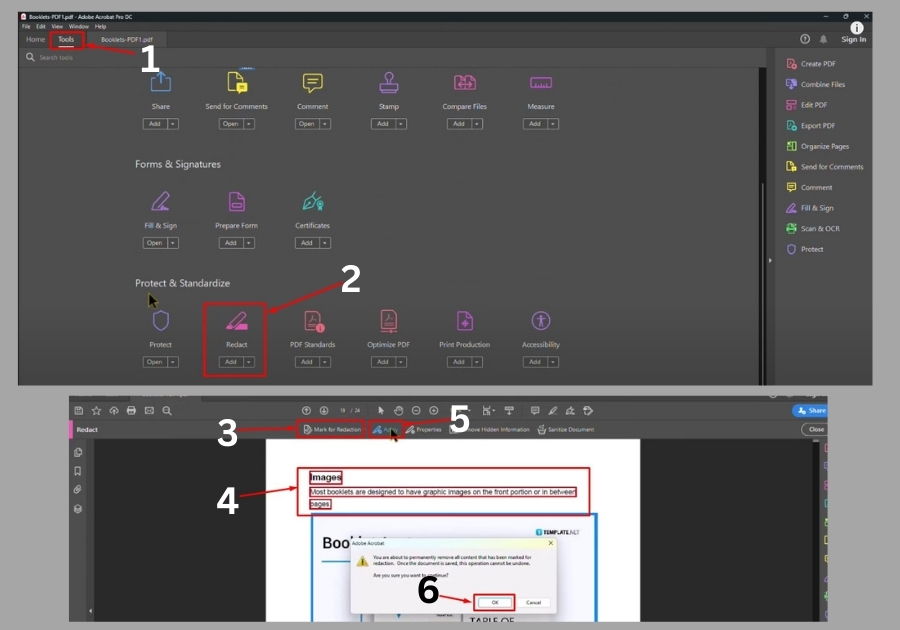
Step 4: Highlight the Info to Redact
Now use your mouse to highlight the text or images you want to hide. Just drag your cursor over the parts you want gone. It’s kind of like highlighting text in Word, but instead of coloring it, you’re about to make it disappear.
Step 5: Apply the Redaction
Once you’ve marked all the areas, click Apply. Acrobat will ask you to confirm, hit OK, then Yes.
The app might take a few seconds to process everything. Once it’s done, the info you selected will be completely hidden, no one can view or copy it anymore.
Step 6: Save and You’re Done!
After redaction, click Close and save your file. That’s it! The private info is now fully removed from your PDF.
And that’s all!. No extra tools, no cost, just a built-in Adobe Acrobat feature.