
Sometimes you need to highlight important information in a PDF. Maybe you are annotating a document or adding a note that needs to stand out. Whatever the case, Adobe Acrobat makes it easy to add text with a background.
If you are using Adobe Acrobat, here’s a simple step-by-step guide to do just that.
Add Text with Background in PDF
Step 1: Open Your PDF in Adobe Acrobat
Start by opening your PDF file in Adobe Acrobat. Once your file is open, head over to the top menu and click on Tools.
Step 2: Choose the Comment Tool
From the Tools menu, select Comment. This will bring up a toolbar where you will find all kinds of annotation tools. The one you need is Add a Text Box; click on it.
Step 3: Draw and Type
Click and drag your mouse on the page to draw a text box. Once it’s there, just type in your text. Write whatever you need, it’s that easy.
Step 4: Change Text Color (Optional)
Want your text to stand out even more? Highlight your entire text, then click on the color box (usually in the toolbar). Pick any color you like for the text.
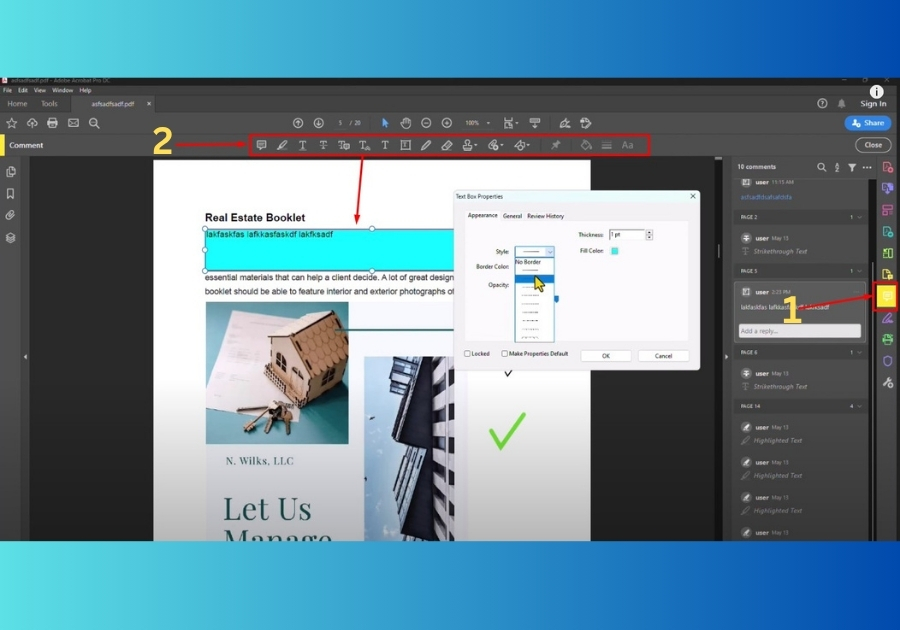
Step 5: Add Background Color
Now here’s where the magic happens. Click outside your text box to deselect the text, then right-click on the box and choose Properties.
In the Properties panel, click on Fill Color and pick a background color for your text box. This adds that eye-catching colored background behind your text.
Step 6: Adjust Border Style (Optional)
Don’t want a border around your text box? No problem. In the same Properties panel, you can change the border style. Select No Border if you want a cleaner look.
Once you are happy with how everything looks, click OK and Close the panel.
Pro Tip:
If you plan to use the same style again, check the “Make Properties Default” option in the Properties panel before you click OK. It will save you time next time around.
And there you go!
You have successfully added text with a background in Adobe Acrobat. This trick works great for callouts, notes, or any time you want to make certain info stand out visually.