Want to make your videos more engaging by adding photos?
CapCut makes it easy to overlay images on your videos right from your phone. Whether you’re creating content for social media or just want to enhance your personal videos, this simple technique can add a professional touch to your projects.
Here’s exactly how to do it.
Simple Guide to Adding a Photo to a Video in CapCut
Step #1
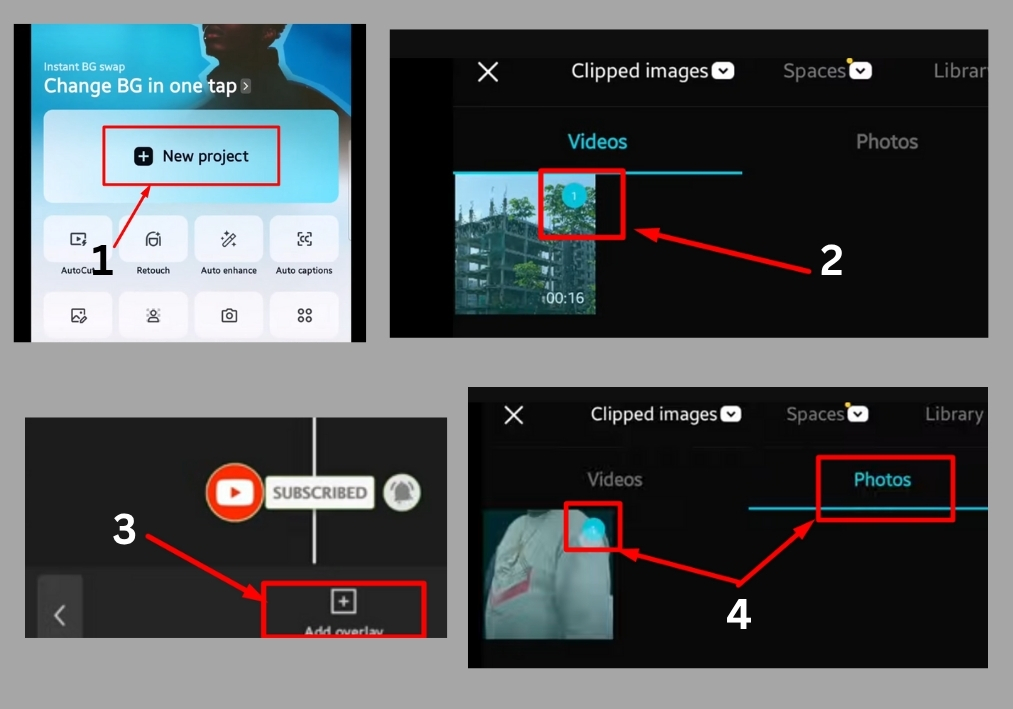
Open the CapCut app on your phone. Once it’s open, tap on the “New Project” button to get started. This will take you to your media library, where you can pick a video.
Step #2
Choose the video you want to edit. Scroll through your gallery, tap on the video you like, and then hit the “Add” button to bring it into your project.
Step #3
Now, let’s add that photo! Look for the “Overlay” option in the toolbar at the bottom of the screen. Tap it, then select “Add Overlay.” This opens your photo gallery again.
Step #4
Pick the photo you want to overlay on your video. Once you’ve found the perfect one, tap it and hit the “Add” button to place it on your video timeline.
Step #5
Adjust the photo to fit your vision. You can resize, reposition, or tweak the timing of the overlay to make it look just right. Play around until it feels perfect.
Step #6
Hit the play button to check out how your video looks with the photo overlay. If it’s good to go, you’re all set!
That’s it!
You’ve just learned how to add a photo to a video in CapCut on your mobile device. It’s a simple trick that can make your videos stand out.