
Want to give your videos that professional, cinematic look?
LUTS (Look-Up Tables) are your secret weapon for instant color grading magic. If you are using CapCut on PC, you are in luck – adding LUTS is straightforward and can transform your footage in seconds.
Let’s see the simple process of importing and applying LUTS to make your videos more interesting.
Easy Steps to Add LUTs in CapCut PC
Step #1
Start by launching CapCut on your PC and opening the project you want to work on. Make sure your video clips are already imported into the timeline.
Step #2
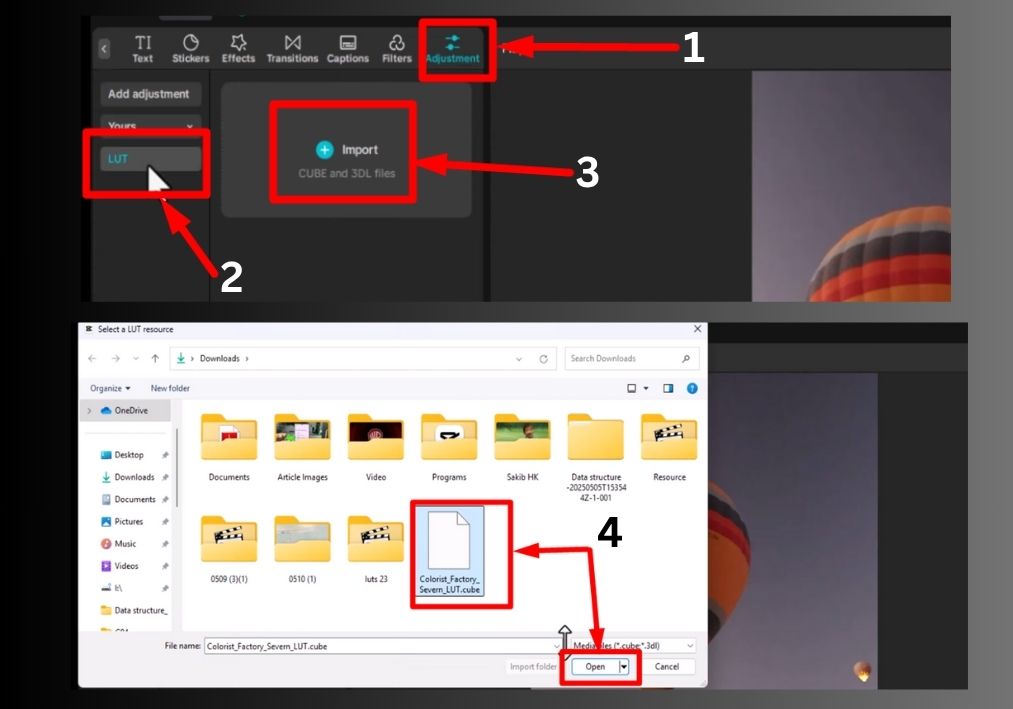
Look at the top of the CapCut interface and find the Adjustments tab. Click on it to access the color grading options.
Step #3
In the Adjustments tab, locate the LUTs option. This is where you will add your LUT files to enhance your video’s colors.
Step #4
Click on the Import button within the LUTs section. Select the LUT files you want to use from your computer. These files are typically in .cube or similar formats.
Step #5
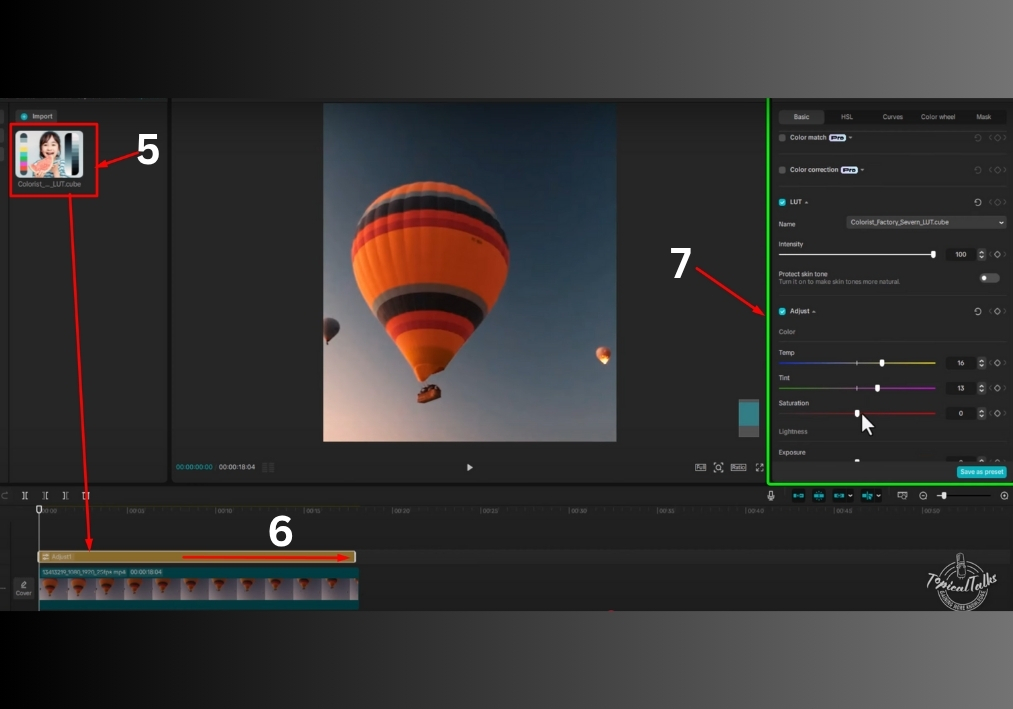
Once imported, your LUTs will appear in the LUTs panel. Simply drag and drop the desired LUT onto the video clip in your timeline. CapCut will automatically apply the LUT, instantly transforming the look of your footage.
Step #6
After applying the LUT, you can tweak the colors further. Check the right side of the screen for additional color adjustment tools, like brightness, contrast, or saturation, to perfect your video’s look.
That’s all!
Adding LUTs in CapCut PC is easy, and it’s very useful for giving your videos a polished, cinematic feel.