Ready to level up your CapCut videos with unique typography?
Adding custom fonts to CapCut PC is easy, and it will take your edits to the next level. Whether you’re creating a fun vlog or a polished promo, custom fonts let you express your style.
In this quick guide, I’ll show you the simple steps to add and use new fonts in CapCut.
Easy Guide to Adding Custom Fonts on CapCut
Step #1
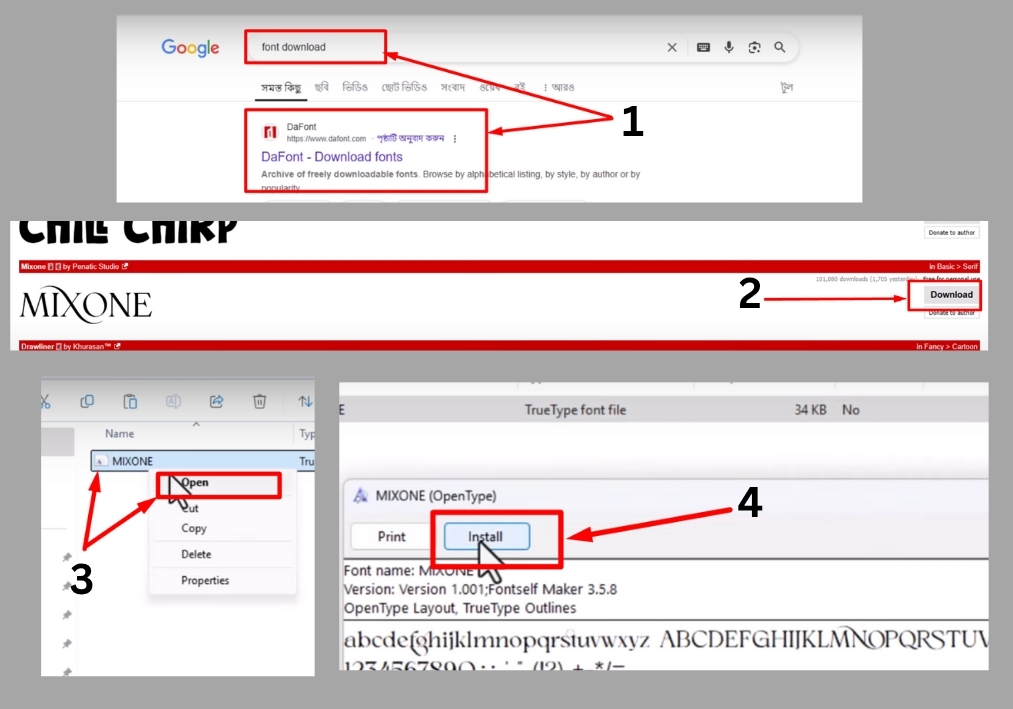
Start by searching for a font you love on a trusted font website. There are tons of free and paid options out there, so pick one that fits your vibe. Once you’ve found the perfect font, download the font file to your computer.
Step #2
Locate the downloaded font file (usually in your Downloads folder). Left-click the file, then click “Open” and select “Install.” This adds the font to your computer’s system, making it available for use in CapCut and other programs.
Step #3
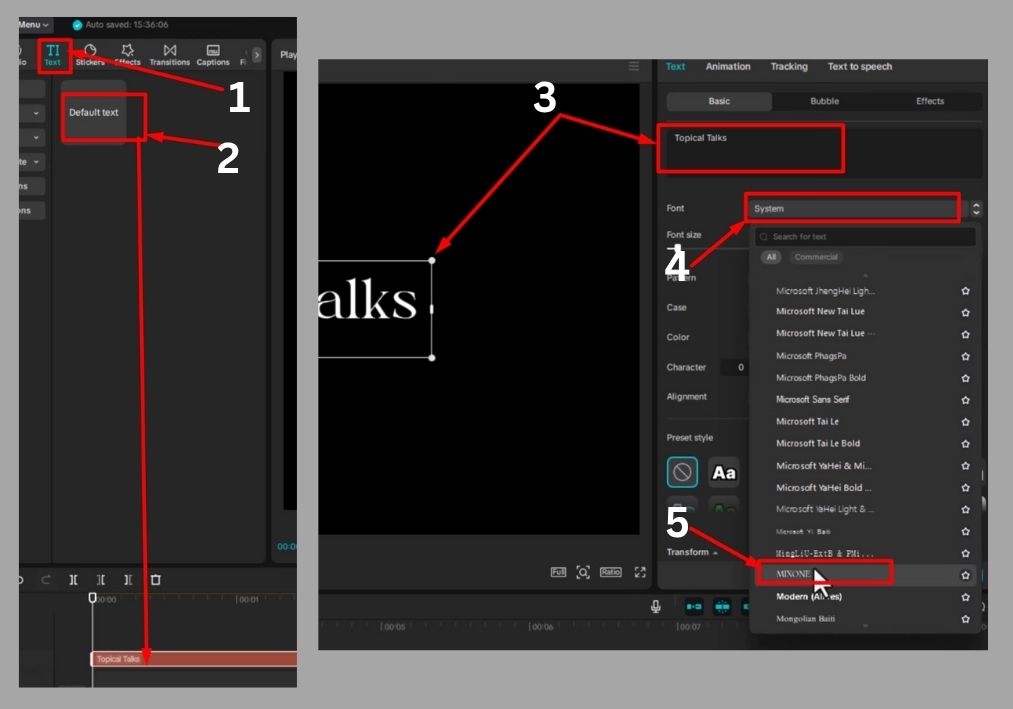
Now open CapCut PC and either create a new project or open an existing one. Click the “Text” icon in the toolbar to add a new text layer to your project. This will let you type out whatever message or title you want to style.
Step #4
Select the text layer you just added. Look for the font or text style options in the menu (usually found in the top or side panel). Click the font drop-down menu, and you should see your newly installed custom font listed. Choose it from the list to apply it to your text.
That’s it!
Your text should now rock the custom font you picked. Play around with sizes, colors, or effects in CapCut to make it stand out even more.