Adding subtitles to your videos will make a big difference, especially when you want your message to be clear and accessible to everyone. If you are using CapCut and thinking about how to get subtitles on your video, then no worries.
In this quick guide, we will see exactly how to use CapCut’s auto-caption feature to generate and customize subtitles.
Easy Guide to Add Subtitles to Video in CapCut
Step #1
Start by opening CapCut on your PC and importing the video you want to add subtitles to. Just drag and drop your video into the CapCut project, or use the import button to select your file.
Step #2
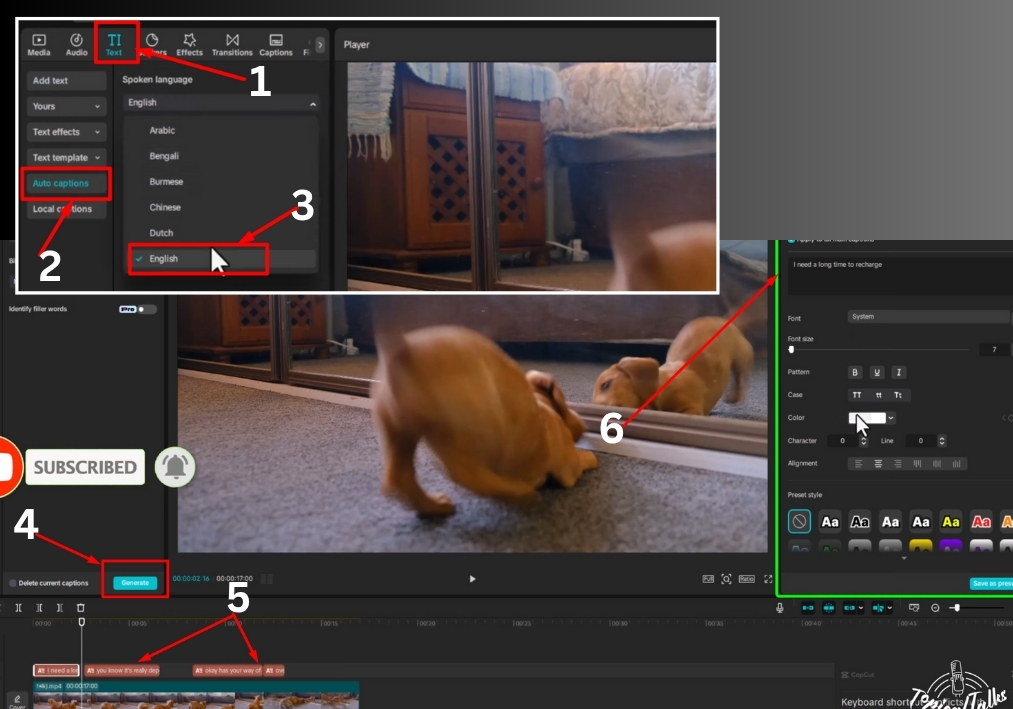
Look at the toolbar and click on the Text icon. This opens up the text options you’ll need for adding subtitles.
Step #3
On the left side of the screen, find and click on Auto Captions. Choose your preferred language from the dropdown menu. CapCut uses this to analyze your video’s audio and create subtitles automatically.
Step #4
Hit the Generate button. CapCut will process the audio and produce subtitles for your video. This might take a moment, depending on the length of your video.
Step #5
Once the subtitles are generated, review them to make sure they are accurate. You can edit the text directly if there are any mistakes. If you want, you can customize the look by adjusting the font size, color, and style from the options on the right side of the screen.
Step #6
Click the Play button to watch your video with the subtitles. This lets you see how they look and make any final tweaks.
And that’s it!
You have added subtitles to your video in CapCut. Your viewers will appreciate the extra effort, and your content will be more accessible.