Want to make your videos more dramatic with thunder and lightning effects?
CapCut makes it surprisingly simple to add these eye-catching elements that’ll take your content to the next level. Whether you’re editing a fun clip or a cinematic masterpiece, this quick tutorial will help you nail the effect in minutes.
Simple Steps to Adding a Thunder Effect in CapCut
Step #1
Start by opening CapCut and importing your main video. This is the clip where you’ll add the thunder effect.
Step #2
Find the thunder or lightning effect in CapCut’s library. Once you’ve got it, press and hold the effect, then drag it to the timeline. Place it on top of your main video clip. Line it up exactly where you want the effect to appear in your video.
Step #3
Now, tweak the thunder effect to fit perfectly. Adjust its duration and position to match the moment you want that lightning strike to hit. Take your time to get the timing just right for maximum impact.
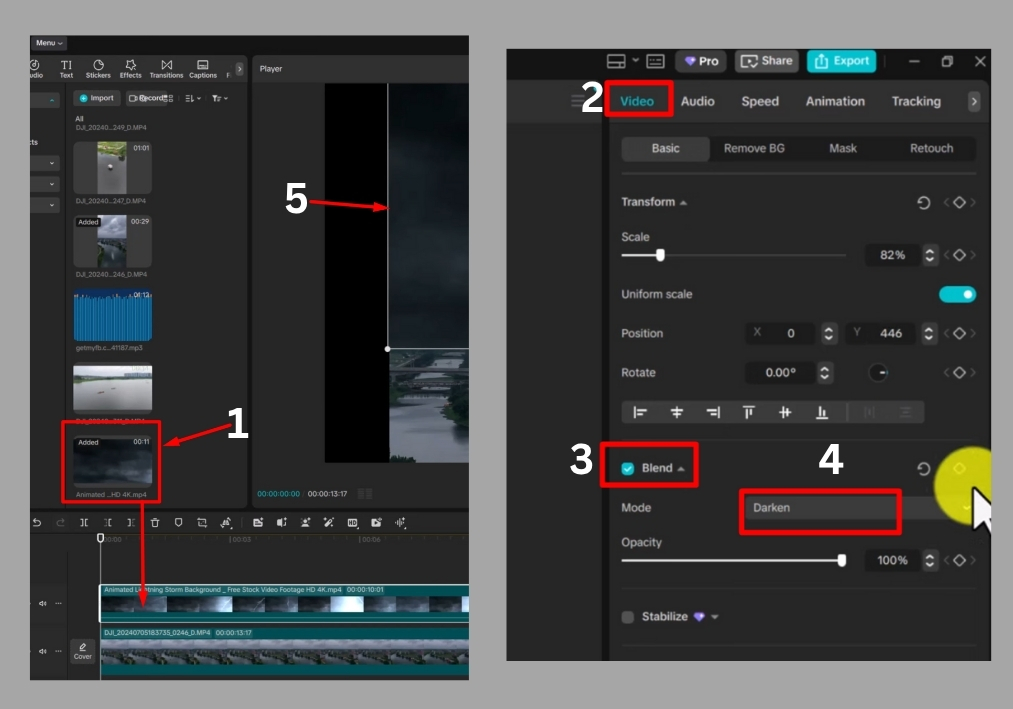
Step #4
Select your main video clip on the timeline, then head to the Video section in CapCut’s menu. Look for the Blend option and tap on it. From the list, choose Darken. This setting helps the thunder effect blend naturally with your video, giving it that realistic, stormy vibe.
Step #5
After applying the Darken blend, you might need to reposition your video or effect slightly. Drag it around to make sure everything looks seamless and the lightning pops where it should.
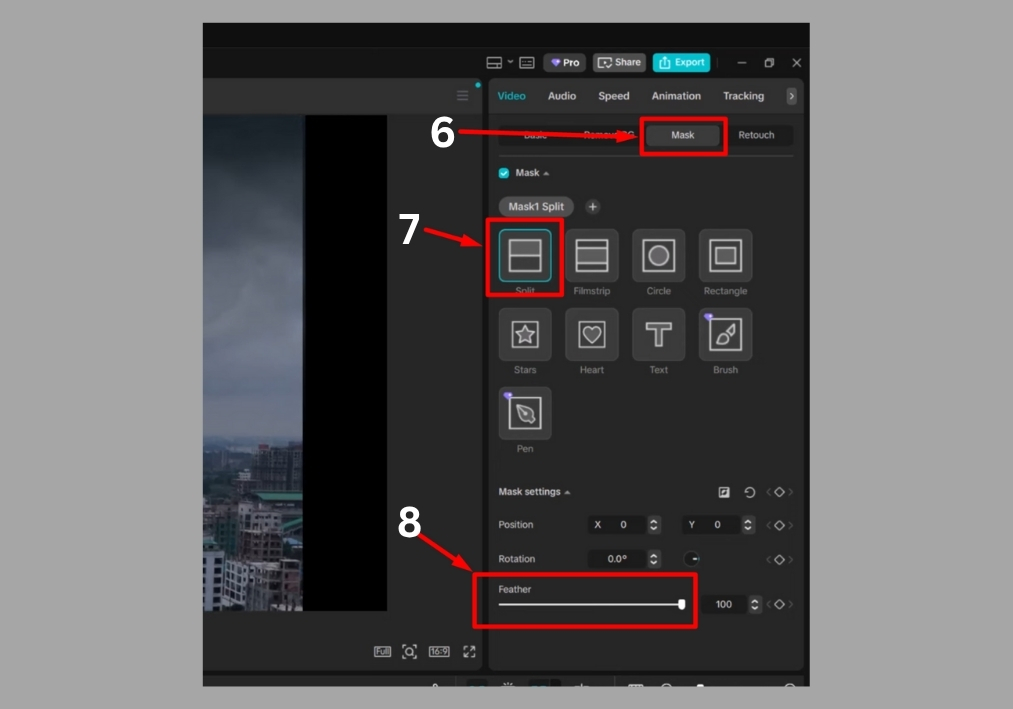
Step #6
Next, tap on your video clip again and go to the Mask option. Select Add Mask, then choose Split. This creates a cool interface where you can refine the effect further.
Step #7
In the mask settings, you’ll see an option to increase the Feather. Crank it up a bit to soften the edges of the effect. This makes the thunder effect blend smoothly into your video, avoiding any harsh lines.
That’s it!
You’ve just added a killer thunder effect to your video in CapCut. It’s a simple trick that can take your edits to the next level.