Adobe Acrobat is a powerful PDF tool, but sometimes you might want to prevent it from connecting to the internet. Maybe you’re tired of constant update notifications or just want to keep things offline for privacy. Whatever the reason, blocking Adobe Acrobat’s internet access is easier than you might think.
Windows Defender Firewall lets you control which programs can send or receive data over the Internet. By creating these rules, you are telling your computer to block any network activity for Adobe Acrobat.
Here’s how to do it:
Block Adobe Acrobat Internet Connection
Step 1: Open Control Panel
Start by going to your computer’s search bar and typing “Control Panel.”
Click on it once it shows up.
Step 2: Open Windows Defender Firewall
In the Control Panel, scroll down until you find “Windows Defender Firewall.”
Click to open it.
Step 3: Go to Advanced Settings
On the left-hand side, you will see an option that says “Advanced settings.”
Click it. This will open up a new window.

Step 4: Create a New Inbound Rule
- In the new window, click on “Inbound Rules.”
- Then on the right side, click “New Rule.”
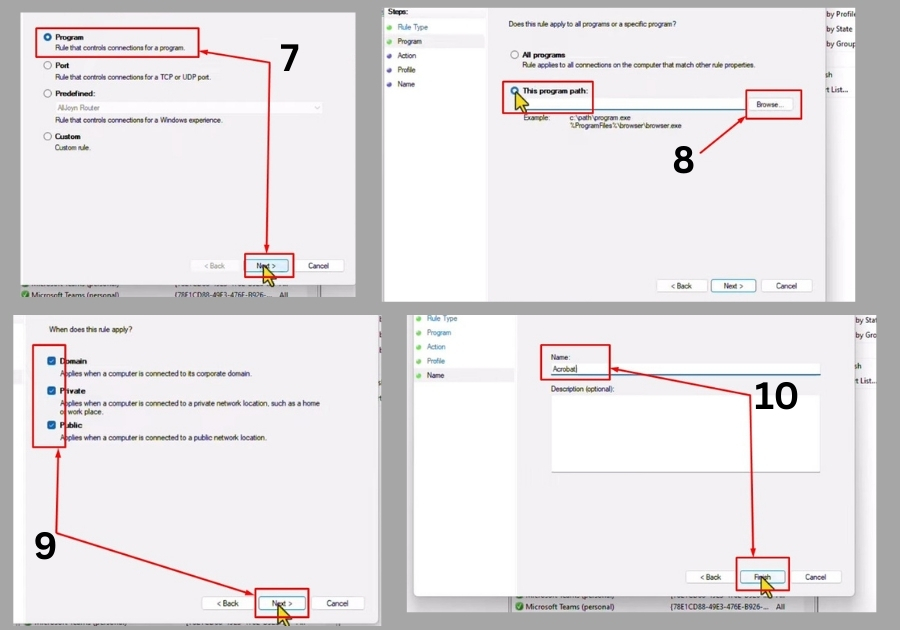
- Choose “Program” and click Next.
- Hit Browse and head to your C drive (or wherever Adobe Acrobat is installed).
- Find and select the Acrobat.exe file. Click Open.
- Choose “Block the connection” and click Next.
- Make sure all three options, Domain, Private, and Public, are checked.
- Give the rule a name like “Acrobat Block Inbound” and click Finish.
Step 5: Create a New Outbound Rule
Now, repeat almost the exact same steps:
- Click on “Outbound Rules.”
- Then click “New Rule.”
- Again, select “Program” and click Next.
- Browse to the same Acrobat.exe file.
- Choose “Block the connection” and hit Next.
- Check all the boxes (Domain, Private, Public).
- Name this rule “Acrobat Block Outbound” and click Finish.
Quick Tips
Double-Check the File Path: Make sure you select the correct “Acrobat.exe” file. If you have multiple versions of Adobe Acrobat installed, pick the one you’re currently using.
Test It Out: Open Adobe Acrobat and try something that requires an internet connection, like checking for updates. You should see it fail to connect.
Reversing the Process: If you ever want to allow Acrobat to connect again, go back to Windows Defender Firewall, find the rules you created (under Inbound and Outbound Rules), and delete them.
That’s it!
You have now successfully blocked Adobe Acrobat from accessing the internet.
You can still use the app normally for opening and editing PDFs, but you won’t be able to reach out online. If you ever want to undo this, just go back into the firewall rules and delete both entries.