Want to make your videos with a dreamy, blurred background?
CapCut makes it easy to achieve that professional look right on your PC. Whether you’re editing a vlog or a creative project, this simple trick can elevate your content.
In this quick guide, I’ll walk you through the exact steps to blur your video background in CapCut, straight from a clear and concise tutorial.
Step Guide to Blur Video Background in CapCut
Step #1
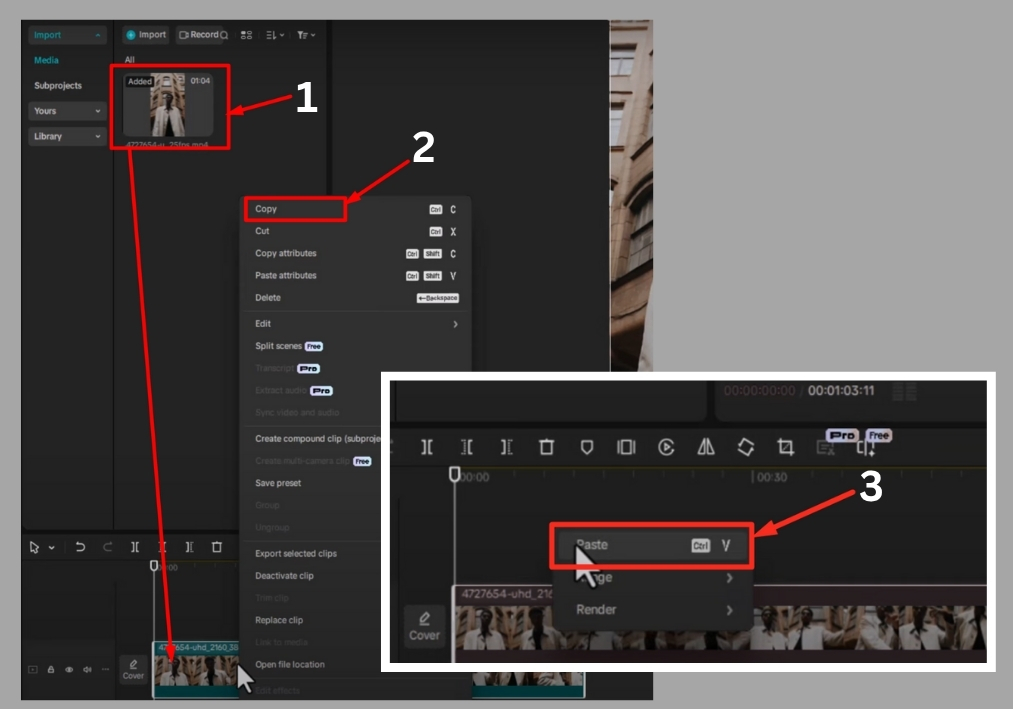
Open CapCut on your PC and click to create a new project. Import the video you want to edit by selecting it from your files. Once it’s loaded, drag it down to the timeline to get started.
Step #2
In the timeline, right-click your video and choose to duplicate it. This creates a second layer of the same video, which we’ll use for the blur effect.
Step #3
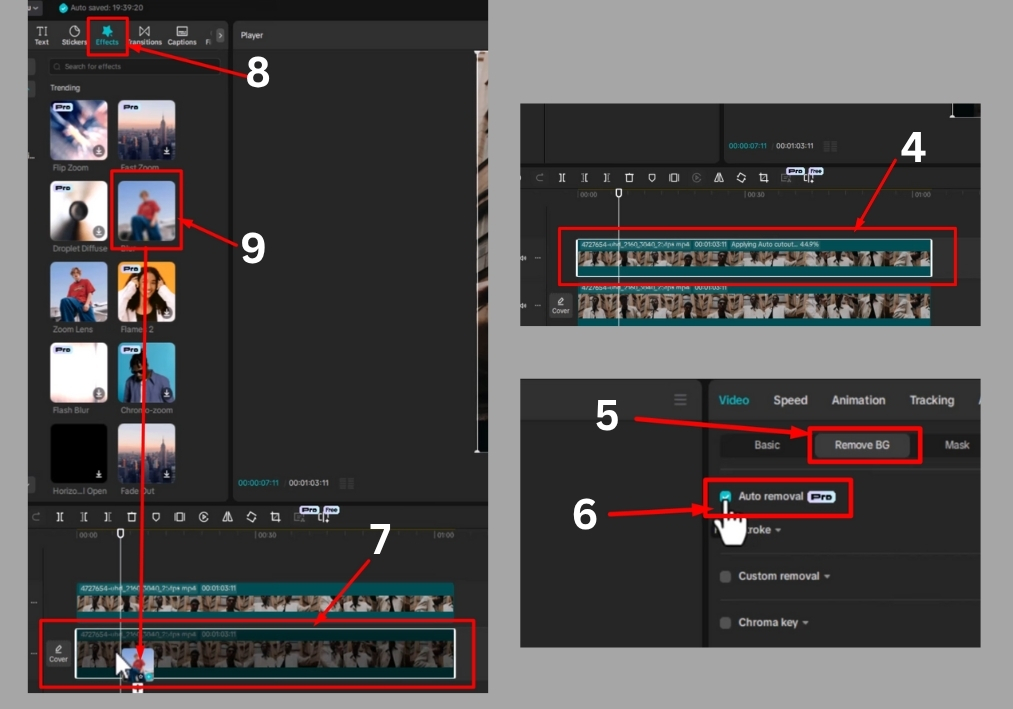
Click on the duplicate video layer in the timeline. On the right side of the screen, find the “Remove Background” option. Select it, then check the box for “Auto Removal.” CapCut will automatically strip away the background from the duplicate layer. You’ll see the background disappear, leaving just the subject.
Step #4
Now, go back to the main video layer in the timeline. Head to the “Effects” tab in CapCut. In the search bar, type “blur” to find the blur effect. Click to apply it to your main video.
Step #5
With the blur effect applied, you can tweak the intensity to get the look you want. Slide the intensity bar to increase or decrease the blur. A higher intensity gives a stronger, more noticeable blur, while a lower setting keeps it subtle. Play around until it feels just right.
Step #6
Once you’ve adjusted the blur, play back your video to see the final result. The duplicate layer (with the background removed) will sit over the blurred main video, creating a polished effect where your subject stands out against a soft, blurred background.
That’s it!
You’ve now mastered blurring the video background in CapCut on your PC. This quick technique can make your videos look more professional and visually appealing in just a few clicks.