
Have you ever wanted to give your photos a fresh new look by switching up the background color?
When working on product photos, portraits, or creative projects, changing background colors in Photoshop is one of those skills that can instantly transform your images.
In just a few clicks, you will have a fresh new background that matches your style perfectly. Let’s walk through the steps together.
Change Your Photos Background Color in Photoshop
Step 1
Start by opening your image in Photoshop. In the Layers panel, click on the image layer to make it active.
Step 2
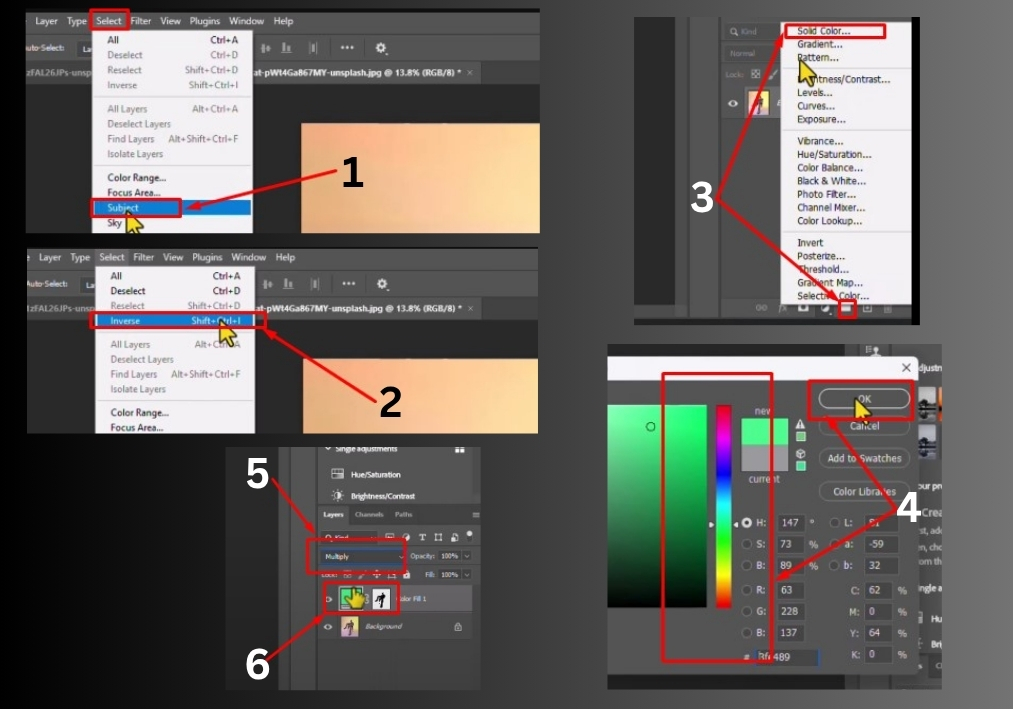
Go to the top menu, click on Select, and choose Subject. Photoshop will automatically detect and select the main subject of your image, like a person or object. And you can refine the selection if needed.
Step 3
Now, you want to select the background instead of the subject. Head back to the Select menu and click Inverse. Or, for a faster way, press Shift + Ctrl + I (Windows) or Shift + Cmd + I (Mac). This flips your selection to the background.
Step 4
Look at the bottom of the Layers panel for the Create New Fill or Adjustment Layer icon (it looks like a half-filled circle). Click it and choose Solid Color. A color picker window will pop up, pick any color you like for your background, and click OK.
Step 5
With the solid color layer selected, go to the top of the Layers panel where it says Normal (this is the blending mode dropdown). Click it and select Multiply. This makes the color layer blend naturally with your image, keeping the subject intact.
Step 6
For a different background color, double-click the solid color thumbnail in the Layers panel. The color picker will appear again, letting you choose a new color. Click OK, and your background updates instantly.
That’s it!
You will see the before-and-after difference right away. Your subject stays untouched, while the background rocks a fresh new color.
With just a few clicks, you can completely transform the vibe of your image by changing the background color in Photoshop