Need to switch up a color in your photo without getting lost in complicated settings?
This quick Photoshop trick will show you exactly how to change the color of any subject in just a few clicks.
Maybe you’re tweaking a shirt color or giving your image a fresh look. This method is simple and beginner-friendly.
Easy Guide to Changing Colors in Photoshop
Step 1
Start by launching Photoshop and opening the image you want to edit. Drag and drop your image into the workspace or go to File > Open to select it. In the Layers panel, click on the image layer to make sure it’s active.
Step 2
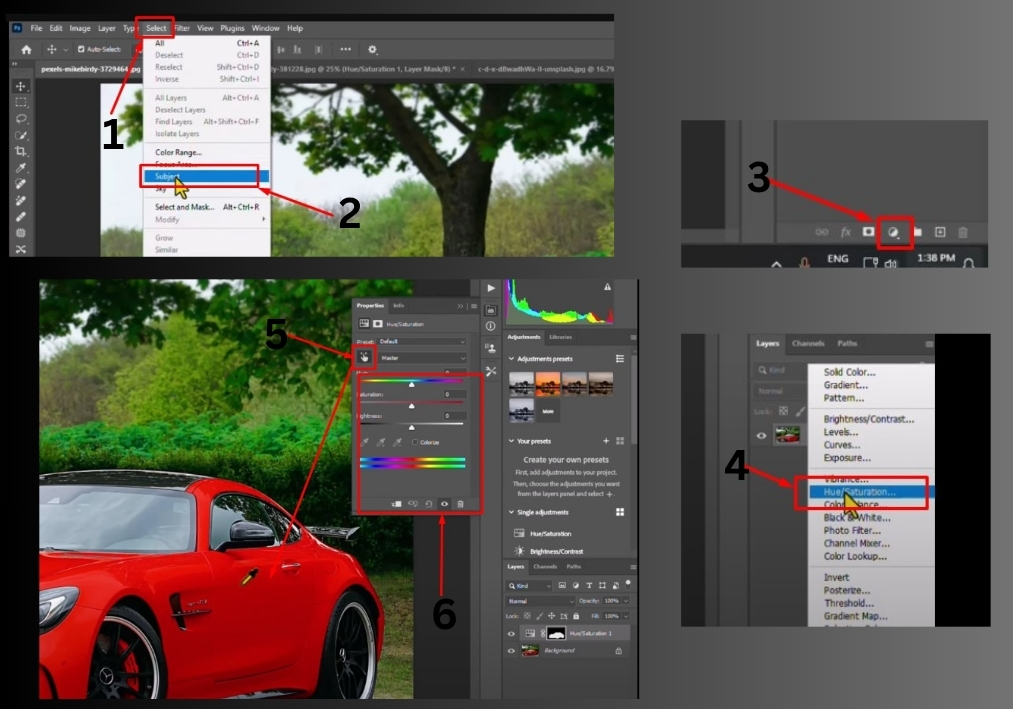
Head to the top menu and click Select > Subject. Photoshop’s smart selection tool will automatically outline the main subject in your image in just a few seconds. It’s like magic!
Step 3
With your subject selected, look at the bottom of the Layers panel for a small circle icon.
Click it and choose Hue/Saturation from the menu. This creates a new adjustment layer that lets you tweak colors without messing up your original image.
Step 4
In the Hue/Saturation panel, you’ll see a dropdown menu. Click it and choose the specific color you want to adjust. For example, if you’re changing a red shirt, select Reds. This targets only that color range in your image.
Step 5
Use the Hue slider to shift the color to something new. Slide it left or right to cycle through different colors until you find the perfect shade. For instance, you can turn a red shirt blue or green with a quick drag.
Step 6
Adjust the Saturation slider to control how vivid the color is. Slide it right for bold, vibrant tones or left for a softer look. You can also tweak the Lightness slider to make the color brighter or darker for that perfect finish.
Step 7
Once you’re happy with the new color, you’re done! Save your image by going to File > Save As and choosing your preferred format, like JPEG or PNG.
That’s it!
This technique works great for clothing, objects, backgrounds, and more.