
Want to make your videos look sharp, clear, and professional?
Maybe you are working with old footage or want to enhance your current projects; CapCut has a solution for you. Converting your regular videos to 4K resolution in CapCut PC is easier than you think.
This straightforward process will help you achieve that sharp, high-definition quality that makes videos stand out.
Easy Guide to Convert & Export Your Video to 4K
Step #1
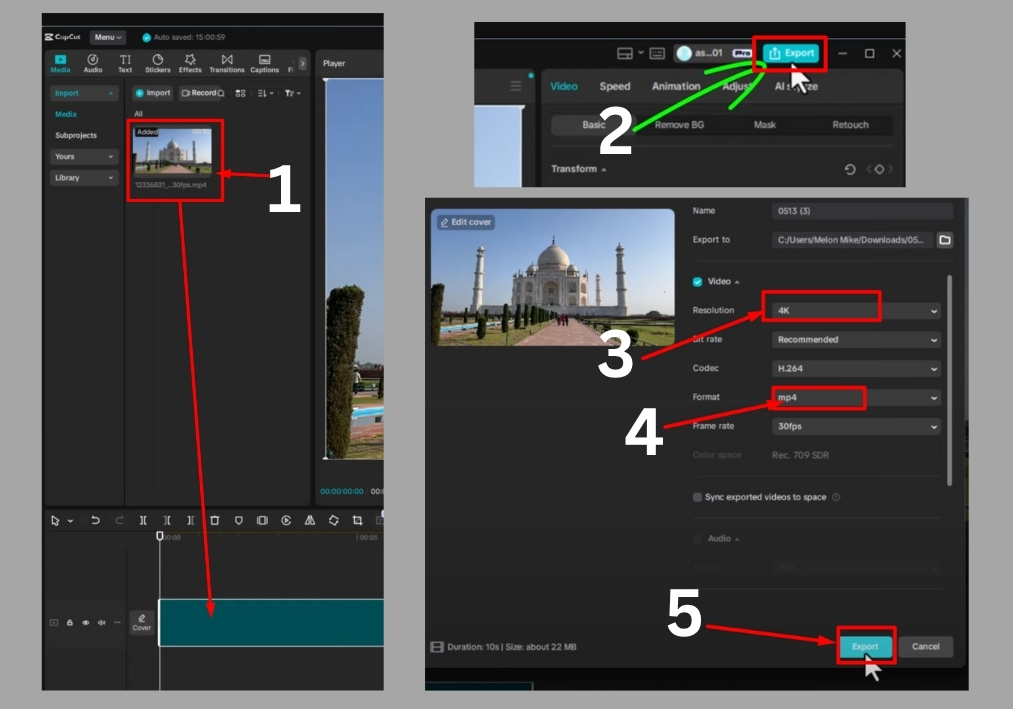
Start by opening CapCut on your PC. Click the import button and select the video you want to convert to 4K.
Step #2
Drag your imported video from the media library to the timeline at the bottom of the screen. This is where you can make any edits, like trimming or adding effects, if you want.
Step #3
Before converting, feel free to tweak your video. Add transitions, text, or filters to make it pop. If you’re happy with the raw footage, you can skip straight to exporting.
Step #4
Once your edits are done, hit the Export button in the top right corner of the screen. A menu will pop up, select Video from the options.
Step #5
In the export settings, find the Resolution option. Click it, and from the drop-down menu, select 4K. This will set your video to ultra-high-definition quality.
Step #6
If you want, you can adjust other settings like frame rate, bit rate, or video format to suit your needs. For most users, the default settings work just fine.
Step #7
Click Export again to kick off the conversion process. CapCut will process your video and save it in 4K.
That’s It!
You’ve just turned your normal video into a sharp, high-quality 4K masterpiece using CapCut on your PC.