
Want to give your image a fun or artistic twist in Photoshop? You don’t need to be an expert, just a few clicks and you’re good to go. Whether it’s for social media, digital art, or just messing around, distorting an image can make it stand out.
In this quick guide, we’ll walk through how to use the Ripple and Zigzag filters to warp your image creatively. Let’s see the process step by step.
Use Distort An Image in Photoshop Easily
Step 1: Duplicate the Image Layer
Before you apply any effect, it’s always smart to duplicate your image layer. This way, your original stays untouched.
- Right-click on your layer and select Duplicate Layer.
- Now you can safely work on the copied one.
Step 2: Go to the Distort Menu
- Head up to the Filter menu at the top.
- Hover over Distort.
- You’ll see a list of fun effects to choose from.
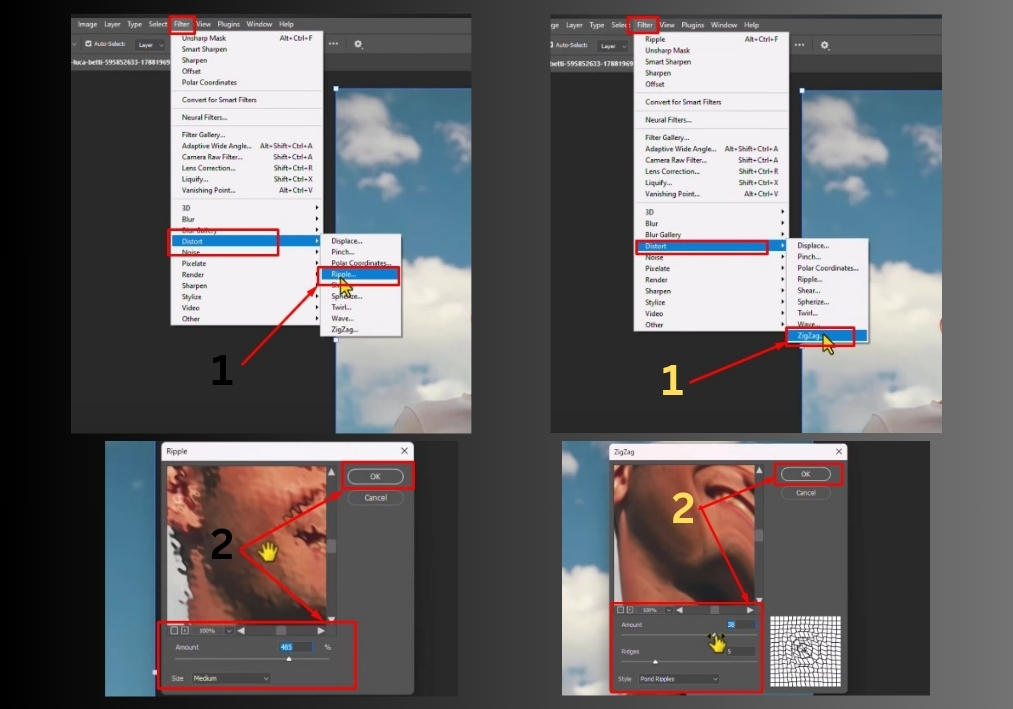
Step 3: Apply the Ripple Effect
Let’s start with Ripple, a popular distortion style.
- Click Ripple from the list.
- A preview window will pop up.
- Adjust the Amount slider to make the effect stronger or more subtle.
- You can also change the Size of the ripples (Small or Large).
- Once you’re happy, click OK.
See, your image now has a cool ripple distortion.
Step 4: Add a ZigZag Effect
Want to layer on more distortion? Try adding a ZigZag effect next.
- Again, go to Filter > Distort > ZigZag.
- In the pop-up, you can:
- Increase or decrease the Amount.
- Adjust the Ridges to control the pattern depth.
- Change the Style to tweak how the zigzag behaves.
- Click OK when it looks good.
Just like that, you’ve distorted your image using simple tools in Photoshop. You can mix and match other effects in the Distort menu for even wilder results. It’s fast, easy, and fun.