
Have you ever experienced a dual monitor setup in your editing life? If not, you are missing the best comfort. You can level up your video editing game with dual monitors in Adobe Premiere Pro.
Having two screens gives you more space to organize your timeline, preview your footage, and access tools simultaneously.
Let’s look at how to set up dual monitors in Premiere Pro with a few simple steps.
Step-by-Step Guide to Enable Dual Monitors in Premiere Pro
- Open Premiere Pro Settings
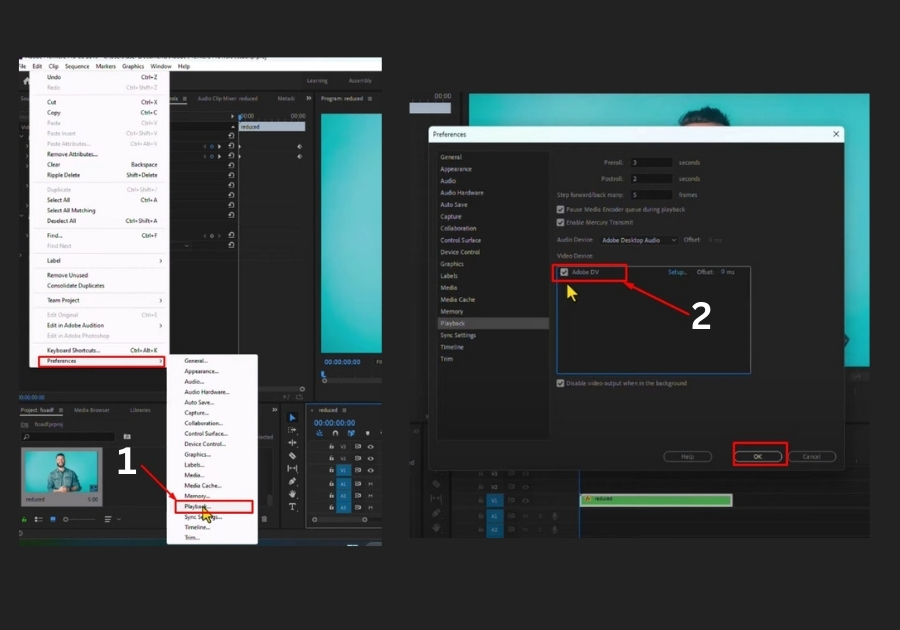
Launch Premiere Pro and head to the top menu. Click on Edit. A dropdown menu will appear; hover over Preferences and select Playback from the list. This is where you’ll find the settings to tweak your monitor setup. - Choose Your Monitors
In the Playback settings, look for the Video Device section. Here, you’ll see a list of all the monitors connected to your computer. To enable dual monitors, simply check the boxes next to the two monitors you want to use. Easy, right? - Save and Done!
Once you’ve selected your monitors, click OK to save the changes. That’s it! Premiere Pro will now use both screens, and you can drag panels or windows across them to customize your workspace.
Quick Tip
If your monitors don’t show up in the list, double-check that they’re properly connected to your computer. Restarting Premiere Pro or your system might help refresh the list.
That’s all it takes to enable dual monitors in Premiere Pro! No complicated setup, no tech lingo; just a few simple clicks to double your workspace.