Need more space around your subject in Photoshop? Maybe you are working on product photos or portraits, extending the background can make a big difference.
In this quick guide, I will show you how to do it step by step using easy tools like the Crop Tool and Content-Aware Scale.
Extend Your Photo Background in Photoshop
Step #1
Start by opening your image in Photoshop. In the Layers panel, you will see your image as a locked background layer. Double-click it to unlock it, then hit Ctrl+J (or Cmd+J on a Mac) to duplicate the layer. This gives you a backup in case anything goes wrong.
Step #2
Select the Crop Tool from the toolbar (or press C). Hold down the Alt key (or Option on a Mac) and drag the edges of the canvas outward to make it bigger. This creates extra space around your image. When you are happy with the new size, click the checkmark or press Enter to confirm.
Step #3
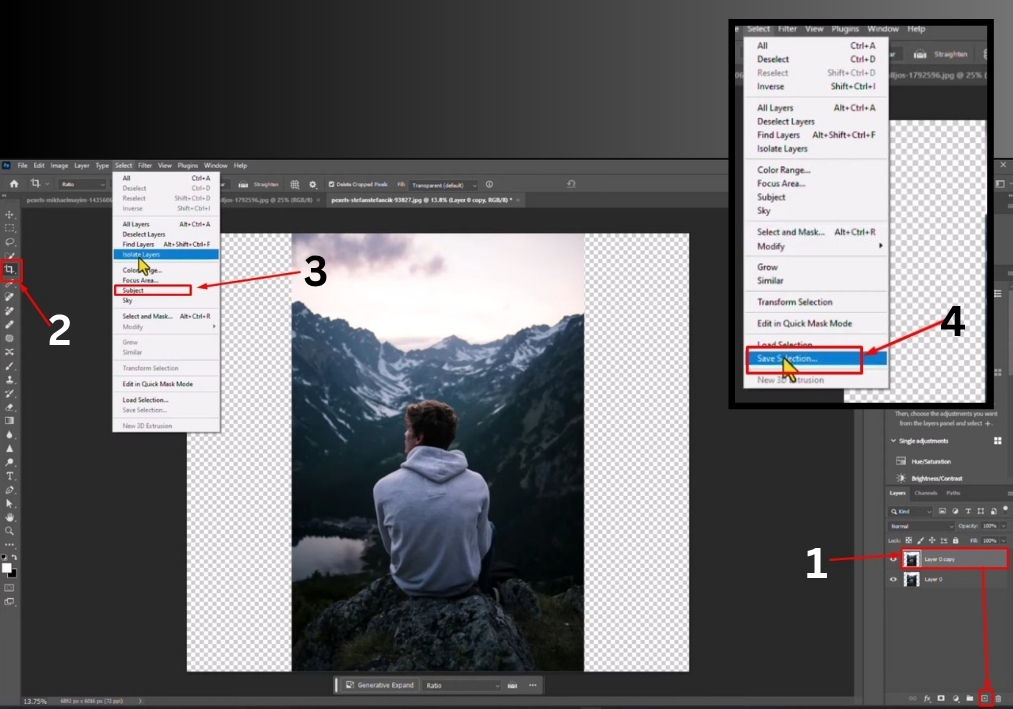
Go to the Select menu and choose Subject. Photoshop will automatically detect the main subject in your image. Once selected, go back to the Select menu, click Save Selection, and name it “Subject.” Click OK to save it. Then, press Ctrl+D (or Cmd+D) to deselect.
Step #4
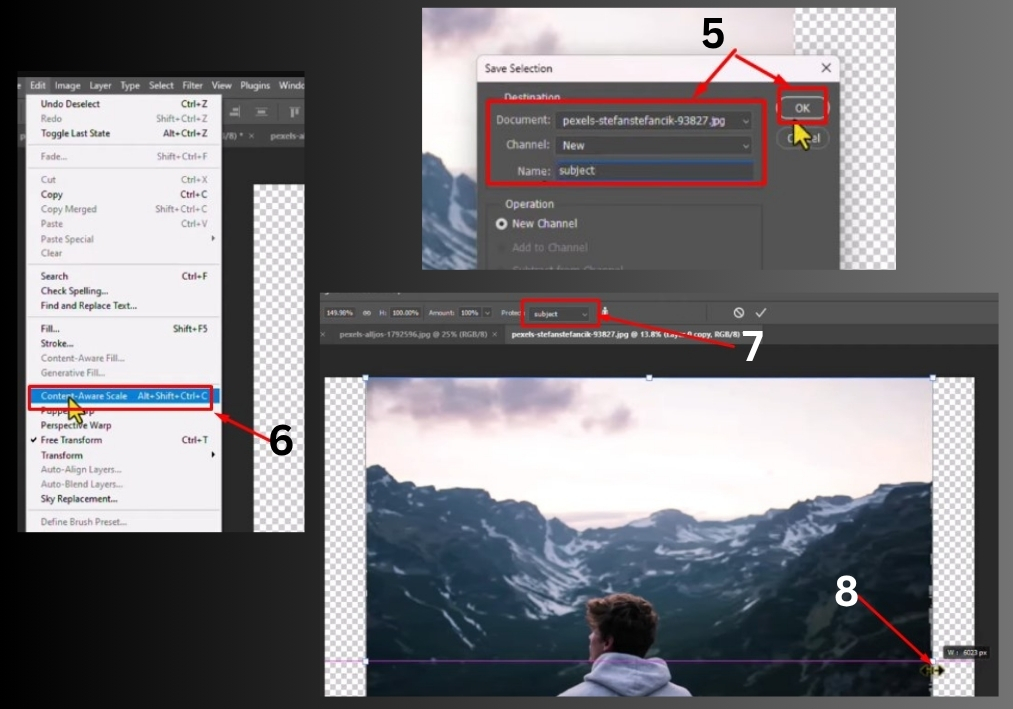
Head to the Edit menu and select Content-Aware Scale. In the options bar at the top, find the Protect dropdown and choose the “Subject” selection you just saved.
Now, hold the Alt key (or Option) and drag the handles to stretch the background. Adjust until it looks natural, then click the checkmark or press Enter.
That’s it!
You have successfully extended your image without messing up the subject. Compare the before and after to see the difference.