Adding custom brushes to Photoshop is a breeze once you know how. Whether you’ve downloaded a cool watercolor brush or a unique texture pack, installing it doesn’t have to be complicated.
In this quick guide, I’ll show you how to get those brushes into Photoshop fast, no techy steps or confusing menus involved. Just a simple method that works every time.
Let’s walk through the process together so you can start using your new brushes right away.
Step-by-Step Guide to Adding Brushes
- Find Your Brush File
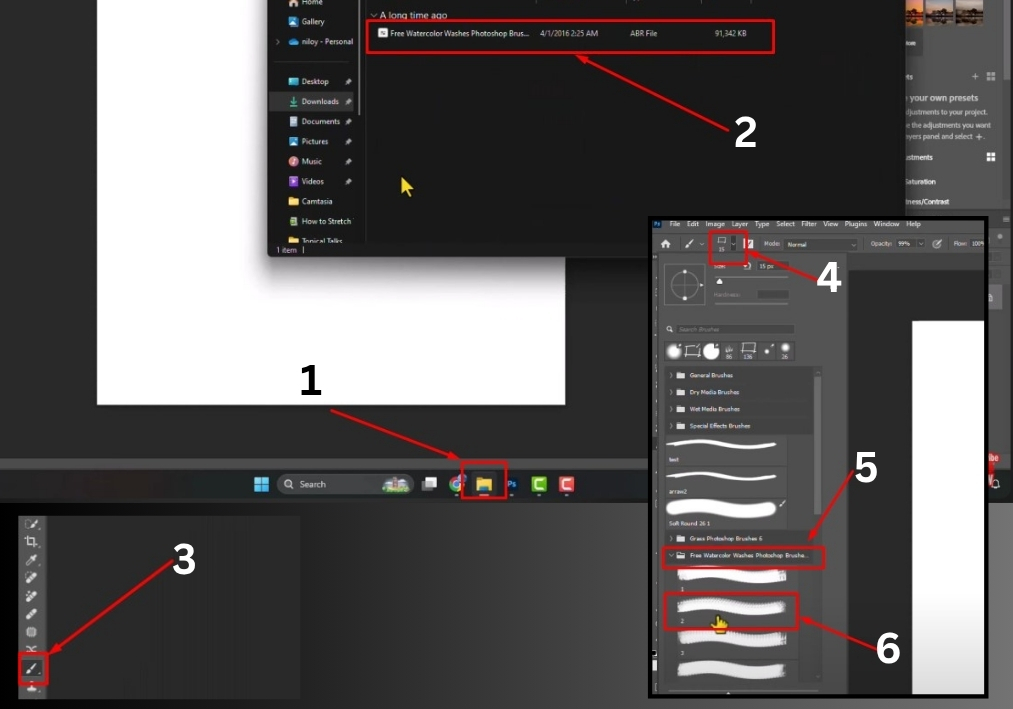
First, head over to the folder on your computer where your downloaded brush files are stored. These files usually have a .abr extension. - Double-click the Brush File
Once you find the brush preset file (like free_watercolor.abr), just double-click it. That’s it. Photoshop will automatically add the new brushes for you. - Open Photoshop and Select the Brush Tool
Now go back to Photoshop. Select the Brush Tool from the toolbar on the left or press “B” on your keyboard. - Locate Your New Brushes
Click the brush icon at the top (or right-click on your canvas while the brush tool is active). You’ll see your new custom brushes listed; look for the name of the brush pack you installed (like “Free Watercolor”). - Start Using Them
Click on your custom brush and start painting. You’re good to go!
Quick Tip: You can keep all your favorite brushes organized by saving them into folders within Photoshop’s brush panel. That way, everything stays neat and easy to find.
There you go! In just a few clicks, you’ve added new brushes to Photoshop and are ready to create something amazing.