Ever wanted to place an image onto a wall in your photo but it just doesn’t look right?
The secret is in the blending. With a few simple steps in Photoshop, you can make any image fit naturally onto a wall, no matter the angle or lighting. This technique works great for mockups, interior design ideas, or just having fun with photo editing.
Let’s walk through exactly how to do it from start to finish.
Step-by-Step Guide to Blending Images
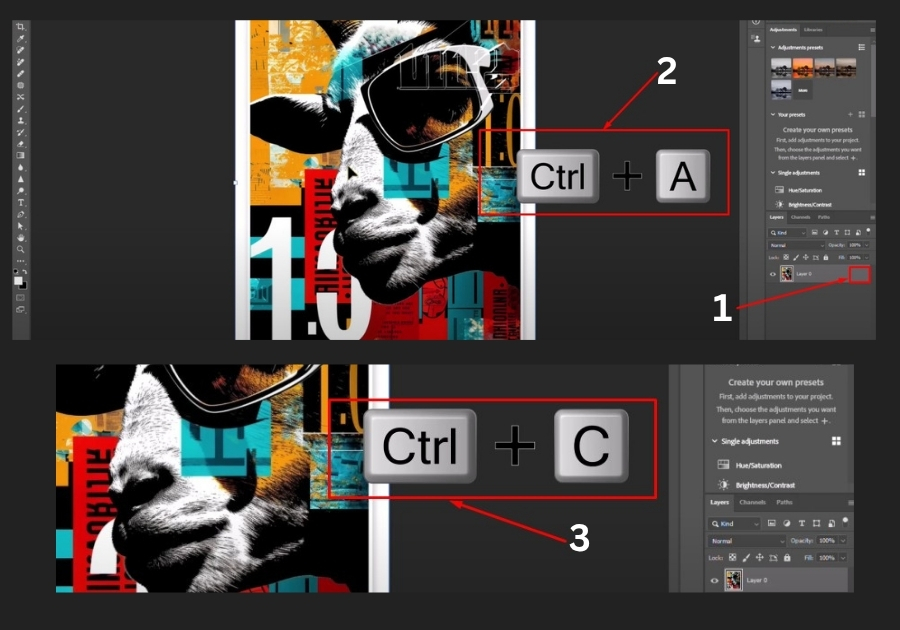
Step 1: Copy the Image You Want to Blend
- Open the image you want to blend into the wall.
- Unlock the image layer (just click the lock icon).
- Press Ctrl + A to select the whole image.
- Then press Ctrl + C to copy it.
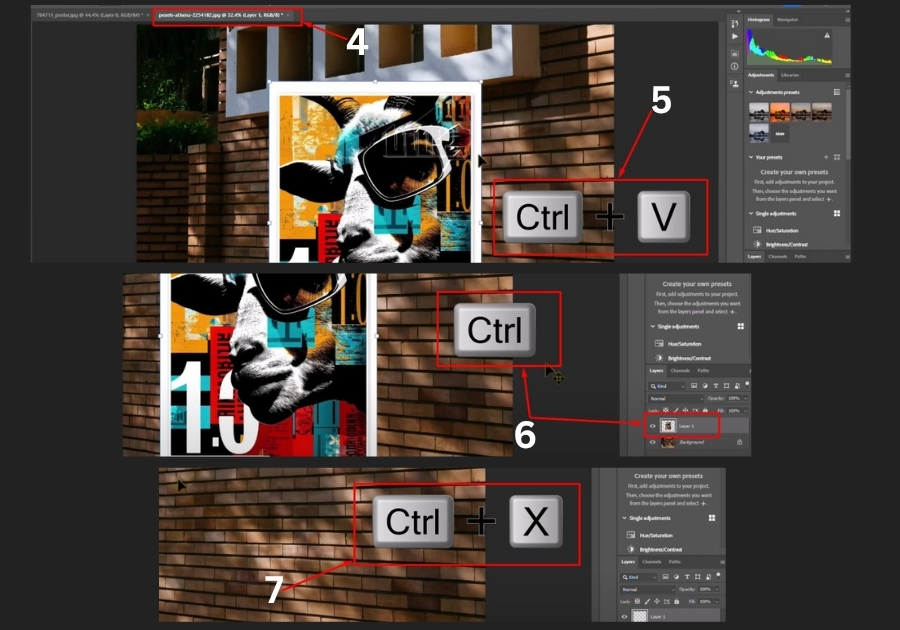
Step 2: Paste the Image onto the Wall
- Open your wall background in Photoshop.
- Press Ctrl + V to paste the copied image.
- Now hold down Ctrl and click the image thumbnail on the layer. This selects the shape of your image.
- Press Ctrl + X to cut it.
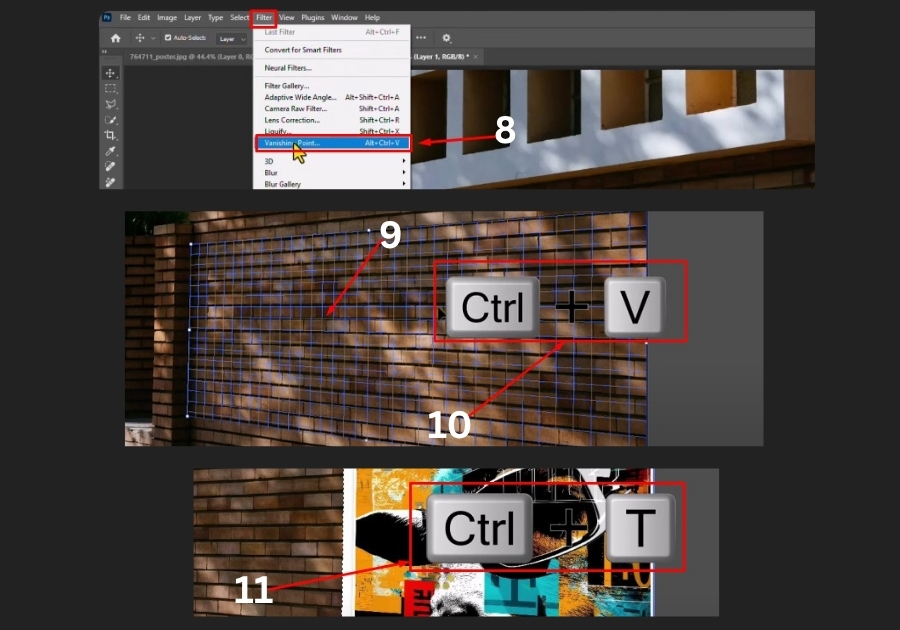
Step 3: Use the Vanishing Point Tool
- Select the wall layer (where you want to blend the image).
- Go to the Filter menu and choose Vanishing Point.
- In the Vanishing Point window, draw a perspective grid to match the shape and angle of your wall.
Step 4: Paste and Adjust the Image
- Once your grid is ready, press Ctrl + V again.
- Drag the image into the grid area, you’ll see it snap to fit the perspective.
- Press Ctrl + T to resize or rotate the image as needed.
- When you’re happy with the placement, click OK.
Step 5: Fine-Tune the Blend
- Double-click on the image layer to open the Layer Style panel.
- Under Blending Options, hold down Alt and drag the slider under “This Layer” to split and smooth the blend.
- Adjust until the image naturally blends into the texture of the wall.
That’s it!
Your image now looks like it was part of the wall all along. Great for realistic posters, graffiti effects, or even mockup presentations.