
Want to rotate your computer screen in Windows 11? Maybe you need a vertical setup for coding or just want to try something new.
It’s easy to change your screen orientation. Here’s a simple step-by-step guide to help you rotate your computer screen without any tech headaches.
Rotate Your Computer Screen in Windows 11
Step 1: Open Settings
Right-click the Start menu (that’s the Windows icon at the bottom-left of your screen), then click Settings. This will open the Settings app.
Step 2: Go to Display Settings
Inside the Settings app:
- Click on System from the sidebar on the left.
- Then click Display on the right.
Quick Tip:
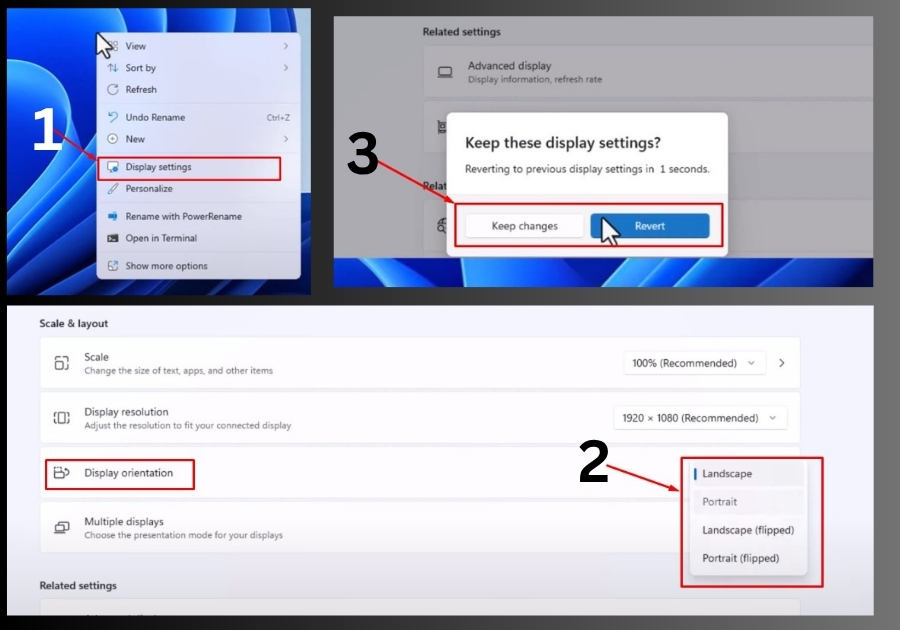
You can skip all that and right-click your desktop, then choose Display settings. It takes you straight to the same place.
Step 3: Find the Orientation Settings
Scroll until you see a section called Scale and layout.
Under it, you’ll find a dropdown menu labeled Display orientation.
Click on that dropdown, and you’ll see four options:
- Landscape – The regular, horizontal view.
- Portrait – Rotates the screen vertically (great for reading or coding).
- Landscape (flipped) – Turns the screen upside down.
- Portrait (flipped) – Rotates it vertically, but in the opposite direction.
Step 4: Pick an Orientation
Click on the option you want. Once you do, your screen will rotate right away. A box will pop up asking if you want to keep these changes.
If it looks good, click Keep changes.
If it’s confusing or hard to see, just wait. After a few seconds, Windows will switch back to your old setup automatically. You can also click Revert if you prefer.
A Note on Keyboard Shortcuts
You might’ve heard about a keyboard shortcut to rotate the screen, but heads-up: that shortcut doesn’t work in the latest Windows 11 updates. Stick to the Settings app method for now, it’s reliable and straightforward.
That’s it!
Changing your screen orientation in Windows 11 doesn’t have to be confusing. Just a few clicks and you’re good to go.