So, Video editors, maybe you are aiming for that smooth, motion-blur look or a crisp, dynamic feel in your video. Whatever your goal is, adjusting the shutter speed is a must.
Changing the shutter speed of your footage in Premiere Pro can give your videos that cinematic, action-packed look that many filmmakers love. Whether you are creating music videos, action sequences, or just want to add a stylistic touch to your project.
Here’s how you can do it step by step:
Change Shutter Speed in Premiere Pro
Step 1: Find the Echo Effect
First, head over to the Effects panel in Premiere Pro. In the search bar, type “echo”. It should pop right up. Drag and drop the Echo effect onto your video clip in the timeline.
Step 2: Tweak the Echo Settings
Now, click on your clip and go to the Effect Controls panel. You will see all the Echo effect settings there. This is where the magic happens.
Here’s what you need to change:
- Echo Time (seconds): Set this to -0.020
- Number of Echoes: Set this to 5
- Decay: Set this to 0.80
- Echo Operator: Change it to Composite in Back
These settings create a motion blur effect that looks like a slower shutter speed was used when the video was shot.
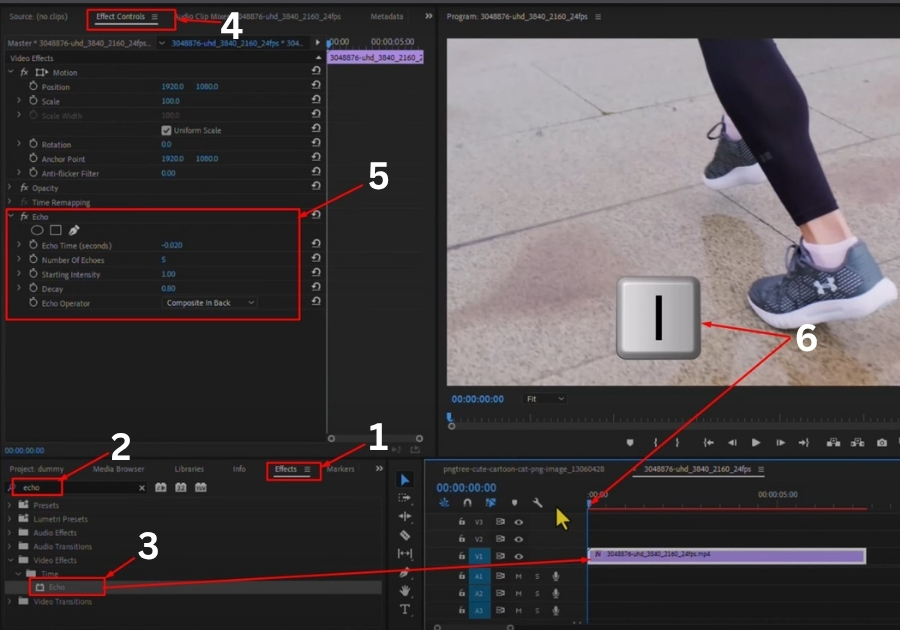
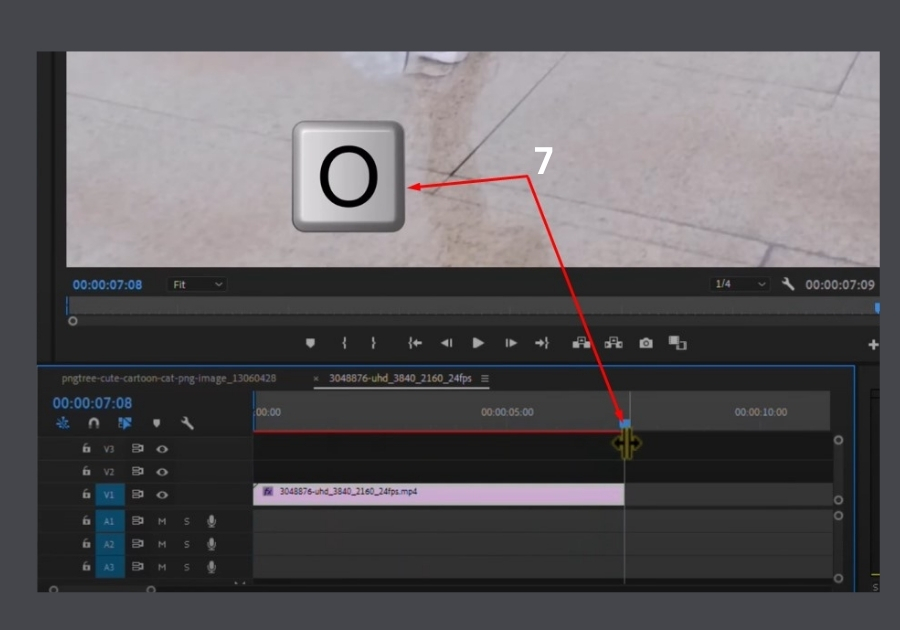
Step 3: Mark the In and Out Points
Move your playhead to the beginning of your clip and press the “I” key to mark the in-point. Then go to the end of the clip and press “O” to mark the out-point.
Step 4: Render the Selection
Now, press “Enter” on your keyboard. This will render the selection so you can preview the effect smoothly.
Step 5: Watch the Shutter Speed Effect in Action
Hit play and see the difference. You will notice smoother motion with that blurry trail, kind of like what you’d get by lowering the shutter speed on a real camera.
And that’s it! You have successfully changed the shutter speed of your video in Premiere Pro. This trick is perfect for adding a professional touch to your projects.