Vertical videos are king on platforms like Instagram Reels, TikTok, and YouTube Shorts. Converting your content to 9:16 ensures it fits perfectly on mobile screens, grabbing viewers’ attention without awkward black bars. Plus, it’s a quick way to repurpose existing footage for multiple platforms.
Converting 16:9 (landscape) to 9:16 (portrait) in Premiere Pro is super simple, and here’s a quick step-by-step guide to get it done fast:
Convert Your Video 16:9 to 9:16 in Premiere Pro
Step 1: Open Your Project
Open your Premiere Pro project like you normally would. Make sure the timeline (or sequence) with your video is visible.
Step 2: Access Sequence Settings
Now go to your Project Panel, right-click on the sequence you’re working on, and hit Sequence Settings.
Alternatively, you can click on the Sequence tab at the top menu and choose Sequence Settings from there.
Step 3: Change the Frame Size
Inside the settings, look for Frame Size.
Here’s what to do:
- Set the horizontal (width) value to 1080
- Set the vertical (height) value to 1920
This flips your video from wide to tall, perfect for mobile content.
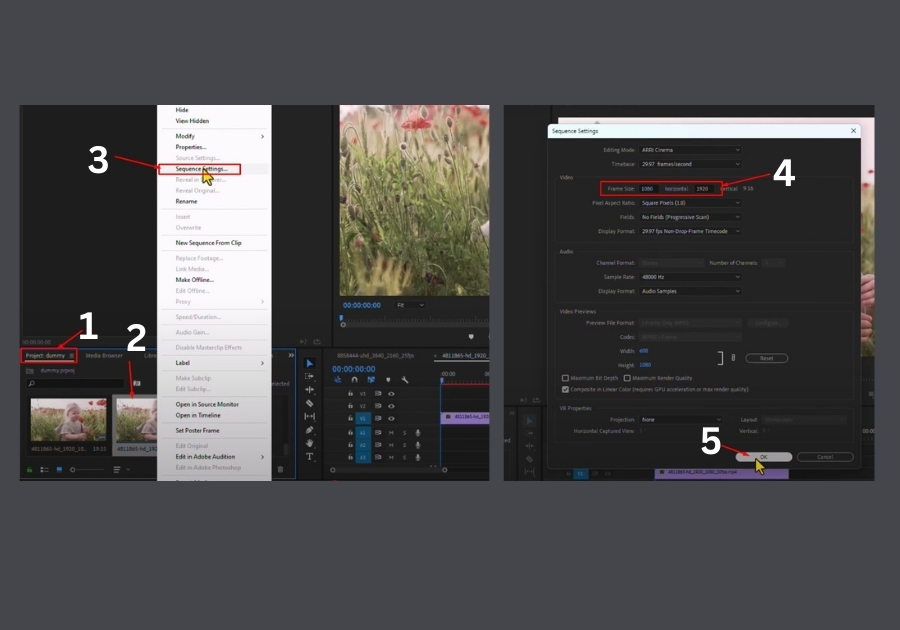
Step 4: Click OK (Twice)
After entering the new dimensions, hit OK, then click OK again if Premiere asks for confirmation. Don’t worry, it won’t break anything.
Your sequence is now in 9:16 format.
Step 5: Adjust the Video
Now, head over to the Effect Controls panel.
Select your clip, and adjust the Scale to fit the new vertical frame. Drag it around if needed to center the subject or crop out space.
That’s It! This trick is good when you are repurposing content or creating new vertical videos, This quick edit will have your clips ready for TikTok, Reels, or Shorts.