PDFs are awesome for sharing images because they keep everything neat and professional. Whether you’re sending a scanned document, a photo for a project, or an image for printing, PDFs are universally compatible and maintain quality.
Converting a JPG image to a PDF is easy, especially with Adobe Acrobat. Let’s see the process together so you can convert your JPG to a PDF in no time.
Convert JPG to PDF in Adobe Acrobat
Step 1: Open Your JPG Image
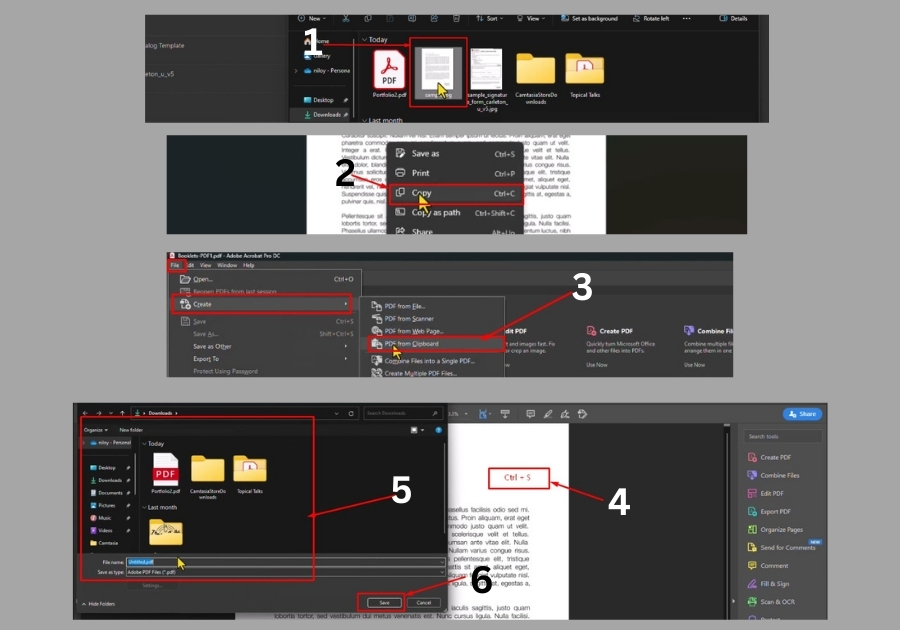
First, find the JPG photo you want to convert. Open it on your computer; just a regular image viewer is fine.
Step 2: Copy the Image
Once the image is open, right-click on it and select “Copy.” This puts the image onto your clipboard, ready for action.
Step 3: Open Adobe Acrobat
Now, open Adobe Acrobat. Once you’re in:
- Click on “File” in the top-left corner
- Select “Create”
- Then choose “PDF from Clipboard”
Just like that, your JPG image appears in Acrobat, already converted to PDF.
Step 4: Save Your PDF
All that’s left is to save your new PDF. Press Ctrl + S, give your file a name, choose where to save it, and hit Save.
That’s it!
In just a minute or two, you have got a PDF ready to go. If you found this helpful, try experimenting with other Adobe Acrobat features to make your workflow even smoother.