If you’re working on a video edit and need to remove a section from the middle of your clip in Adobe Premiere Pro, maybe it’s an awkward silence, a mistake, or just something you don’t want in your final edit.
Adobe Premiere Pro makes this simple with just a few clicks. Let me show you how to cut out the middle part of your video without leaving gaps.
Cut Middle Part of Video in Premiere Pro
Step 1: Unlink Video and Audio
First, unlink the video from the audio so you can work with them separately. Just right-click on your clip in the timeline and choose “Unlink.” That’s it. Now your video and audio are no longer stuck together.
Step 2: Move the Playhead to Where You Want to Cut
Drag the playhead to the spot where you want the cut to happen. This marks the beginning of the part you want to remove.
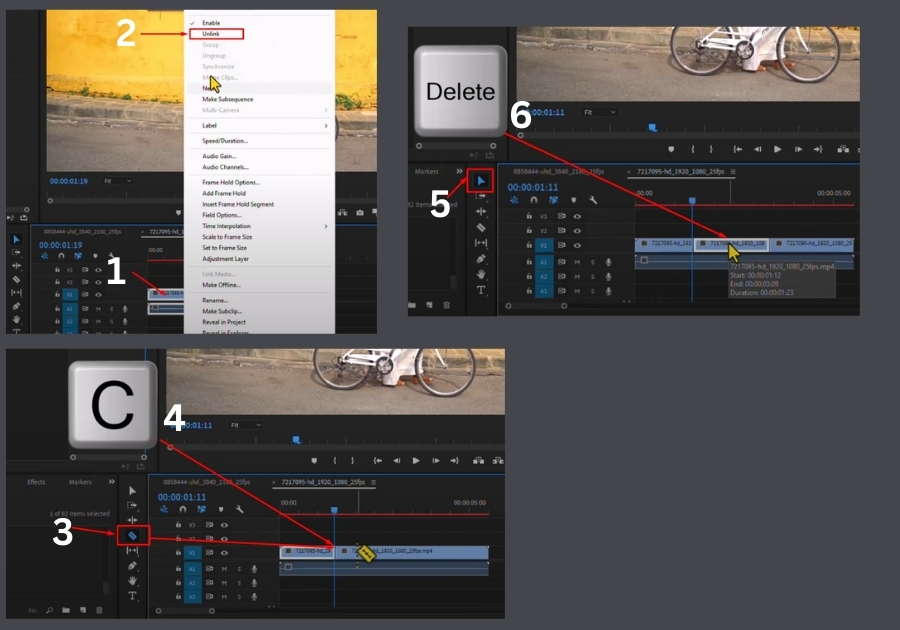
Step 3: Use the Razor Tool
Now, head to the toolbar and select the Razor Tool (it looks like a little razor blade). Or, for a faster way, just press the C key on your keyboard. Click right on the timeline where your playhead is; that’s your first cut.
Move the playhead to where the middle section ends and make another cut. You have now sliced out the chunk you don’t want.
Step 4: Delete the Middle Section
Switch back to the Selection Tool (or press V on your keyboard), click on the part you just cut out, and hit Delete on your keyboard. See, it’s gone.
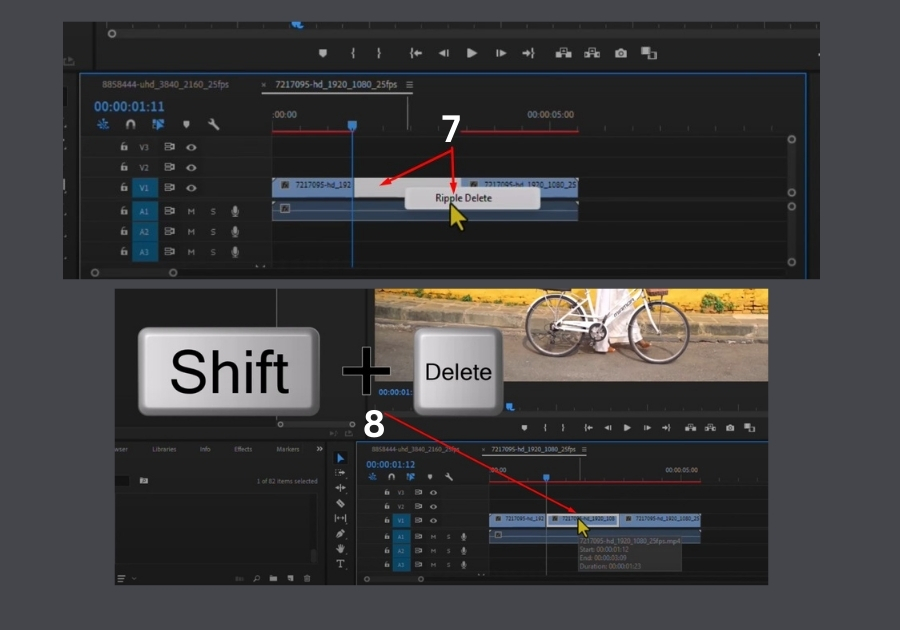
Step 5: Remove the Gap
You will now see a gap where the clip used to be. To close it up, just right-click on the empty space and choose “Ripple Delete.”
Another quick method: hold down Shift and press Delete. The gap disappears, and the remaining clips snap together like nothing ever happened.
And that’s it!
It might sound like a lot at first, but once you do it a couple of times, it becomes second nature. Practice a few times with a test clip and you’ll be trimming like a pro in no time.