
To make your videos sound polished and professional, you can add a fade-out effect to your audio in Premiere Pro. Instead of your audio tracks ending abruptly, a fade-out creates a smooth transition that gradually reduces the volume until silence.
Here are the simple steps to follow:
Fade Out Audio in Premiere Pro (Quick Guide)
Step 1: Import Your Audio Clip
At first, make sure your audio clip is in your timeline. You should see it sitting nicely on one of your audio tracks.
Step 2: Right-Click the End of the Clip
Now, go to the end of your audio clip. Right-click on it. A menu will pop up; don’t let it overwhelm you.
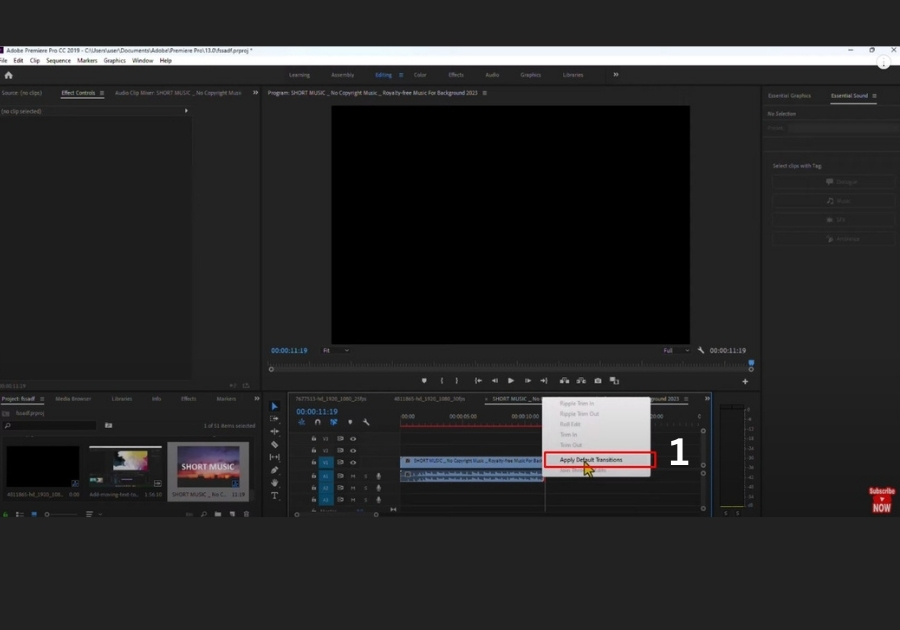
Step 3: Select “Apply Default Transitions”
From the menu, click “Apply Default Transitions.” That’s it! Premiere Pro will automatically add a fade-out effect to the end of your audio.
Step 4: Adjust the Fade (If You Want To)
Want a slower or quicker fade? Just click on the fade-out area and drag it to make it longer or shorter. The longer the fade, the smoother it sounds.
Done!
This trick works great for ending scenes, transitions, or just giving your video a more professional feel.