
Sometimes, you want your audio to sound like it’s coming from another room or through a wall; kind of distant and “muffled.” Maybe someone is underwater, or you are doing a dream sequence. Whatever the reason, Adobe Premiere Pro makes it pretty simple to pull off.
Here’s a simple guide to achieving this effect in Adobe Premiere Pro.
Make Audio Sound Muffled on Premiere Pro
Step 1: Open Your Project and Locate Your Audio
First, fire up Premiere Pro and open the project with the audio you want to tweak. In your timeline, find the audio clip you are working with. It could be background music, dialogue, or any sound you want to muffle. Click on it to select it.
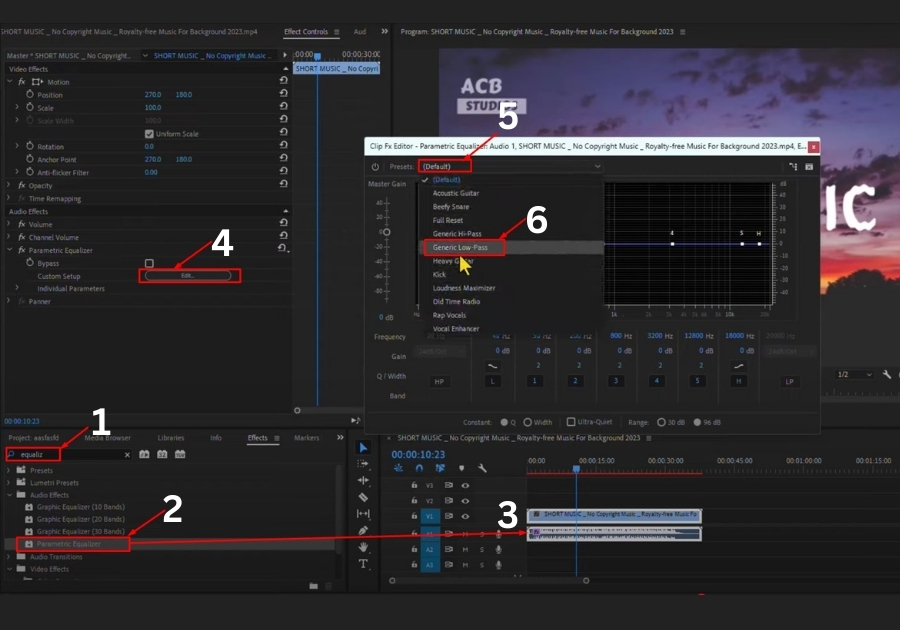
Step 2: Head to the Effects Panel
Next, look at the left side of your screen for the Effects panel. If you don’t see it, go to the top menu, click Window, and make sure Effects is checked. In the Effects panel, type “equalizer” into the search bar to quickly find the effect we need.
Step 3: Apply the Parametric Equalizer
In the search results, you’ll see Parametric Equalizer under Audio Effects. Click and drag it onto your selected audio clip in the timeline. This effect is your ticket to customizing the sound.
Step 4: Open Effect Controls
With your audio clip still selected, head to the Effect Controls panel (usually above the timeline). You’ll see Parametric Equalizer listed under the clip’s effects. Next to Custom Setup, click the Edit button to dive into the settings.
Step 5: Choose the Low Pass Preset
In the Parametric Equalizer window, you’ll see a dropdown menu labeled Preset. Click it and select Generic Low Pass. This preset is perfect for muffling audio because it cuts out high frequencies, giving you that soft, muted sound.
Step 6: Fine-Tune the Muffled Effect
Now, you’ll notice a slider or a dot labeled H (for high frequencies). Drag it to adjust the level of muffling. Want it super muffled? Lower the frequency. Prefer a subtle effect? Keep it higher. Hit the Enter key on your keyboard to play the audio in real-time and hear how it sounds. Tweak the slider until it feels just right.
Step 7: Save and Close
Once you are happy with the muffled sound, close the Parametric Equalizer window. Your changes are automatically saved, and you are good to go! Play your timeline to double-check the vibe.
That’s it! In just a few steps, you have transformed your audio to sound muffled in Premiere Pro. Play around with the settings to match your vision, and don’t be afraid to experiment.