
Got a PDF that’s all over the place?
Adobe Acrobat makes rearranging PDF pages super intuitive. Whether you’re prepping a report, combining scanned documents, or fixing a mixed-up file, this tool saves time and keeps your work polished. Plus, the drag-and-drop feature feels natural, even if you’re not a tech pro.
In this quick guide, I will show you how to do it step by step using Adobe Acrobat in 2025
Rearrange Pages in PDF
Step 1: Open Your PDF in Adobe Acrobat
First, launch your Adobe Acrobat app. Then, open the PDF file you want to fix. You’ll see all your pages just as they are, even if they’re in the wrong order.
Step 2: Head Over to the Tools Section
Now look for the “Tools” tab. Once you’re there, scroll to the section labeled “Create & Edit.” Under that, click on “Organize Pages.”
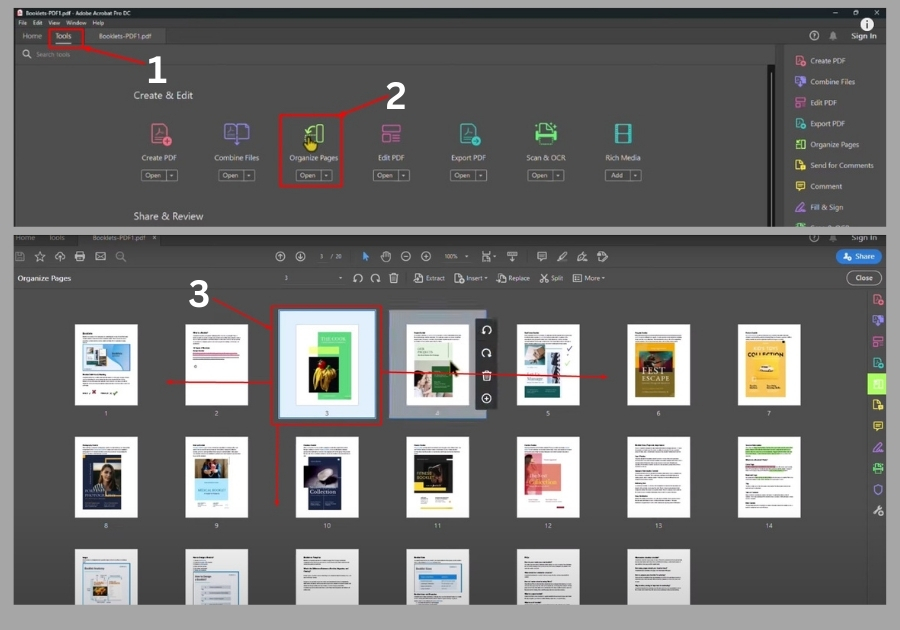
Step 3: Drag and Drop to Rearrange
All your PDF pages will show up in thumbnail view. From here, just click and drag the page you want to move. For example, if you want page 15 to be the first page, just drag it all the way to the top of the list.
It’s literally that easy. Drag, drop & done.
Step 4: Save or Export Your PDF
Once you’ve rearranged everything the way you want, go to File > Save to update your current file. If you want to keep the original and save this as a new version, use File > Export instead.
It really doesn’t take much time once you know where to go. Whether you’re organizing a report, a portfolio, or any multi-page document, Adobe Acrobat gives you full control over your PDF layout.