Want to swap out that green screen in your video for a cool new background? Maybe you are making a YouTube video, a presentation, or just having fun with video effects, removing a green screen in Premiere Pro is an easy skill that gives impressive results.
It’s super easy to do in Adobe Premiere Pro, and I’m going to walk you through the steps
Remove Green Screen in Premiere Pro
Step 1: Add the Ultra Key Effect
First, open your green screen video in Premiere Pro. Head over to the Effects panel, it’s usually on the right side of your screen.
In the search bar, type “Ultra Key.” Once you see it, drag and drop the Ultra Key effect onto your green screen clip in the timeline. Easy, right?
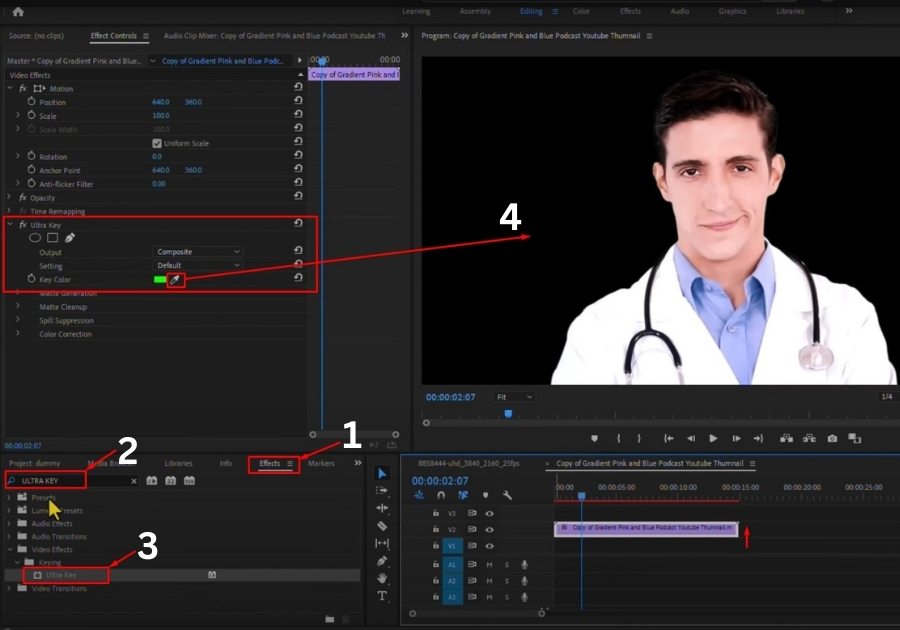
Step 2: Select the Green Screen
Now, go to the Effect Controls panel (usually above your timeline). You will see the Ultra Key settings.
Look for the little dropper icon next to “Key Color.” Click it, then click anywhere on the green screen in your video preview. The green screen should disappear instantly, leaving you with a transparent background.
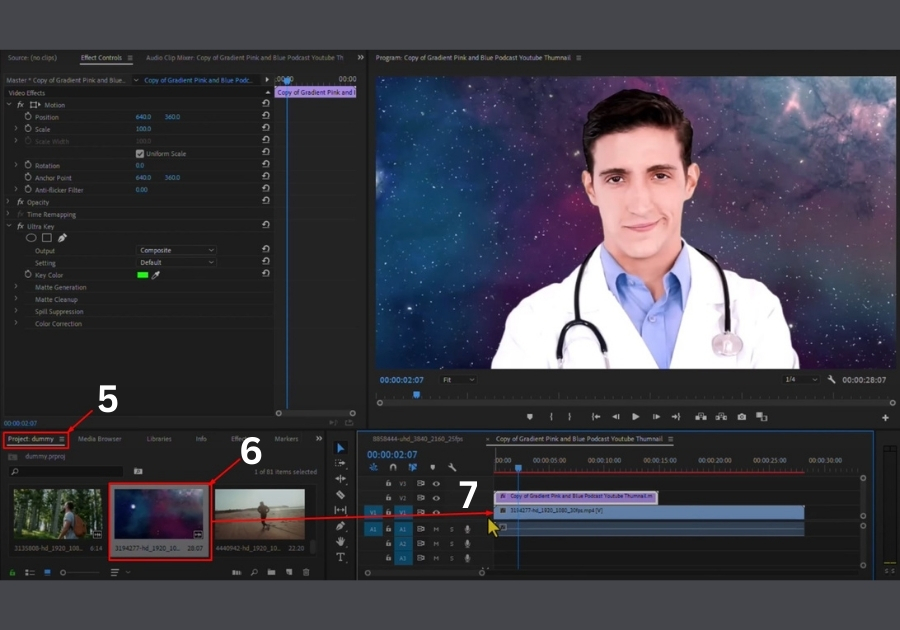
Step 3: Add a New Background
Want to replace that green void with something awesome? Here’s how. Import the background video or image you want to use into your Project panel.
Drag it to the timeline and place it on a layer below your green screen clip. Your green screen video should now appear over the new background, blending perfectly.
Pro Tip
If the edges of your subject look a bit rough, you can tweak the Ultra Key settings like “Choke” or “Soften” in the Effect Controls panel to smooth things out. Play around until it looks just right.
And that’s it! You have just removed a green screen and added a new background in Premiere Pro. It’s a simple process that can make your videos pop.