Being able to replace text in a PDF is a lifesaver when you need to update documents without recreating them from scratch. Whether it’s fixing a typo, updating a term, or tweaking a report, Adobe Acrobat’s find-and-replace tool gets the job done fast.
In this short guide, I will show you the exact steps to find and replace text in your PDF file.
Replace Text in PDF
Step 1: Open Your PDF in Adobe Acrobat
First, launch Adobe Acrobat on your computer. Once it’s open, load the PDF file you want to edit.
Step 2: Press Ctrl + F to Open the Find Box
Now, hit Ctrl + F on your keyboard. This will open a little find box, usually at the top or side of the screen. This box helps you locate the text you want to change.
Step 3: Search for the Text You Want to Replace
In the find box, type the word or phrase you want to change. For example, if your document says “information” and you want to change it, just type that word in the box.
Once you find it in the document, click on that word to highlight it.
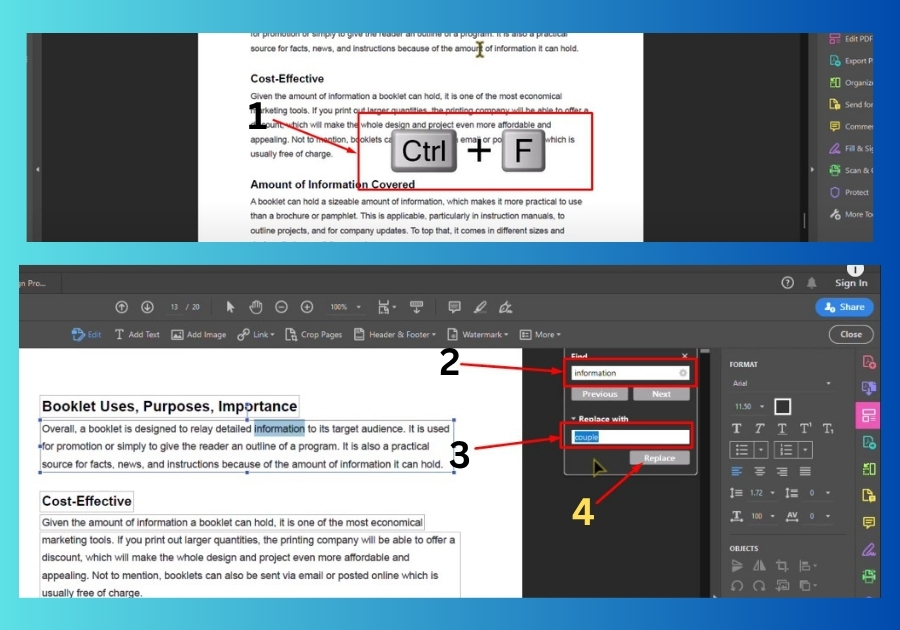
Step 4: Click “Replace With”
Now look for the Replace with option. Type in the new word or phrase you want to use instead. For example, let’s say you want to replace “information” with “technology.”
Type “technology” in the Replace With field.
Step 5: Hit Replace
Click the Replace button, and just like that, your text is swapped out. If the word appears more than once and you want to change all of them, click Replace Next until you are done.
Step 6: Save Your File
Once you are happy with the changes, don’t forget to save your PDF. Just go to File > Save or press Ctrl + S on your keyboard. Done!
That’s all,
Replacing text in a PDF doesn’t have to be hard, and with Adobe Acrobat, you can get it done in just a few clicks.