Want to give your videos that dreamy, motion-blurred look? Use a slow shutter speed in Adobe Premiere Pro. This effect adds a smooth, almost cinematic vibe to your footage, perfect for music videos, montages, or creative projects.
In this easy guide, we will see how to slow shutter speed step by step
Slow Shutter Speed Guide
Step 1: Drop Your Clip in the Timeline
Start by adding your video clip to the timeline. This is the footage you want to apply the slow shutter effect to.
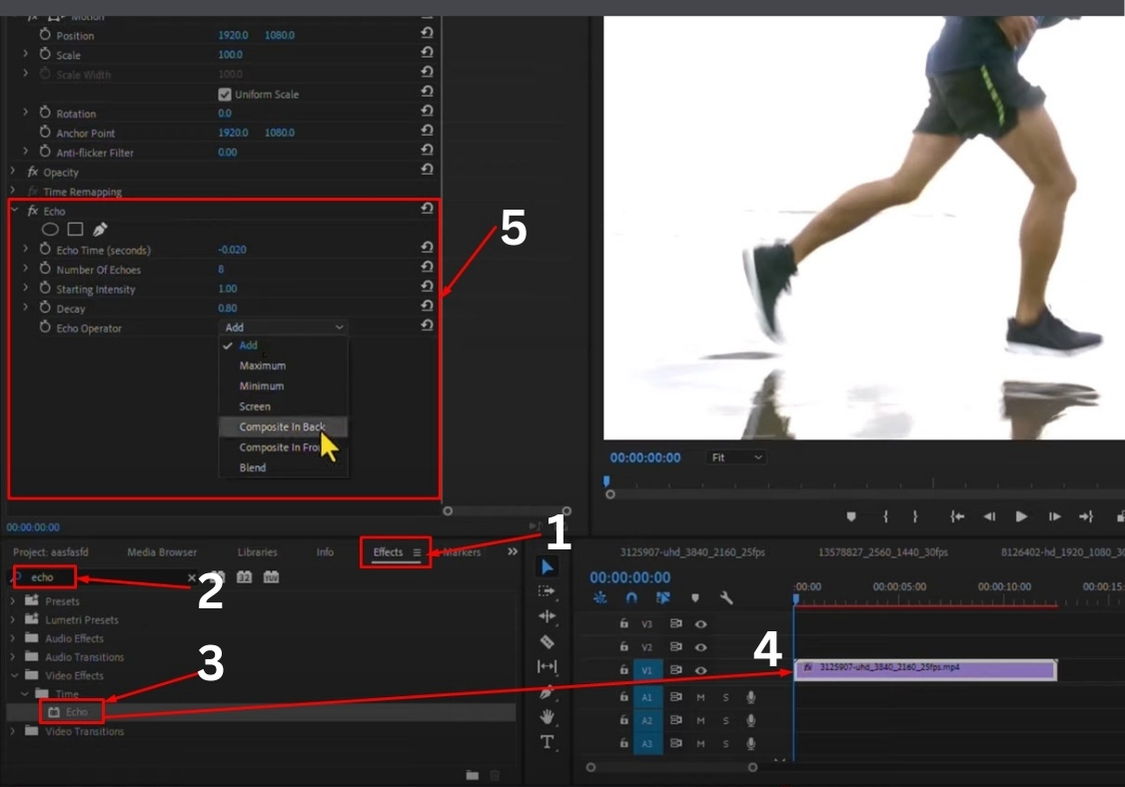
Step 2: Add the Echo Effect
Now, head over to the Effects panel. In the search bar, type “Echo”. Once you find it, drag and drop it onto your clip.
With your clip selected, go to the Effect Controls panel. You will see the Echo effect settings there.
Here’s what you need to adjust:
- Echo Time (Seconds): – 0.020
- Number of Echoes: 8
- Decay: 0.80
- Echo Operator: Change this to “Composite In Back”
These settings add a trail behind any motion in your video, giving it that signature slow shutter blur.
Step 3: Add Posterize Time
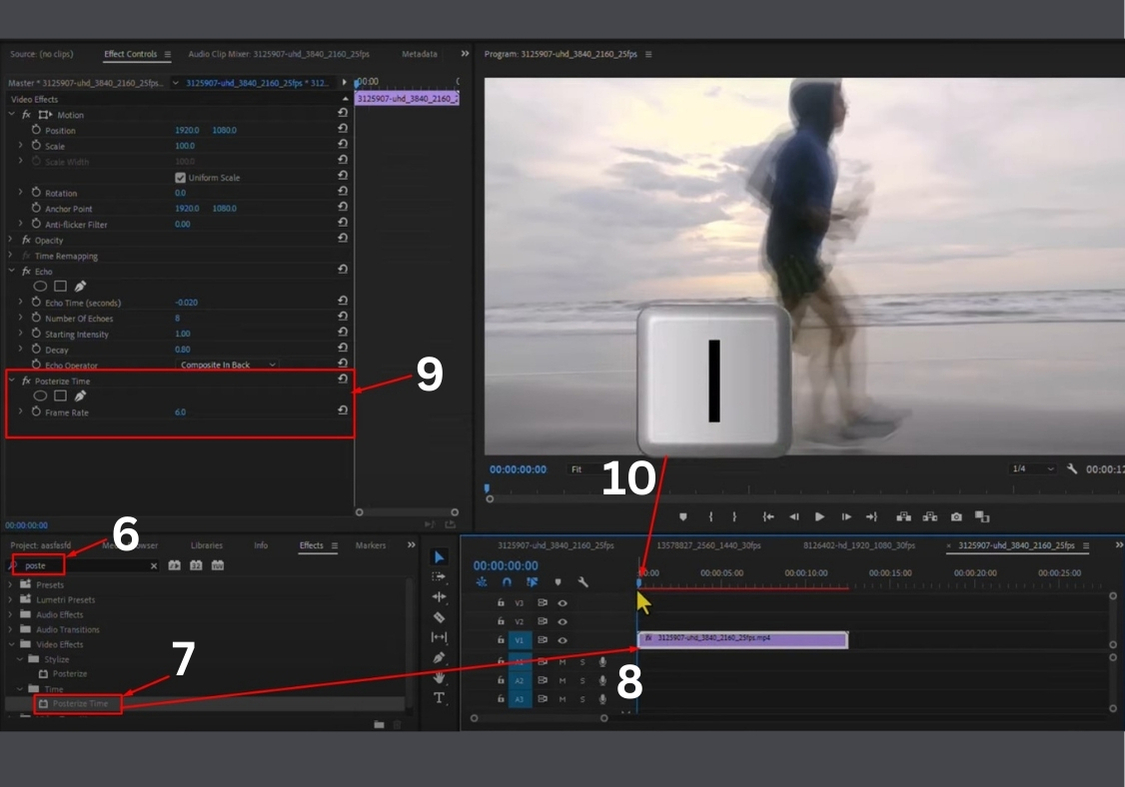
To make the effect even smoother, it helps to lower the frame rate just a bit. This makes everything feel more fluid and stylized.
In the Effects panel again, search for “Posterize Time.” Drag and drop it onto the same clip.
In Effect Controls, set the Frame Rate to 6.
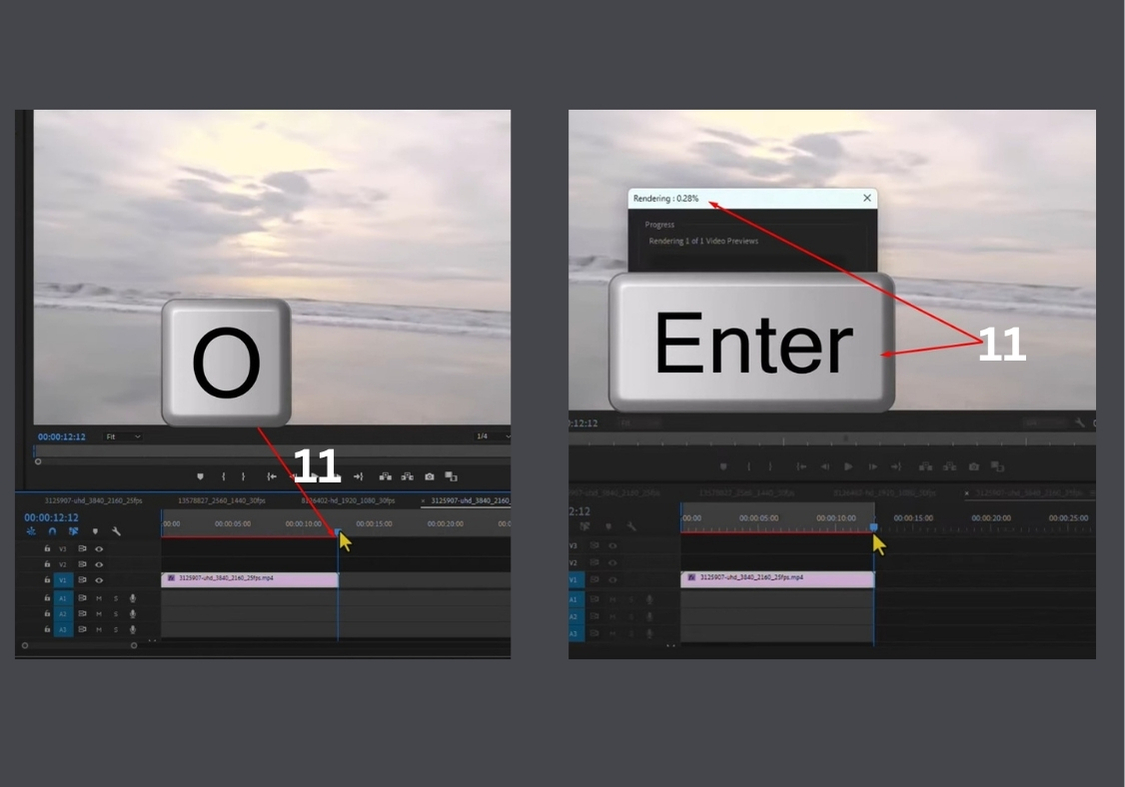
Step 4: Render & Preview
Before hitting play, render your timeline so everything plays back smoothly. Once that’s done, tap on play. You’ve got that gorgeous slow shutter speed effect in action.
That’s all!
This trick works great for music videos, transitions, or adding some flair to your footage. Just remember, these settings can be tweaked depending on the speed and vibe you’re going for. Don’t be afraid to experiment!