
Want to snap photos without fumbling with your iPhone? Your Apple Watch can make it super easy to capture moments remotely. Whether you’re setting up a group shot or just want a hands-free way to take a picture, the Apple Watch has you covered.
With just a few taps, you can use your watch to snap photos from your iPhone like a pro. Here’s exactly how to do it, step-by-step.
Take Photo with Apple Watch
Step 1: Open the Camera App on Your Apple Watch
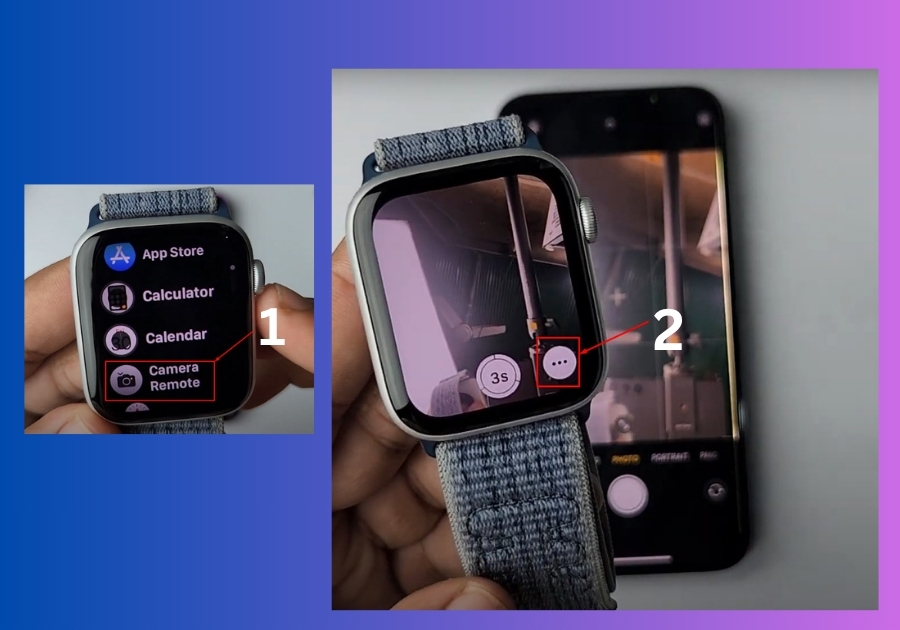
Start by going to the home screen on your Apple Watch. Scroll through your apps until you find the Camera icon, which might also be labeled Camera Remote. Tap it.
As soon as you do, your iPhone’s camera will automatically open up and start showing a live preview right on your watch.
Step 2: Adjust Your Camera Settings
Now that your iPhone camera is connected to your watch, you can tweak a few settings right from your wrist:
- Tap the three dots on the screen.
- Set a timer if you want a delay before the photo is taken.
- Choose the front or rear camera depending on the shot you need.
- Turn the flash on or off.
- Enable or disable Live Photo, depending on whether you want that motion effect.
Once you’ve got your settings how you like them, tap Done.
Step 3: Take the Photo
Now comes the fun part, snapping the shot.
Just tap the shutter button on your Apple Watch screen, and your iPhone will take the photo instantly. You’ll see the result right on your iPhone, just like you would if you tapped the camera button yourself.