Adobe Acrobat’s automatic updates are annoying, especially when they interrupt your work or slow down your computer. Disabling the updater gives you more control over when and how you update Adobe Acrobat.
Maybe you want to avoid interruptions during work, or perhaps you prefer to check for updates manually when it suits you. Whatever the reason, these steps ensure Adobe won’t update without your permission.
Here’s a quick and simple guide to stop Adobe Acrobat from auto-updating
Turn Off the Update on PDF
Step 1: Open Adobe Acrobat Preferences
First, launch Adobe Acrobat on your computer.
At the top, click on “Edit”, then scroll down and select “Preferences.”
Step 2: Go to the Updater Section
In the Preferences window, look for a section called “Updater.”
You will find it near the bottom of the left-hand list.
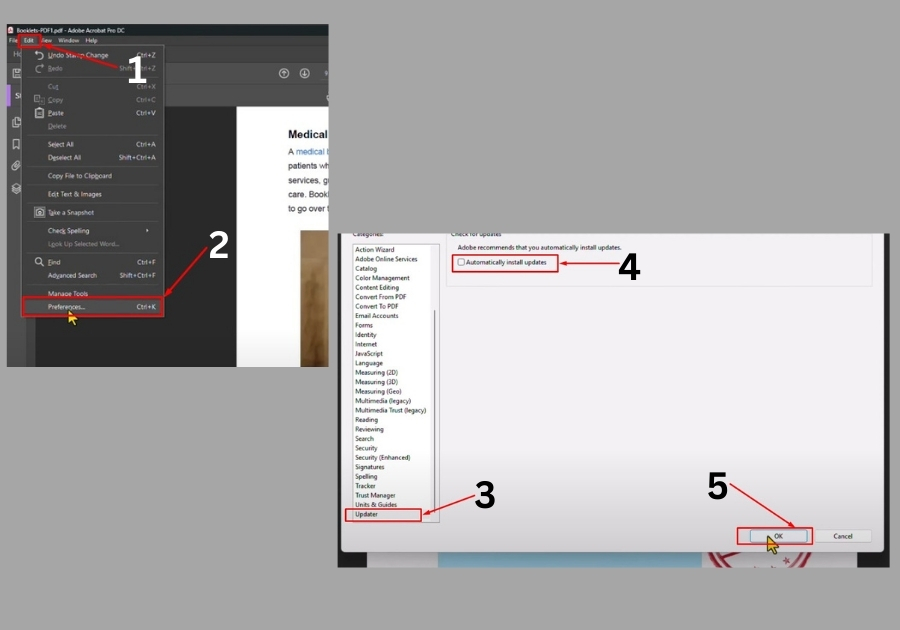
Step 3: Turn Off Automatic Updates
Once you’re in the Updater section, you’ll see an option that says “Automatically install updates.”
Just uncheck that box.
Click “OK,” and if a pop-up asks for confirmation, click “Yes.”
Step 4: Disable the Update Task from Your Computer Settings
To make sure Acrobat doesn’t sneak an update in through your system, follow this extra step:
- Go to the search bar on your computer and type “Computer Management.”
- Open it, then expand the Task Scheduler from the side menu.
- Click on “Task Scheduler Library.”
- Look for a task named “Adobe Acrobat Update Task.”
- Once you find it, right-click on it and select “Disable.”
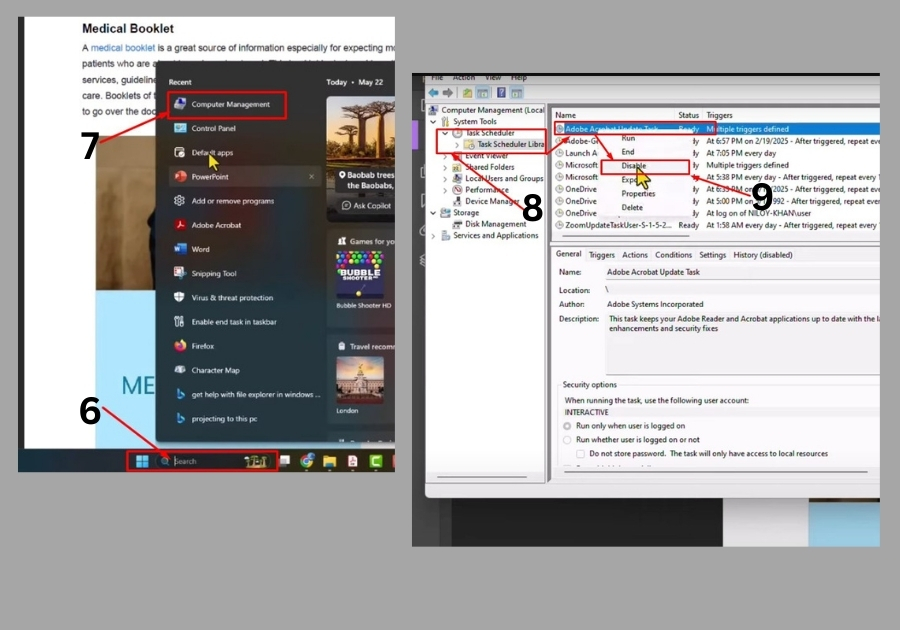
That’s it! Now Adobe Acrobat won’t check for or install updates without your permission.