
Want to track your elevation with your Apple Watch? Whether you’re hiking, climbing, or just curious about your altitude, the built-in altimeter in the Compass app makes it easy.
Here’s a quick, step-by-step guide to using it, based on a handy YouTube tutorial I came across.
Use the Altimeter on Your Apple Watch
Step 1: Open the App Library
First, press the Digital Crown on the side of your Apple Watch. This will take you to your app library, where all your apps are neatly displayed.
Step 2: Launch the Compass App
Scroll through your apps and tap on the Compass app. If you haven’t used it before, don’t worry, it comes pre-installed on your watch.
Step 3: Tap the Info Button
Once you’re in the Compass app, look for the small “i” (info) button and tap it. This opens up a screen with more features, including the elevation data.
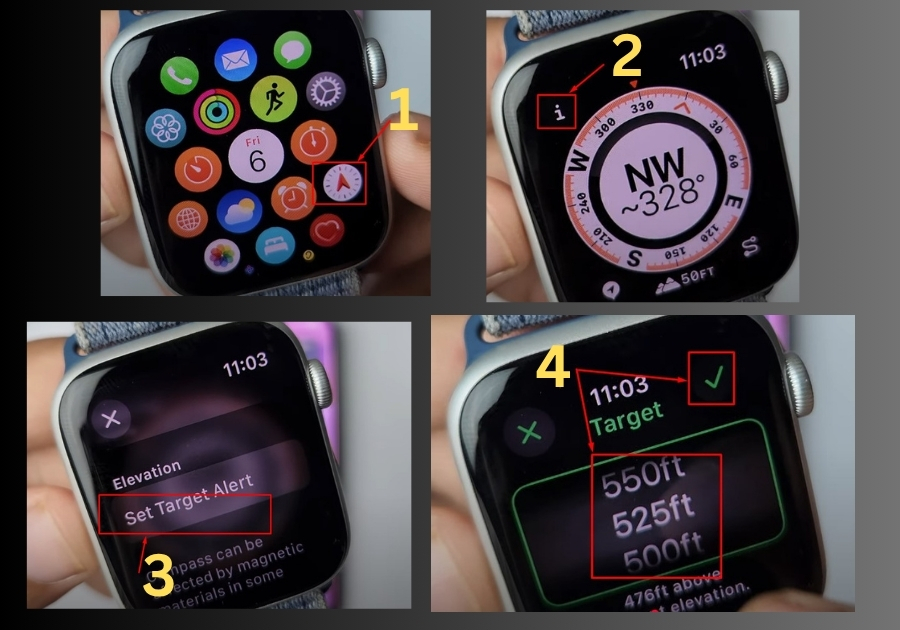
Step 4: Find Your Elevation
Scroll down a bit, and you’ll see your Elevation listed. This tells you how high you are above sea level, updated in real-time.
Step 5: Set a Target Elevation Alert
Want to be alerted when you hit a certain height? You can do that too!
Here’s how:
- Tap on Set Target Alert
- Enter your desired elevation (like 500 ft)
- Tap Done
Now your Apple Watch will notify you when you hit that elevation.
Step 6: Check Your Altimeter Anytime
Need to check your current altitude later? Just:
- Press the crown to go back to your app screen
- Open the Compass app again
- Tap the info button
- Scroll to view your current elevation and your target
That’s it!
Using the altimeter on your Apple Watch is a breeze. Whether you’re out adventuring or just curious about your surroundings, this feature is a cool way to stay informed about your altitude.