If you’ve downloaded a cool Photoshop action but aren’t sure how to install it, don’t worry. In this quick guide, I will show you exactly how to load and apply Photoshop actions step by step. It’s easy, fast, and perfect if you want to speed up your editing with just one click.
Quick Guide to Installing Photoshop Actions
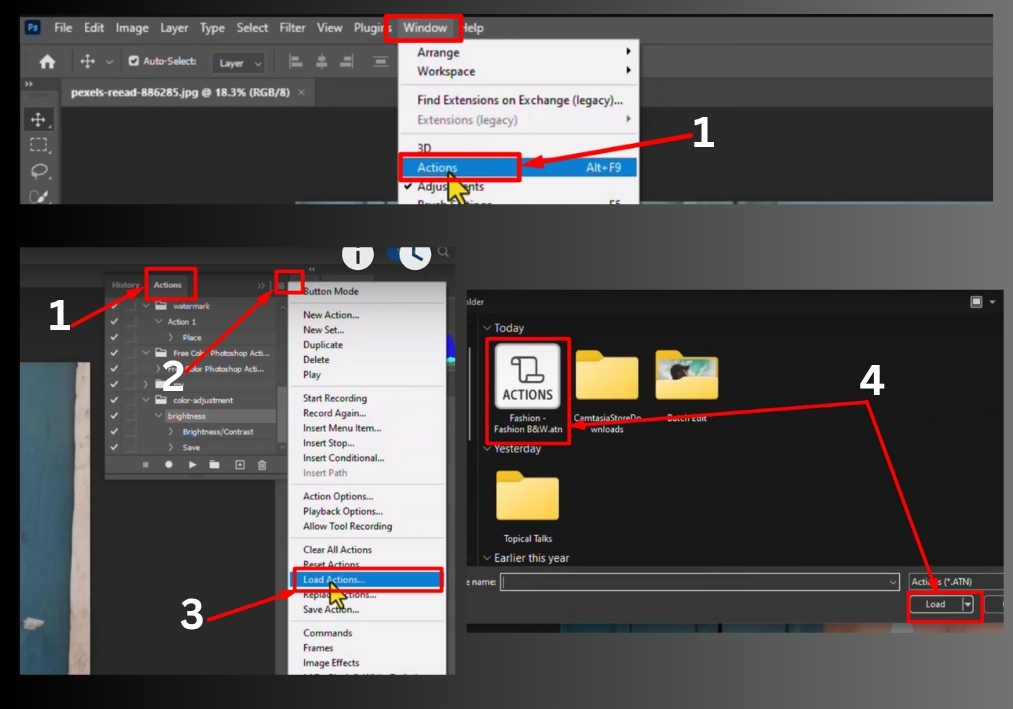
Step #1
First, open Photoshop and head to the top menu. Click on Window and select Actions from the dropdown. This will bring up the Actions panel. The panel displays a list of available actions, where you can load your new ones.
Step #2
In the Actions panel, look for a small icon in the top-right corner. Click it to open the menu, then choose Load Actions. This opens a file explorer window on your computer.
Step #3
Navigate to the folder where your Photoshop action is saved. Actions typically have a .atn file extension. For example, let’s say you have an action called “Fashion BMW.” Select that file and click Load. Photoshop will import the action into your Actions panel.
Step #4
Scroll down in the Actions panel to confirm your action loaded correctly. You should see the action’s name, like “Fashion BMW,” listed there. If it’s there, you’re good to go!
Step #5
To use the action on an image, open the image in Photoshop first. Then, in the Actions panel, expand the action folder by clicking the small arrow next to it. Select the specific action (e.g., “Fashion BMW”), and click the Play icon at the bottom of the panel. Photoshop will automatically apply the action to your image, saving you a significant amount of time.