Making an arrow in Photoshop is easier than you might think. Whether you’re designing a diagram, a button, or just trying to point something out in your image, knowing how to create a sharp, customizable arrow is super useful.
The trick lies in using the Line Tool- yes, really! and adjusting its settings to include arrowheads.
Let’s walk through it step by step so you can start adding clean, polished arrows to your projects in no time.
Create an Arrow in Photoshop Easily
Step 1: Select the Line Tool
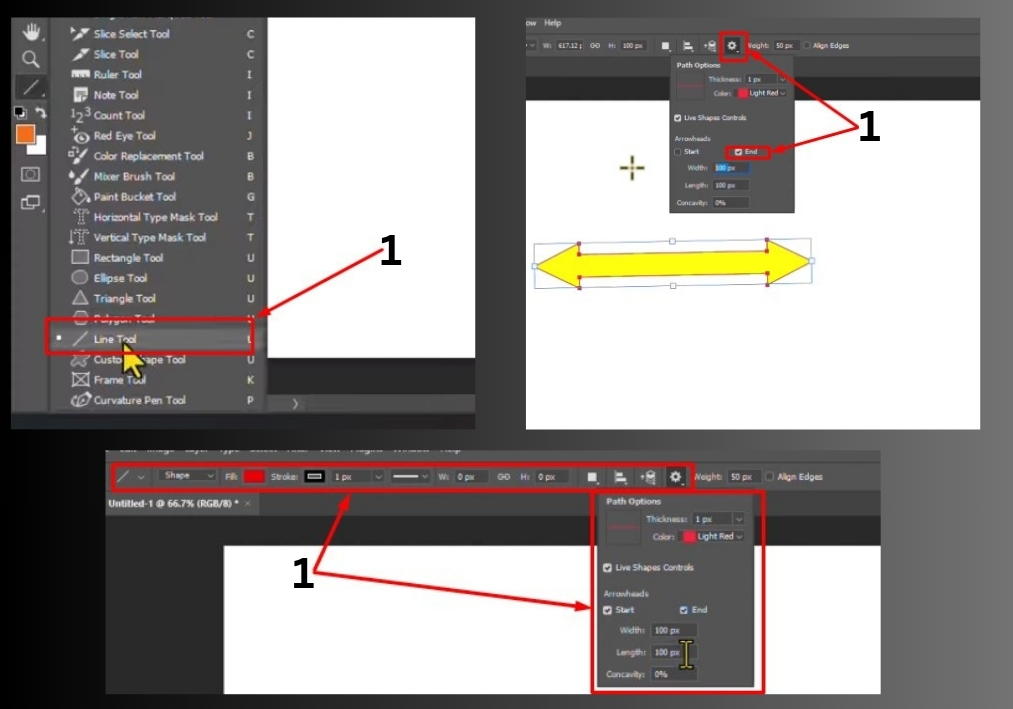
Open Photoshop and head to the Tool Panel on the left. Look for the Line Tool (it looks like a diagonal line). Click to select it. This tool is your starting point for creating arrows.
Step 2: Set Up the Shape
At the top of the screen, find the options bar. Make sure the Shape option is selected (not Path or Pixels). This ensures your arrow is a vector shape, which is easier to edit later.
Step 3: Choose Your Arrow’s Color
In the same options bar, click the Fill box to pick a color for your arrow. You can choose any color that suits your design. If you want a border around your arrow, click the Stroke option and select a color and thickness for it.
Step 4: Add Arrowheads
Here’s where the magic happens! Click the Settings icon (a little gear) in the options bar. You’ll see an Arrowheads section. Check the Start box if you want an arrowhead at the beginning of your line, or the End box for one at the end. You can even check both for arrowheads on both sides.
Step 5: Customize the Arrowhead
Want to tweak the arrowhead’s look? In the same Arrowheads section, you can adjust:
- Width: Make the arrowhead wider or narrower.
- Length: Change how long the arrowhead is.
- Concavity: Adjust the curve of the arrowhead for a sharper or softer look.
Play around with these sliders to get the style you want.
Step 6: Draw Your Arrow
Now, click and drag on your canvas to draw the line. As you drag, the arrowhead(s) will appear based on your settings. Release the mouse when you’re happy with the length and direction. See, your first arrow is done!
Step 7: Create a Second Arrow (Optional)
Want another arrow with a different style? Duplicate your shape layer or start fresh. You can turn off arrowheads by unchecking the Start or End boxes in the settings. Pick a new color from the Fill option and adjust the width or length if you like.
For example, try setting the arrowhead width to 200 pixels for a bolder look. Draw your second arrow on the canvas.
That’s it!
You’ve just created custom arrows in Photoshop. Experiment with colors, sizes, and arrowhead styles to match your project.