Want to create scalable vector graphics directly from Photoshop?
While many designers think they need specialized software for SVG files, Photoshop actually has a built-in export feature that makes the process incredibly simple.
Whether you’re creating icons, logos, or web graphics, this quick guide will show you exactly how to export your designs as SVG files in just a few clicks.
Creating and Exporting SVG Files (Easy Guide)
Step #1
Start by opening Photoshop and loading the project you want to export as an SVG. Make sure your design is ready to go!
Step #2
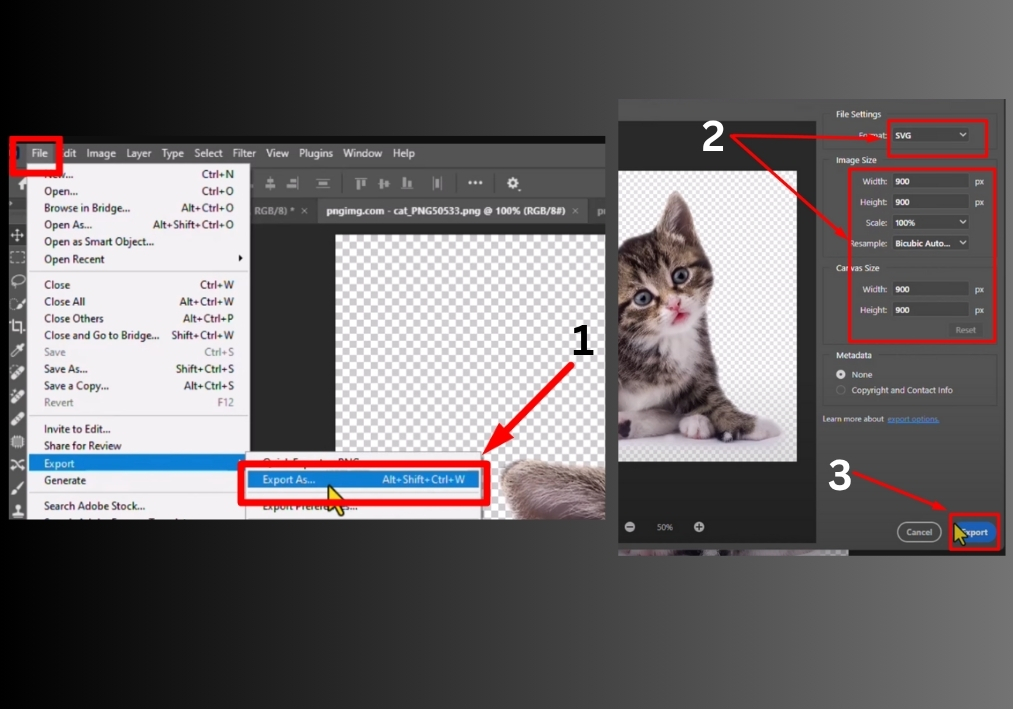
In the top menu, click on File. Hover over the Export option, and then select Export As from the dropdown.
Step #3
In the Export As window, look for the Format dropdown menu. Click it and select SVG from the list.
Step #4
You can tweak the width, height, or scale of your SVG image to fit your needs. Adjust these settings as necessary to get the perfect size.
Step #5
When you are done with the settings, click the Export button. Choose where to save your file.
What If You Don’t See the SVG Export Option?
Step #1
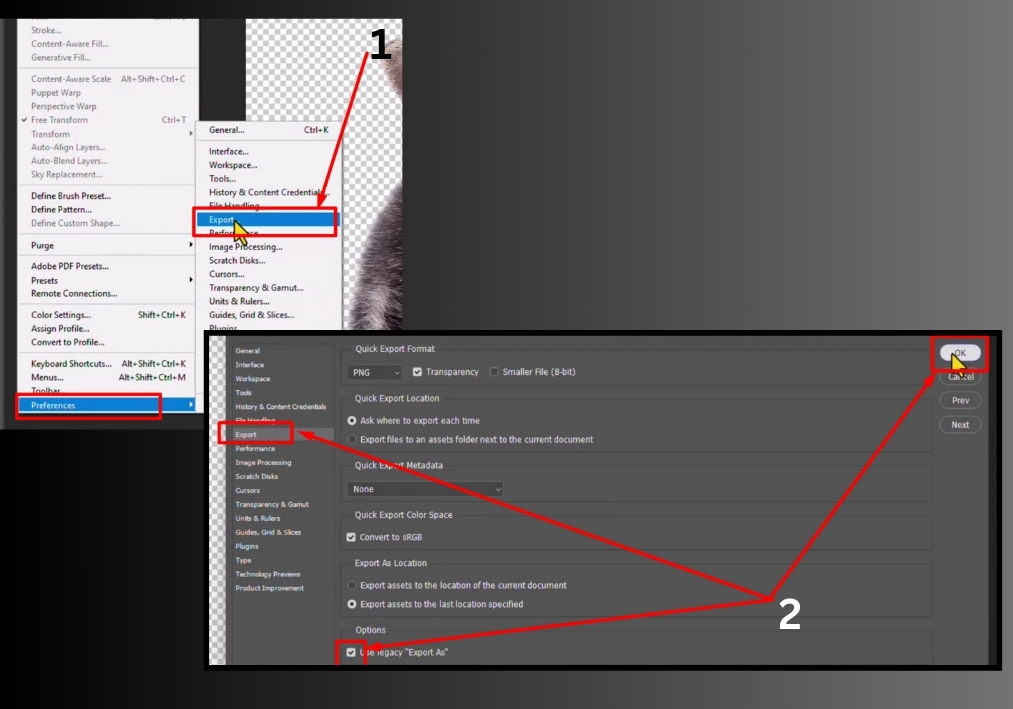
Click on Edit in the top menu, then hover over Preferences and select Export.
Step #2
In the Preferences window, look for the Use Legacy Export As option. Check this box to enable it, then click OK.
Step #3
Go back to the File > Export > Export As menu, and the SVG option should now be available in the Format dropdown.
That’s it!
You’re now ready to create and export SVG files in Photoshop. This simple process ensures your designs are scalable and ready for any project.